Admin Area > New App Tutorial
Introduction
Learn how to extend the Admin Area application with custom standalone modules.
- the motivation for extending the Admin Area application with new modules
- the goal of this tutorial
- what are the prerequisites that need to be fulfilled in order to follow this tutorial
In order to follow this tutorial, you must use Webiny version 5.9.0 or greater.
Overview
By default, every Webiny project comes with Webiny Admin Area, a ready-made React application which enables project administrators to manage content coming from one or more Webiny applications, like Headless CMS , Page Builder, File Manager, and so on. And while these applications do offer a solid number of features and can also be extended to a certain extent, there are still cases where creating custom standalone Admin Area application modules makes more sense.
For example, let’s imagine we’re working on a custom Car Manufacturers module, which lets us perform basic CRUD operations, includes a set of operations that need to follow specific business logic rules, security requirements, may interact with external APIs and services, and so on.
Extending the existing Webiny applications may work, but still, by creating a custom standalone Admin Area application module, we can benefit from additional application code control, flexibility and easier maintenance. And, with the help of the existing Extend Admin Area scaffold, we can start working on our new module in no time, with all of the right development workflows in place.
The Goal
The goal of this tutorial is to learn how we can easily extend the existing Admin Area application with custom standalone modules. We will create a new Car Manufacturers module, which, as the name itself depicts, will enable users to manage car manufacturer entries.
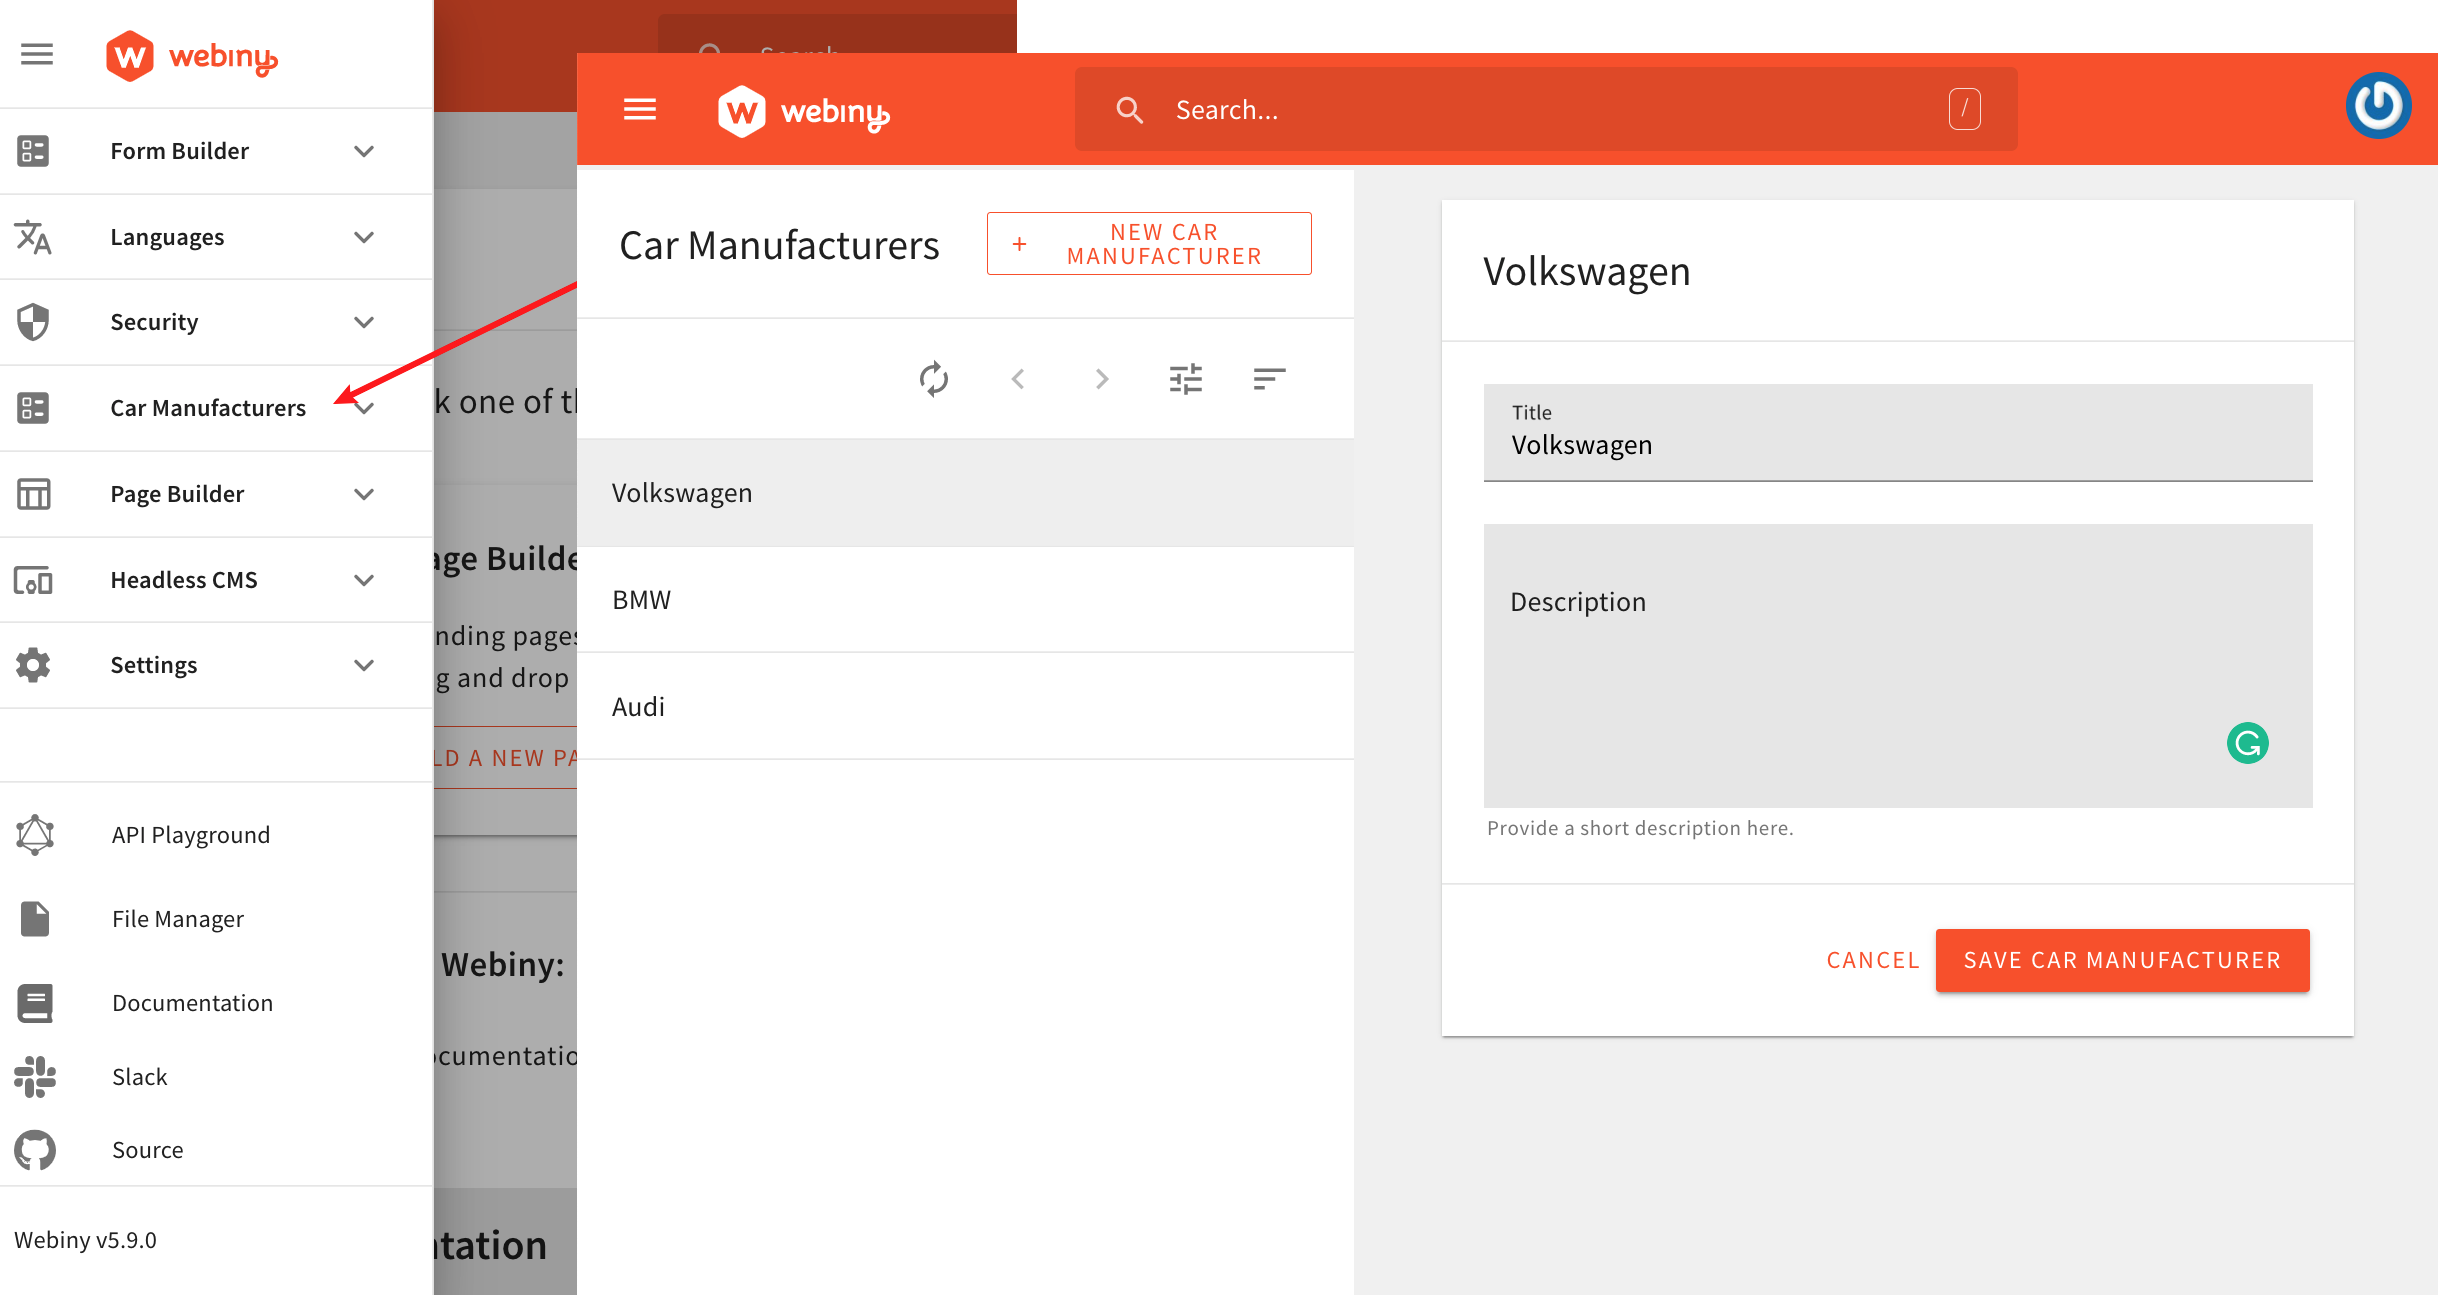 New Car Manufacturers Module
Prerequisites
Except having an installed Webiny project (version 5.9.0 or greater) on top of which we can follow this tutorial, there are no special prerequisites that need to be fulfilled.