File Manager > Extensions
Customize File Fields
Learn how to add custom fields to the File Manager.
This feature is available since Webiny v5.x.
- how to add custom file fields to the File Manager
- how to control field rendering in the File Manager UI
Overview
File Manager allows you to add custom fields to the GraphQL schema, as well as the user interface in the Admin app. Since File Manager is powered by our Headless CMS under the hood, adding of new fields is as simple as defining a new field on the File model.
Once the field is defined on the model, it will immediately show up in the GraphQL schema, under the extensions field. In the user interface of the File Manager, the new field will appear under the Advanced Details tab, in the File Details drawer.
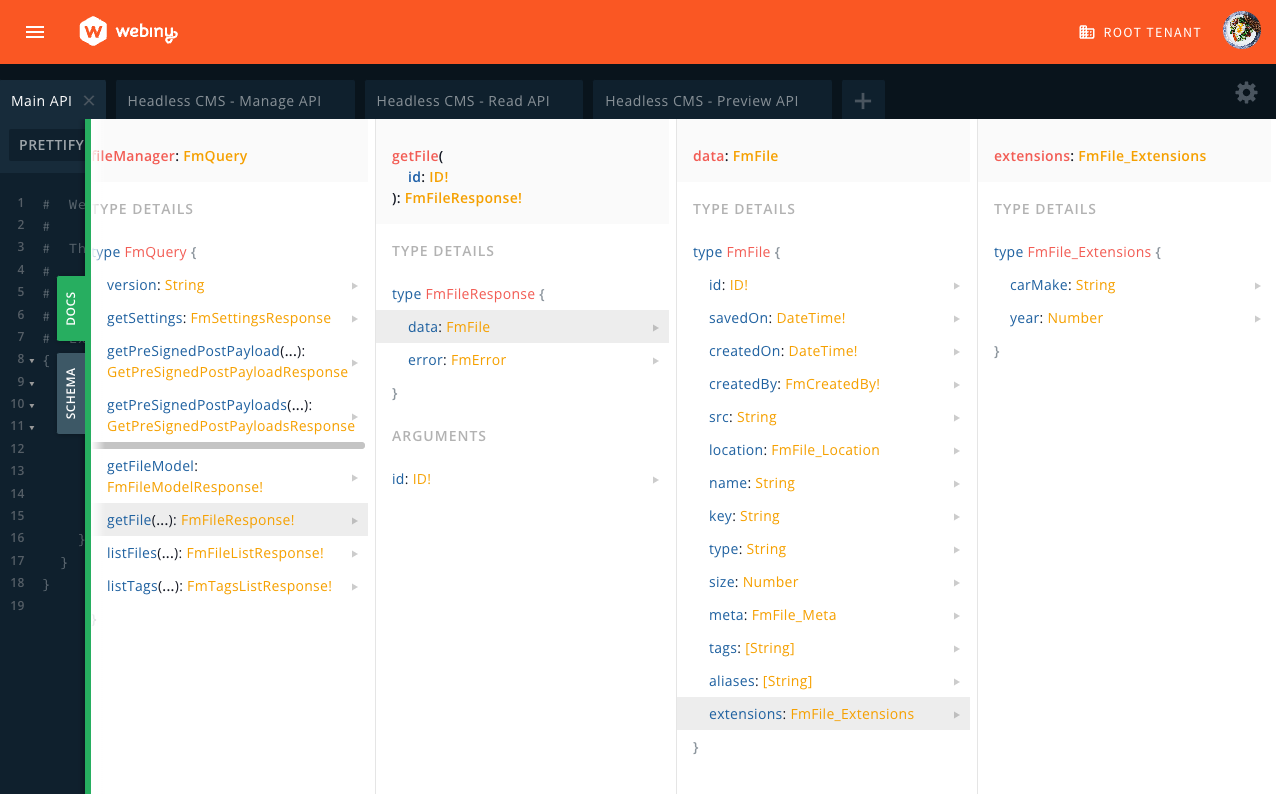 Custom fields in the GraphQL schema
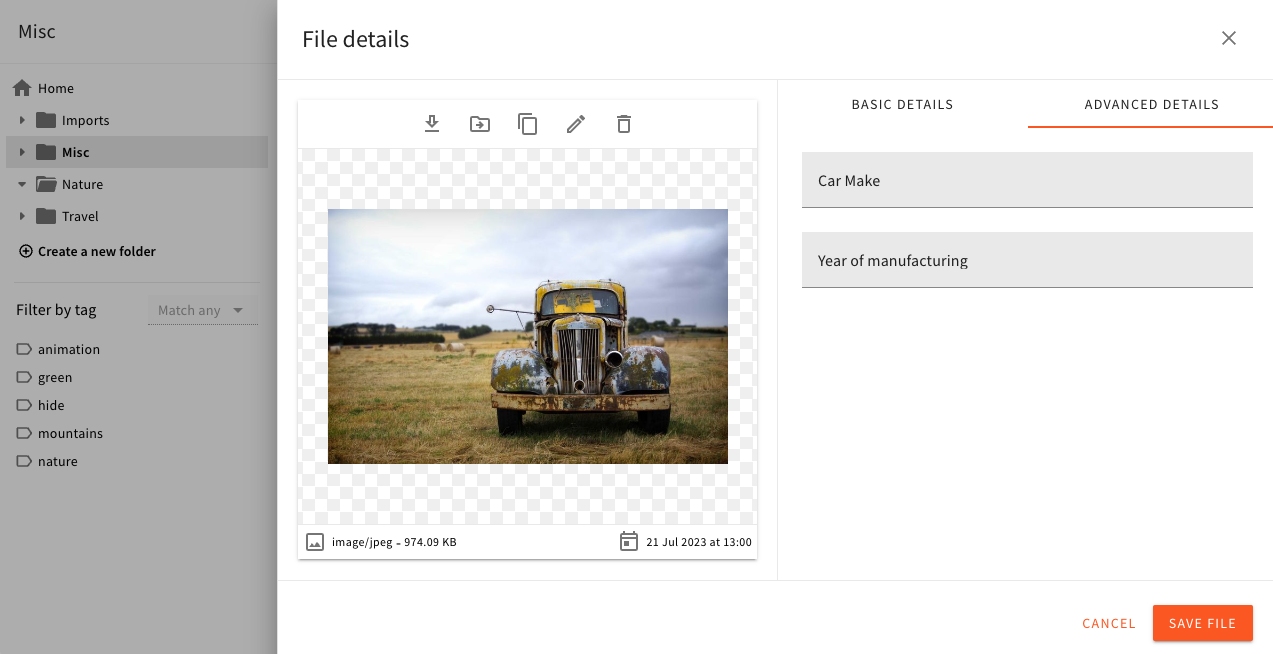 Custom fields in the Admin app
Add a Field
To add a new field, use the createFileModelModifier plugin factory, provided by the @webiny/api-file-manager package.
In this example, we add two fields: carMake and year. You can add as many fields as you like. The field definition is identical to that of the Headless CMS model field, and all the same rules and options apply. To learn more about programmatic model and field definition, visit Define Content Models via Code.
Once the code shown above is applied, you need to deploy your API. Make sure to use the --env value that corresponds to your development environment.
After the deployment is done, your new fields should be visible in the GraphQL schema, and the UI, as demonstrated in the Overview section of this article.
Customize Field Rendering
To control how and when a particular field is rendered, you need to configure a field decorator. Decorators are higher order components that allow you to intercept the component, and add custom logic to the rendering process.
The following code example shows how to create a field decorator, which is only applied to a specific field, in case the current file is a video file. When the conditions are met, a custom renderer will be applied to that particular field.
The useFile hook provides access to the current file. Using this approach, you can conditionally show or hide fields depending on any file property, swap field renderers like we did in our code example, check for user permissions, etc.
The FileManagerViewConfig is a component which provides access to other components and utilities to configure the File Manager. You need to mount it as a parent of other config components, to correctly apply the configurations to the File Manager (as shown in the code example).
Once you run your Admin app, and navigate to the File Manager, upload an mp4 file to see your custom renderer in action. The demonstrated custom renderer might not be the most exciting one, but it shows how you can dynamically apply different renderers depending on the file context.
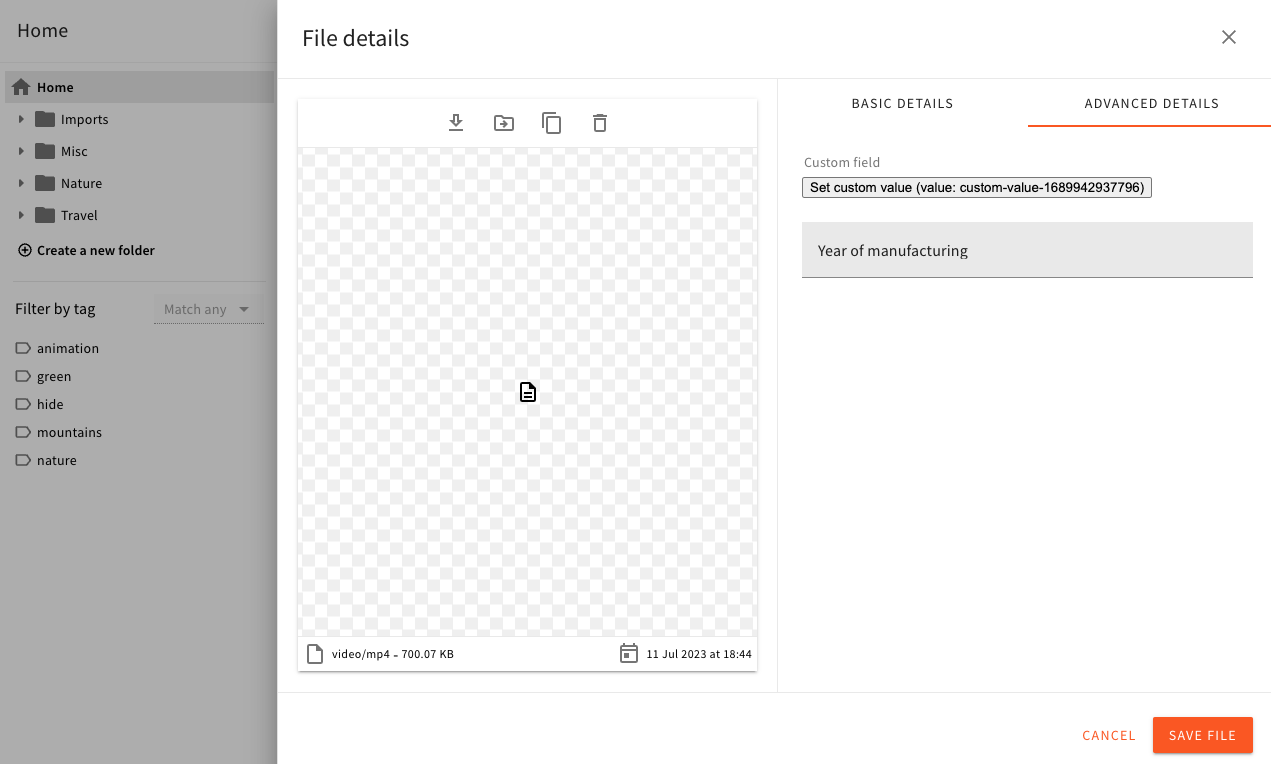 Custom Renderer Is Applied to 'carMake' Field on All Mp4 Files