Webiny Enterprise
Cognito Federation
Learn how to configure Cognito Federation to sign into the Admin app.
Webiny Enterprise license is required to use this feature.
- social providers support is available since v5.37.6
- OpenID Connect (OIDC) support is available since v5.40.0
- how to configure federated identity providers in the Admin app
- how to configure social IdPs (Facebook, Google, Apple, Amazon)
- how to configure OpenID Connect (OIDC) IdPs
Overview
Out of the box, Webiny comes with an AWS Cognito setup to manage its admin users. There’s a preconfigured Cognito User Pool dedicated to admin users. This user pool doesn’t allow external users to sign-up, which means that new admin user accounts can only be created by a Webiny admin, from within the Admin app.
In this article, we show the process of configuring your Webiny project to use external identity providers (both social and custom).
 Cognito with Social IdP
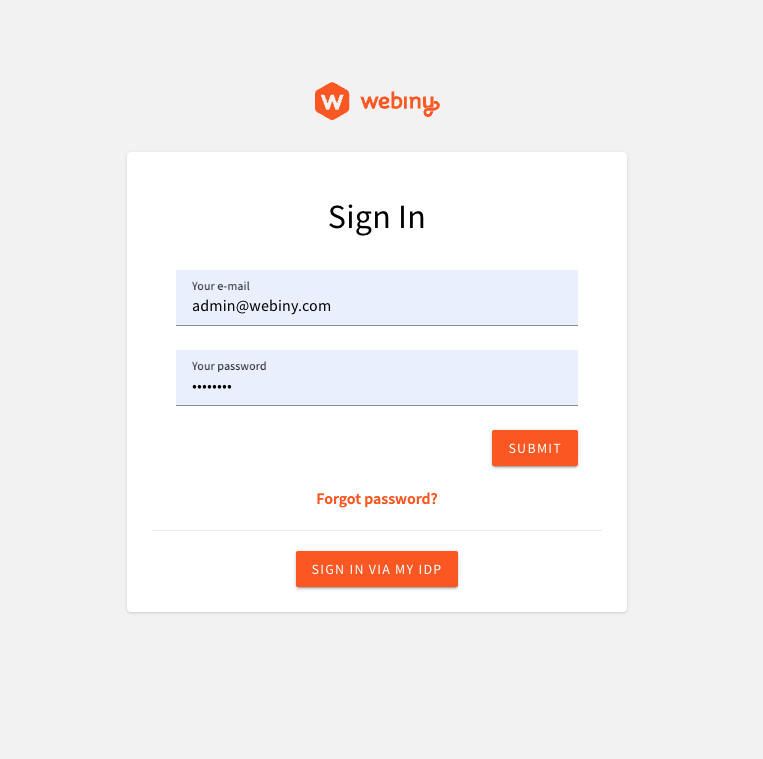 Cognito with External OIDC IdP
 Custom Login Screen
If your project was created before v5.37.6, and you used our AWS Cloudformation template to set up your deployment user, make sure you update the permissions using the template.
Cognito With Social IdPs
In this article, we’re using Google as the identity provider of choice. To set up a Google Cloud project and obtain the client_id and client_secret, follow the official documentation. In particular, see the To register an app with Google section.
Configure AWS Infrastructure
Cognito resources are part of the Core app, which is responsible for stateful resources (databases, user pools, S3 buckets, etc.). To configure Cognito to use federated identity providers, we need to modify the webiny.application.ts file of the core app. Webiny provides a utility to facilitate the configuration of infrastructure resources involved.
Once you have your client_id and client_secret ready, you can store them in your project’s .env file, like so:
You can add multiple identity providers to your Cognito user pool. Simply add more identity provider configs to the identityProviders array.
Note that for development purposes, it’s enough to have just the localhost defined in the callbackUrls. This article assumes that you’ll be researching this feature in a development environment, on localhost.
However, once you deploy your Admin app, and want to use the real Cloudfront URL, or a custom domain, you’ll need to go back to this config, and update the callbackUrls with the live URL. You’ll also need to redeploy your core app for your config to apply.
Once the config of your identity provider is in place, you need to deploy your core app, to apply the new infrastructure configuration:
Once deployed, you need to whitelist your Cognito domain in your Google OAuth 2.0 Client ID, as described in the official documentation (see points 13-14 in the To register an app with Google section).
To get the domain name, copy the value of cognitoUserPoolDomain output from the following command:
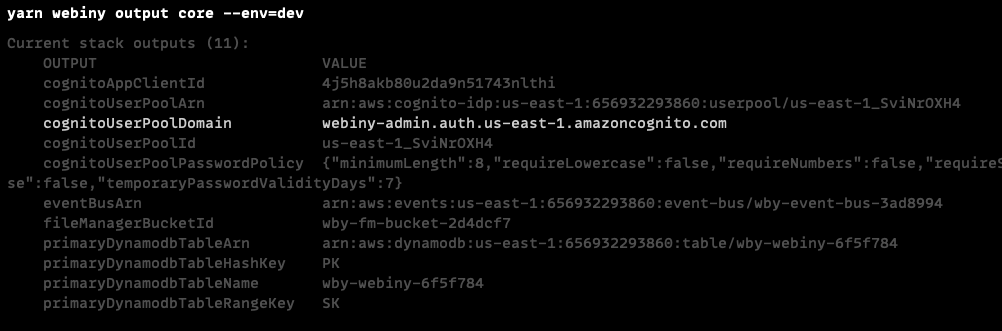 Core App Output
Configure GraphQL API
Cognito will be handling the communication with the external identity providers, and creating the idToken which is then sent to the API from the Admin app. This means that the authentication process remains the same as with regular Cognito users. However, external user profiles do not exist in the Admin app, and cannot be mapped to a security group or a team using their profile.
To help Webiny map your external users to specific user groups, we need to add the group information to the identity object, generated in the authentication process.
Open your apps/api/graphql/src/security.ts file, and update the existing cognitoAuthentication configuration:
In this basic example, we’re checking if the token contains the identities claim, which is only present on tokens of identities coming from external IdPs. If so, we map those identities to a full-access user group.
group is an identity attribute which Webiny uses to map the identity to the specified user group. This gives identities their permissions, which are then used in the authorization process. If this attribute is not set (or is undefined), Webiny will attempt to load the user group using a user profile, which exist only for users created via the Admin app.
With this approach, we can manage group mapping programmatically, and decide where the mapping information is coming from. We might fetch the group slug from the idToken claim (which can be managed outside Webiny, within Cognito, or within the external identity provider), or we can use a hardcoded map (as we do in this example, using the full-access group slug).
Once the config is in place, you need to deploy your api app:
Configure Admin App
We need to update the default Cognito configuration in the Admin app, to enable sign in via Google. We also need a component to render the Google sign in button, so we’ll use the react-social-login-buttons package from NPM, to get a styled button.
You are free to skip this step and render whatever component you want. The important bit is that you call the signIn callback that is passed to you as a prop, which initiates the sign-in process.
Notice the use of localhost redirect URLs. In your staging and production environments, you’ll
need to update these values to reflect the domains of your deployed systems.
And lastly, we need to get the value of REACT_APP_USER_POOL_DOMAIN environment variable in the code above. Its value is the fully qualified Cognito User Pool domain, which lives in the Core app. It looks something like this: webiny-admin.auth.us-east-1.amazoncognito.com, and is generated once the User Pool Domain is created in your AWS infrastructure.
To pull this value from the Core app, and inject it into the Admin app, there’s a utility provided by Webiny. Update your apps/admin/webiny.config.ts file like so:
To run and test the new identity provider, start your Admin app:
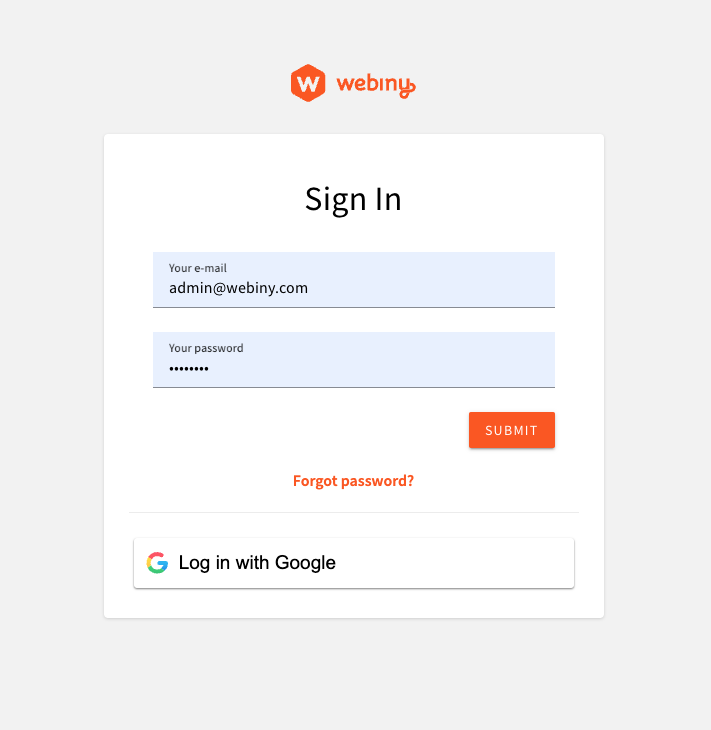
Once your app is up and running, you should see the following login screen:
Using Google IdP to Sign Into the Admin AppCognito With OIDC IdPs
Using OpenID Connect, you can connect your user pool with almost any remote IdP. Before you begin configuring your Webiny project, you need to obtain some information from the remote IdP: client_id, client_secret, and oidc_issuer.
Here’s an example of the oidc_issuer, just so you have an idea of what you’re looking for in your remote IdP: https://cognito-idp.eu-central-1.amazonaws.com/eu-central-1_12345678
AWS documentation provides detailed instructions on registering with an OIDC IdP, so please consult the official documentation before proceeding with this article. You only need to read Step 1. of the AWS guide to get the information you need.
While configuring the remote IdP, at one point you will have to specify the callback URL pointing to the user pool deployed by Webiny. Since you don’t know the exact URL until you deploy your configured Webiny project, temporarily specify any random URL, and then come back and update the URL after you finish the Webiny infrastructure setup.
Configure AWS Infrastructure
Cognito resources are part of the Core app, which is responsible for stateful resources (databases, user pools, S3 buckets, etc.). To configure Cognito to use federated identity providers, we need to modify the webiny.application.ts file of the core app. Webiny provides a utility to facilitate the configuration of infrastructure resources involved.
Once you have your client_id, client_secret, and oidc_issuer ready, you can store them in your project’s .env file, like so:
AWS has very strict rules around the name of your custom provider. Our advice is to keep your names really simple: no spaces, [a-zA-Z], maximum length of 32 characters. This will save you a lot of headache.
You can add multiple identity providers to your Cognito user pool. Simply add more identity provider configs to the identityProviders array.
Note that for development purposes, it’s enough to have just the localhost defined in the callbackUrls. This article assumes that you’ll be researching this feature in a development environment, on localhost.
However, once you deploy your Admin app, and want to use the real Cloudfront URL, or a custom domain, you’ll need to go back to this config, and update the callbackUrls with the live URL. You’ll also need to redeploy your core app for your config to apply.
Once the config of your identity provider is in place, you need to deploy your core app, to apply the new infrastructure configuration:
Once deployed, you need to update the callback URL on your remote IdP, so it can connect to your Webiny user pool. To get the domain name, copy the value of cognitoUserPoolDomain output from the following command:
The final callback URL might look something like this: https://{domainName}.auth.{region}.amazoncognito.com/oauth2/idpresponse. The /oauth2/idpresponse part may vary depending on the IdP you’re using, so consult the documentation of your remote IdP.
Configure GraphQL API
Cognito will be handling the communication with the external identity providers, and creating the idToken which is then sent to the API from the Admin app. This means that the authentication process remains the same as with regular Cognito users. However, external user profiles do not exist in the Admin app, and cannot be mapped to a security group or a team using their profile.
To help Webiny map your external users to specific user groups, we need to add the group information to the identity object, generated in the authentication process.
Open your apps/api/graphql/src/security.ts file, and update the existing cognitoAuthentication configuration:
In this basic example, we’re checking if the token contains the identities claim, which is only present on tokens of identities coming from external IdPs. If so, we map those identities to a full-access user group.
group is an identity attribute which Webiny uses to map the identity to the specified user group. This gives identities their permissions, which are then used in the authorization process. If this attribute is not set (or is undefined), Webiny will attempt to load the user group using a user profile, which exist only for users created via the Admin app.
With this approach, we can manage group mapping programmatically, and decide where the mapping information is coming from. We might fetch the group slug from the idToken claim (which can be managed outside Webiny, within Cognito, or within the external identity provider), or we can use a hardcoded map (as we do in this example, using the full-access group slug).
Once the config is in place, you need to deploy your api app:
Configure Admin App
We need to update the default Cognito configuration in the Admin app, to enable sign in via the custom IdP. In the federatedProviders config key, you can specify one or more federated providers, and use the same name you used in the infrastructure setup. You also have the ability to specify the component that will be used to render the UI for your IdP (usually a button).
Notice the use of localhost redirect URLs. In your staging and production environments, you’ll
need to update these values to reflect the domains of your deployed systems.
And lastly, we need to get the value of REACT_APP_USER_POOL_DOMAIN environment variable in the code above. Its value is the fully qualified Cognito User Pool domain, which lives in the Core app. It looks something like this: webiny-admin.auth.us-east-1.amazoncognito.com, and is generated once the User Pool Domain is created in your AWS infrastructure.
To pull this value from the Core app, and inject it into the Admin app, there’s a utility provided by Webiny. Update your apps/admin/webiny.config.ts file like so:
To run and test the new identity provider, start your Admin app:
Once your app is up and running, you should see the following login screen:
Using external OIDC IdPCustomizing the Sign-in Screen
Sometimes, you might want to only allow your users to sign in via a remote IdP, and completely hide the default Cognito sign in via username/password. You might also want to change the title and the description of the screen, implement a completely different UI.
The following example demonstrates how you can apply a decorator to the default SignIn component, and modify its props:
Notice the use of allowSignInWithCredentials prop. This tells the system that the username/password UI should not be rendered. There are other props, like footer (which allows you to render a footer), and a content, which allows you to completely replace the main content of the login screen, and render everything yourself.
The result of this customization looks like this:
External IdP OnlyDisable Default User Management
By default, the @webiny/app-admin-users-cognito package provides the sign-in UI, but also a module to manage admin users that are stored in the default Cognito user pool. When using external IdPs, you can’t really manage users from outside of the IdP control panel. In that case, the user management module provided by Webiny is of no use.
To only use the sign-in UI provided by Webiny, you only need to swap the Cognito component, for CognitoLogin. Here’s a full example:
The entire Cognito configuration is the same. The only difference is the component you import from @webiny/app-admin-users-cognito. With the CognitoLogin component, you only get the most necessary things registered into the system. You also get an ability to control which user menu items will be visible in the top-right user menu, because, regardless of your IdP, you need to allow users to sign out.
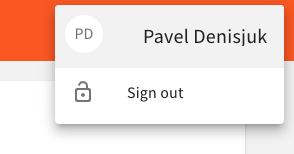 User Menu Items