Headless CMS > Integrations
Building a Frontend With GatsbyJS
Learn how to build a frontend for Webiny Headless CMS with Gatsby
- how to fetch data from Webiny
- how to render data using Gatsby’s data layer
- how to parse data including rich text
Overview
In this article we’ll learn how to integrate a GatsbyJS application that uses Webiny as a Headless CMS. We’ll go through the following:
- Getting started with Webiny
- Setting up a GatsbyJS project
- Fetching data
- Rendering data using Gatsby’s data layer
- Rendering Webiny’s rich text field
Getting Started With Webiny
Webiny works really well as a headless CMS with GatsbyJS ,
,
The easiest way to get started is to use the official starter, but we’re going to walk through a similar custom implementation here.
Use the official starter for 1-click install on Gatsby Cloud.
For this tutorial, we’re going to assume you have already done the following:
Once you have an app up and running, click into the “Headless CMS” app in the sidebar, click on models.
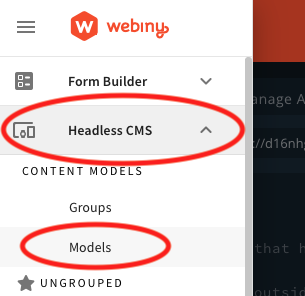 Sidebar - Headless CMS Models
Add the following models and fields: (Skip this step if you already have content models defined)
Authors
- A
textfield with the value “name” - A
textfield with the value “slug” (optionally add a validator using this regex which will make sure you have valid urls:^(?!.*--)[a-z0-9\-]+$) - a
filesfield with the value “picture” - a
textfield with the value “description” - a
textfield with the value “twitterHandle”
Posts
- A
textfield with the value “title” - A
textfield with the value “slug” (optionally use the regex above as a validator) - A
filesfield with the value “featured image” - A
rich textfield with the value “body” - A
referencefield with the value “author” - A
textfield with the value “description”
Next, add some content by going to Headless CMS > Ungrouped and choosing a content model.
Before we spin up our Gatsby project, let’s go to the API playground and see how our GraphQL API is structured. In the sidebar menu, choose “API Playground” to open the GraphQL explorer.
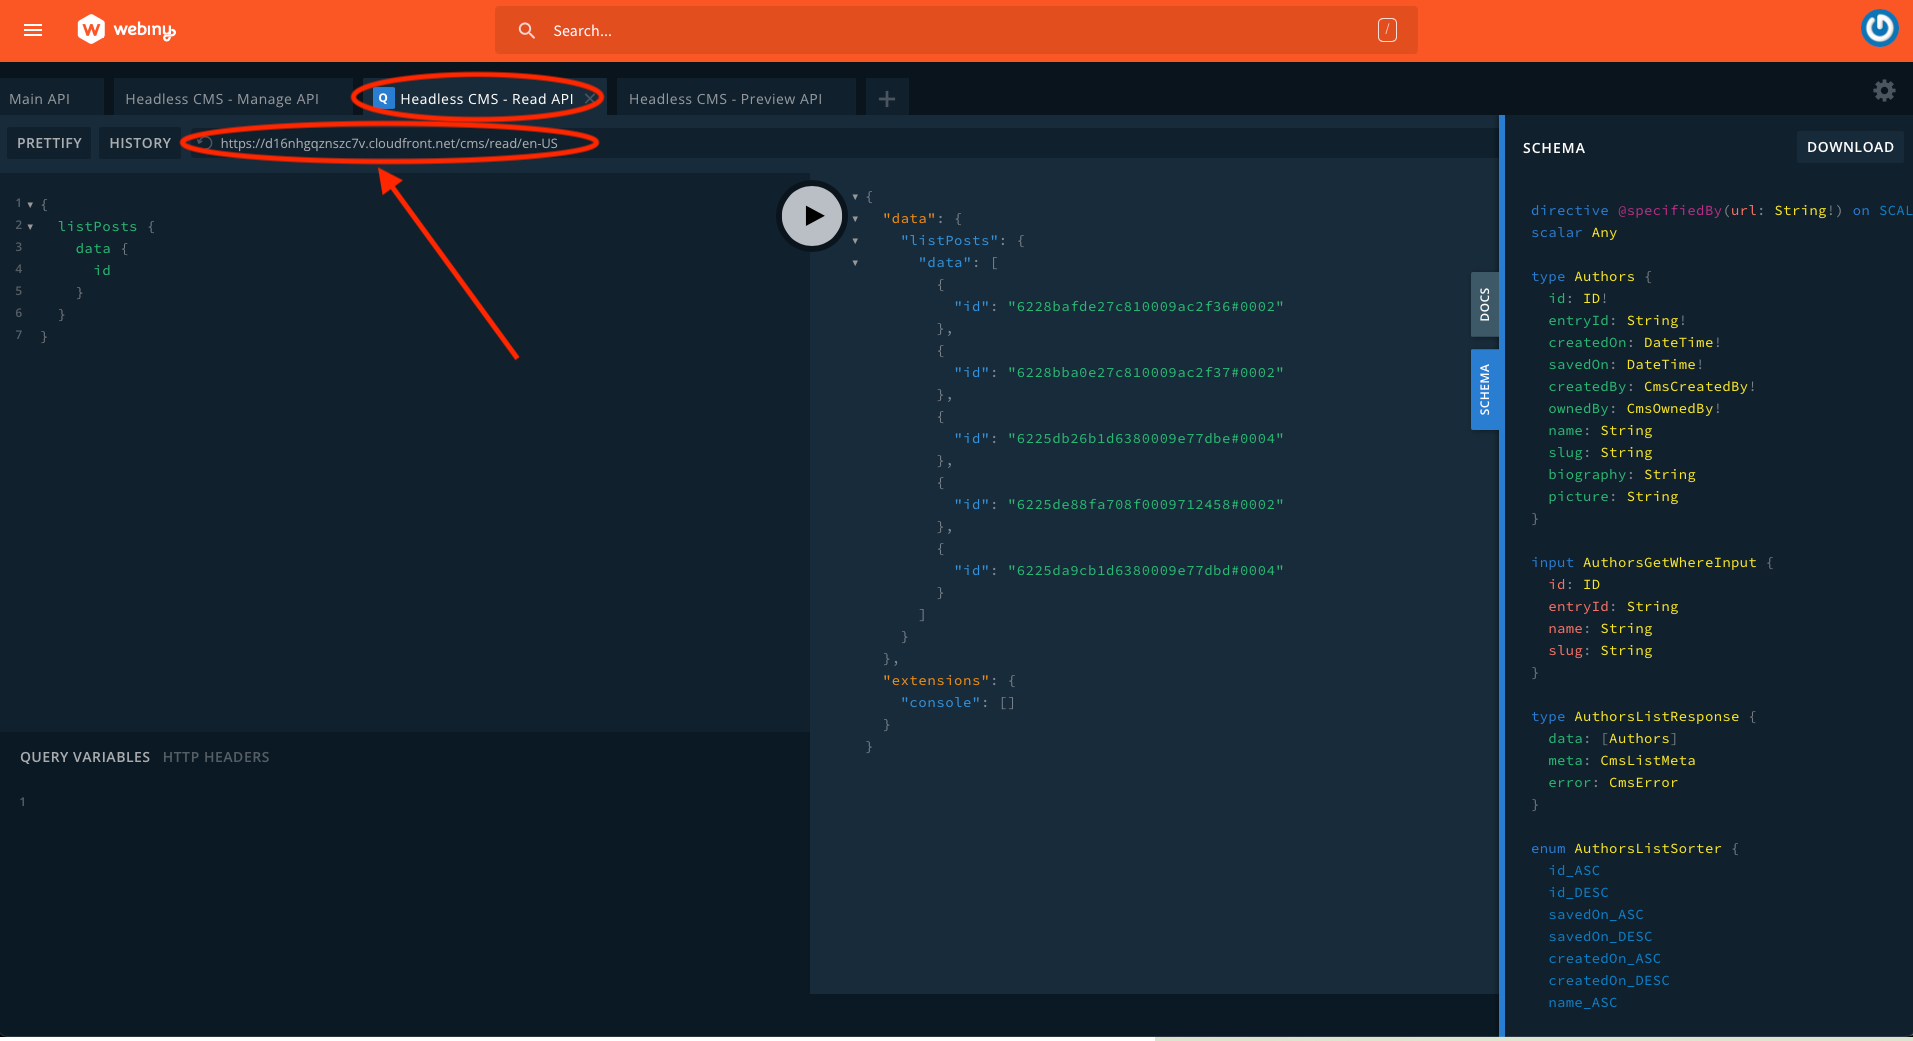 GraphQL playground
Notice that there are four APIs listed in the tabs at the top of the page. Choose HeadlessCMS - Read API. From here you can explore your content structure and the schema (via the right side panel). Directly below the tabs is a URL string. That’s the URL you can use to fetch data. Make a note of this URL, you’ll need it soon.
For more information about the Headless CMS GraphQL API, see this page of our docs.
Next, let’s configure API credentials. Choose API Keys in the sidebar. Add an API key with any name and description. Select “Headless CMS” and choose a Custom access level for all content model groups with the values read and preview. Make sure to leave “manage” unchecked. This will help secure our Webiny instance.
If you’re planning to source images from Webiny too, scroll down to the “File Manager” section and enable Custom access to all files with read as the primary action.
Save the API token and the Token itself will be revealed. You can use the same API token for both published and draft posts.
Set Up a GatsbyJS Project
You can follow the “Quick Start” page on the Gatsby site, or run npm init gatsby to spin up a basic project.
Once you’ve done one of these, add a new file .env to the project root. Gatsby will look for environment variables in that location.
Add the API endpoint URL (maybe call it WEBINY_API_URL), and the API token (maybe as WEBINY_API_TOKEN).
Make sure you don’t commit this file to your project’s git repository otherwise anyone could gain access to your API. You can do that by adding it to the .gitignore file.
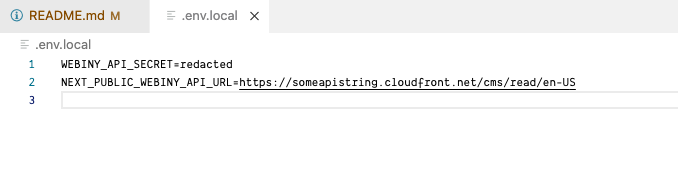 Environment variables set up in the project root
Fetching Data
We’re going to be using the plugin gatsby-source-graphql to fetch data from the GraphQL endpoint in our webiny instance. Run the following command to add the plugin:
Next, open the file gatsby-config.js and add the following. First we need to import dotenv and specify where we have put our environment variables so we can access them. Then inside the exported object we’re going to define our new plugin and the configuration we need to fetch data:
As you can see, we’re going to pass our environment variables to the plugin to fetch from the url and use the authorization token. But we also have made sure our data is easy to find in the datalayer by prefixing our fields and types with the webiny string.
If you start developing and visit the graphql endpoint in Gatsby you will see how this changes our graphql data:
Open the browser at the url http://localhost:8000/___graphql (that’s three underscores) and if successful you will see the webiny content source:
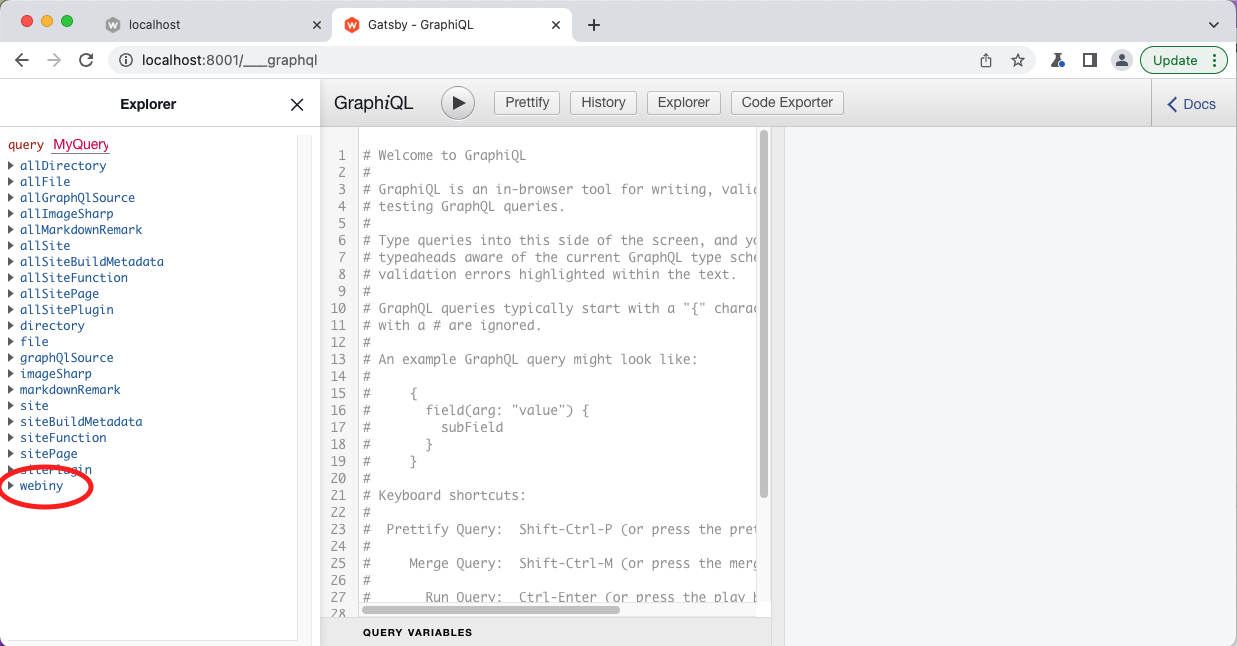 Gatsby's GraphQL IDE showing the API connection was successful
Rendering Data Using Gatsby's Data Layer
Gatsby’s approach to data is quite unique but very useful. Now that we have data available in the datalayer, we can test queries locally without having to contact the remote server.
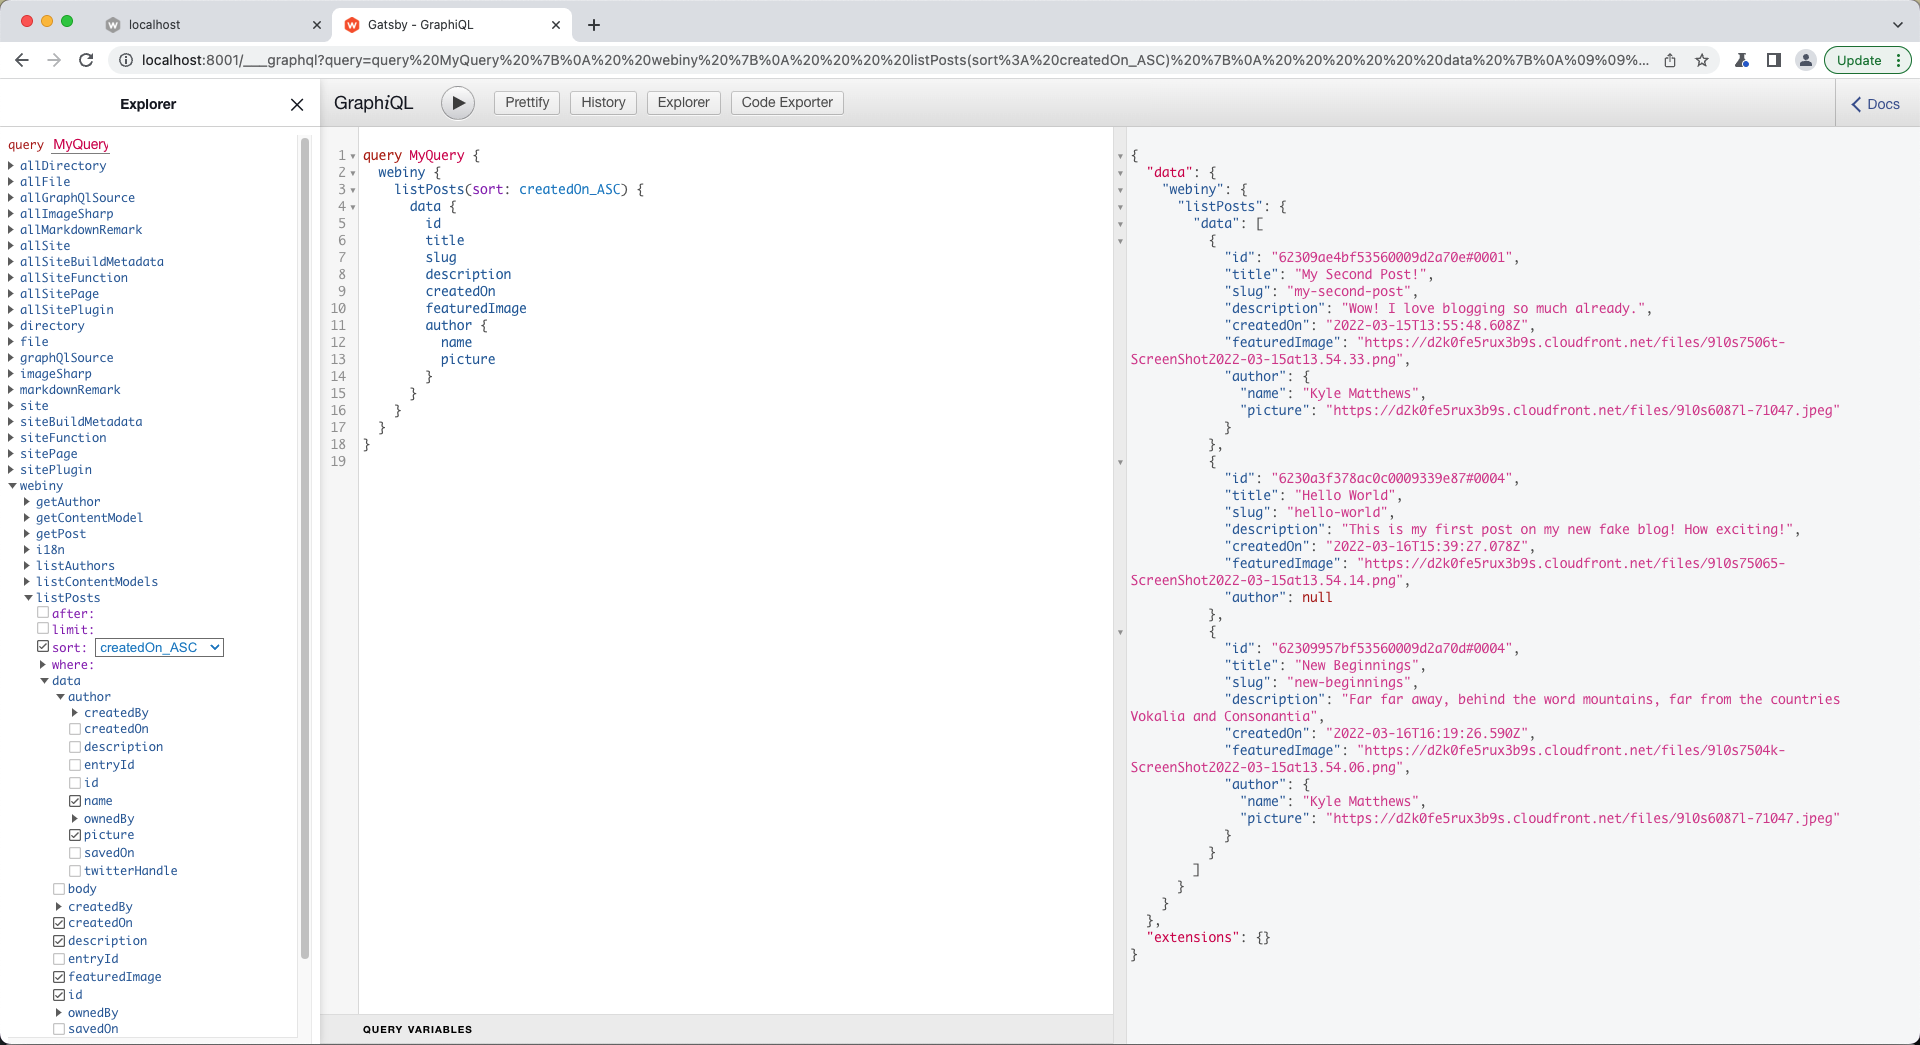 Gatsby's GraphQL IDE with the webiny data
To create pages, we need to modify the gatsby-node.js file so that it fetches and renders our posts.
To do that, we will need to import path and gatsby-source-filesystem, and export a function named createPages like so:
The final step is to create a template for your created nodes and pass the data to the component:
If this is successful you should be able to start your development server and see pages rendered with URL paths that correspond to your posts.
For more information about creating pages from data, see the Gatsby documentation.
Rendering Rich Text Fields
You may have noticed that we chose a rich-text field for the body of the post. You can copy the code from below into a new component:
And use that in your template like this:
Conclusion
Using Webiny for a Headless CMS using GatsbyJS is an easy, cost-effective and scalable solution.
As well as the basics we’ve discussed here, you have virtually no limit on the amount of records you store, or even the amount of images you store inside Webiny. You can also have multiple locales to support multiple languages, and other apps are included such as the page builder. Also, we have pricing plans that scale if you’re a small business owner or enterprise customer.
We hope you enjoy using Webiny to create your next website!