Headless CMS > Extensions
Customize Entry List Bulk Actions
Learn how to add, replace, or remove bulk actions in the Entry List.
This feature is available since Webiny v5.38.0.
- how to add a custom bulk action to the Entry List
- how to discover existing bulk action names
- how to change the position, remove, or replace an existing bulk action
Overview
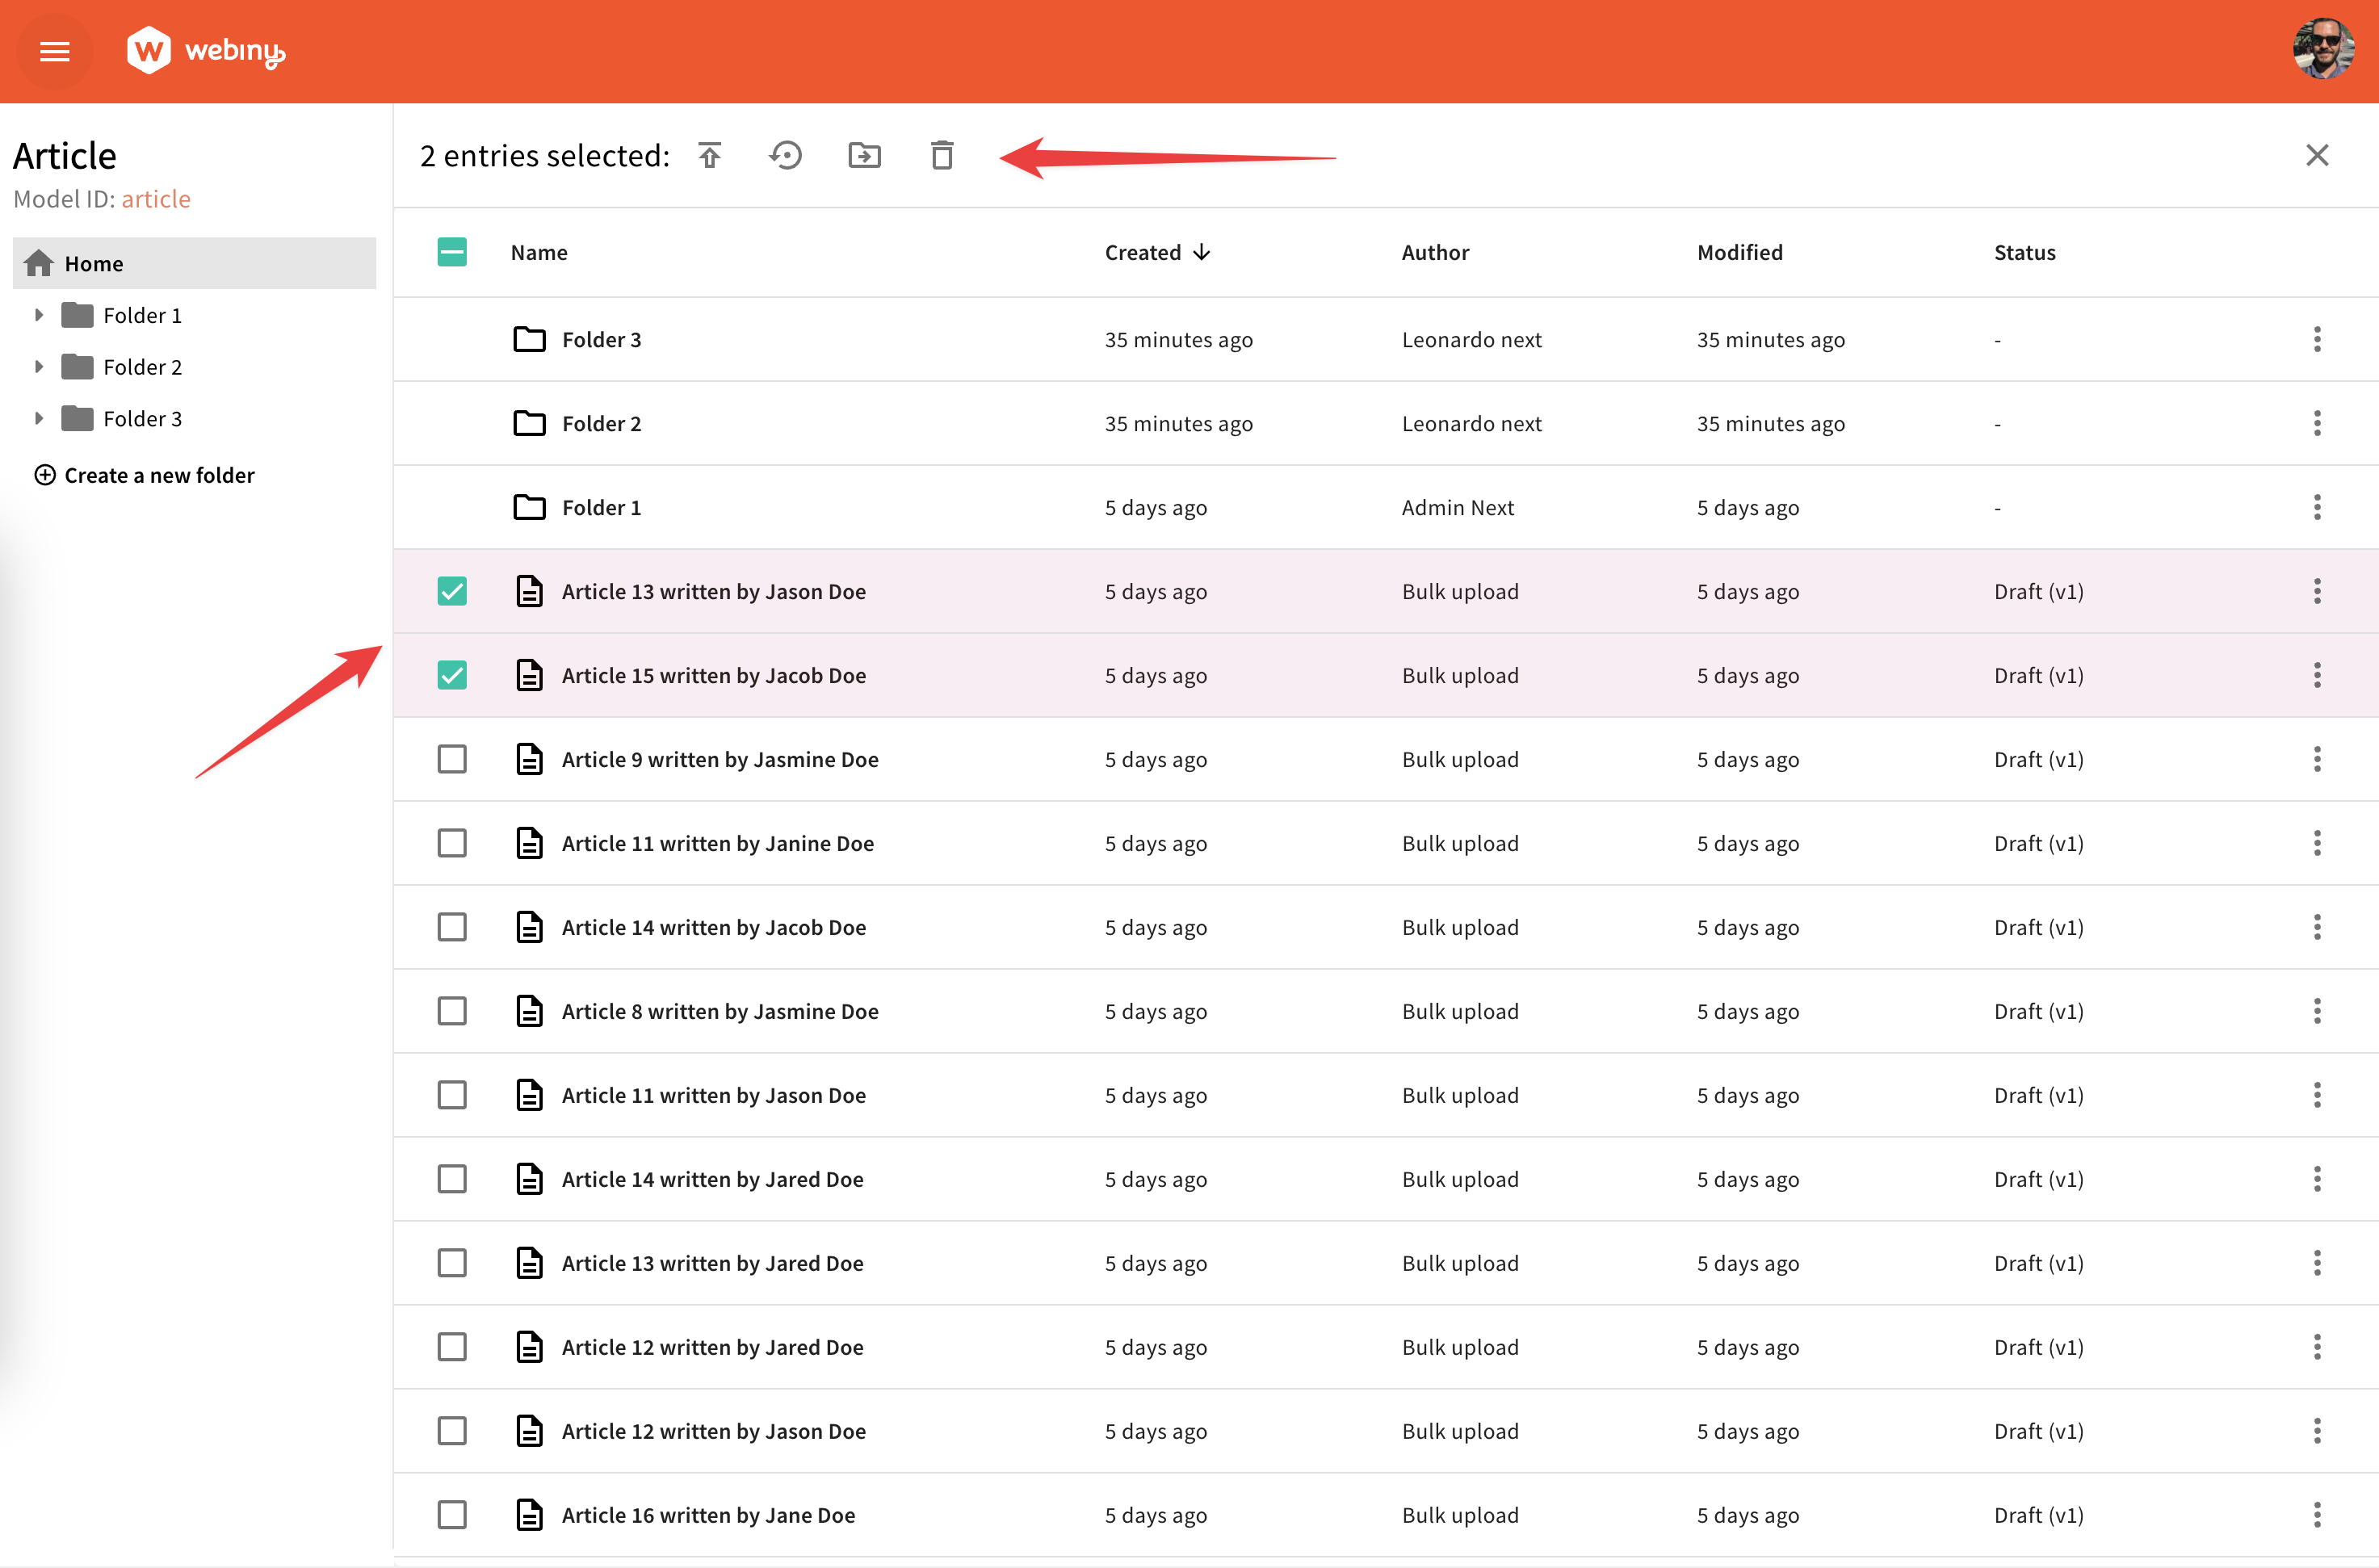
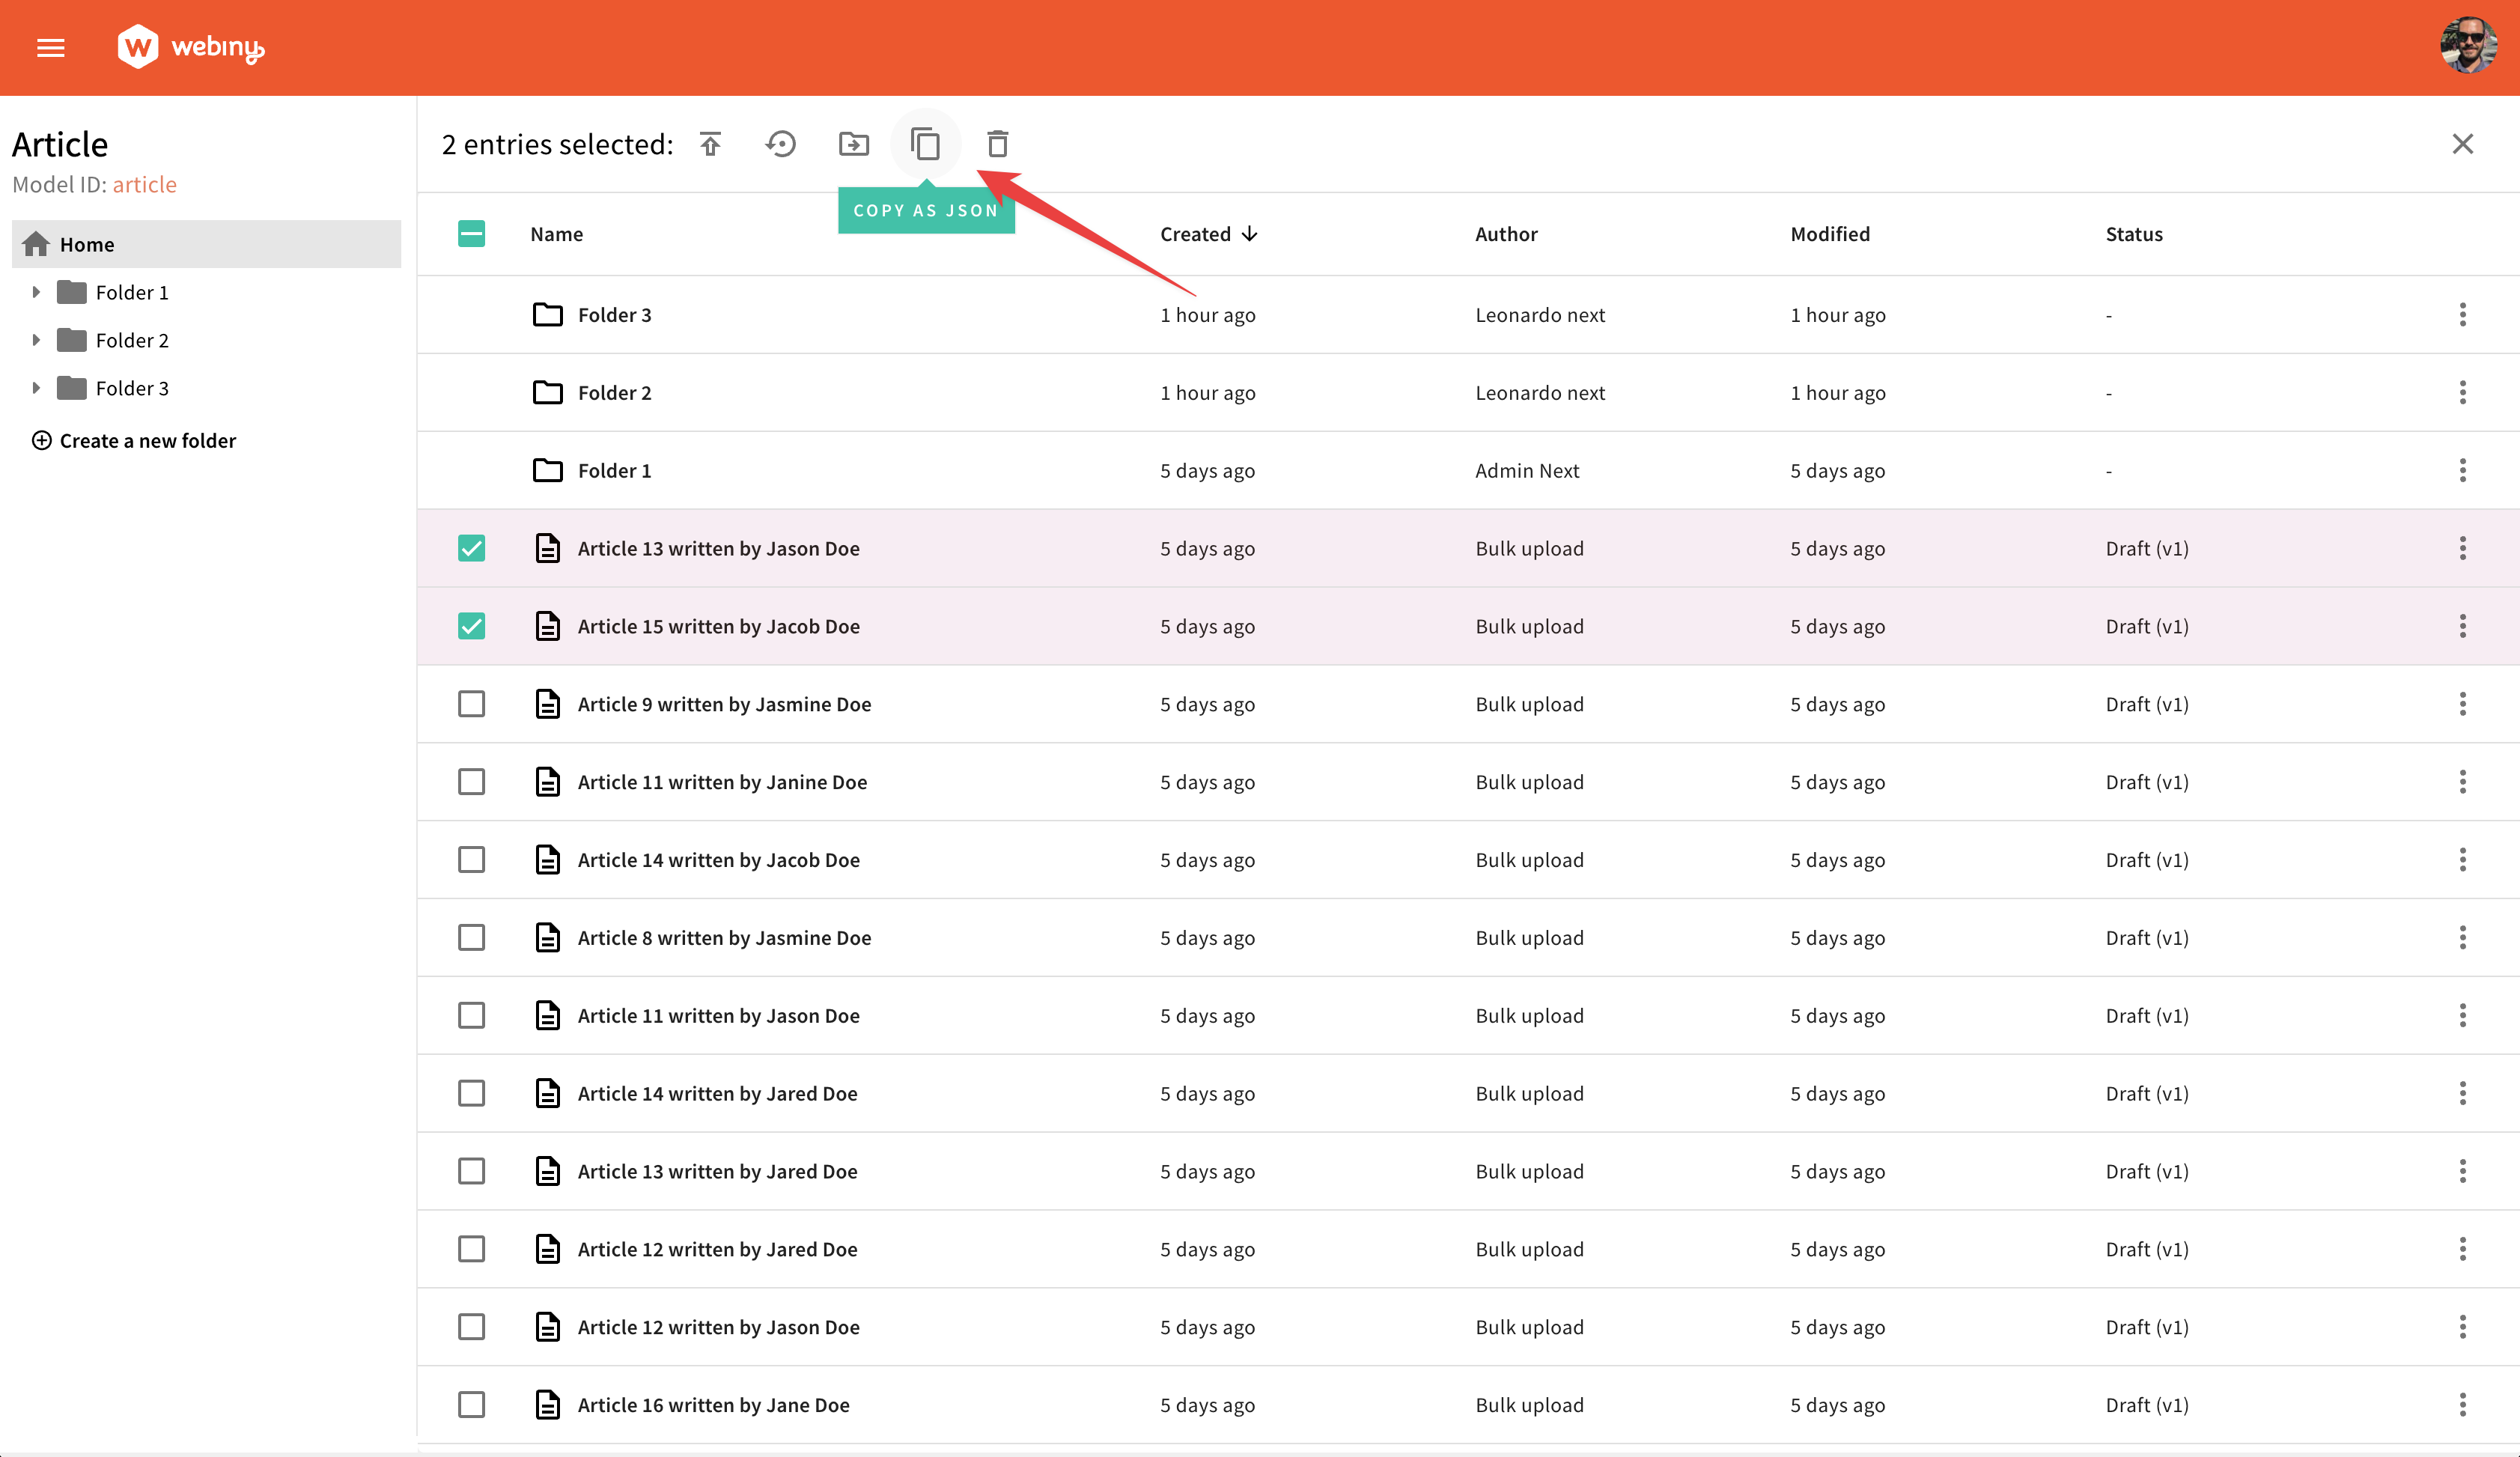
In Headless CMS, pre-built actions empower users to modify status, delete, or move multiple entries effortlessly. These actions become visible when you select one or more entries from the list.
To work with bulk actions, you need to use the ContentEntryListConfig component. For this article, we will use the BulkAction in the Browser namespace.
Browser is the crucial component of the Admin app’s Content Entry List. This is where users can easily browse through entries, apply filters, perform searches, create new entries, and organize them into folders.
If users select one or more entries from the list, the bulk action bar will appear.
 Browser and the Built-in Bulk Actions
Add a Bulk Action
To add a new bulk action, use the ContentEntryListConfig component and mount it within your Admin app. This component will serve as the foundation for your bulk actions.
To ensure UI consistency, use the useButtons hook to access four button components:
ButtonDefaultButtonPrimaryButtonSecondaryIconButton
Choose the one that best suits your design needs. In the following examples, we will use the IconButton component.
Simple Bulk Action
Here is an example of creating a bulk action that copies the selected entries to the clipboard in JSON format.
 Custom Simple Bulk Action
yarn webiny scaffold extension headless-cms/bulk-action-simpleExtension source code, and the accompanying content model, can be found here .
.
The items property obtained from useWorker() is a crucial part of managing bulk actions: these are the currently selected items within the context of the Content Entry List.
By declaring the modelIds prop, you can define in which Content Model Entry List you want to show your bulk action. If you exclude this prop, the bulk action will be registered for all models in the system. For instance, in the given example, next time you open the article content model browser and choose one or multiple entries, the defined bulk action will be shown.
This is the whole process of registering a new bulk action element.
Asynchronous Bulk Action
Occasionally, you might need to perform a bulk action that involves various asynchronous tasks, like syncing chosen entries with an external service. In these situations, we can leverage the useWorker and useDialogs hooks to ensure a smooth user experience:
useWorkerprovides the currently selected items and theprocessInSeriesmethod to perform our callback.useDialogprovides methods to display confirmation and result dialogs.
Here’s an example of creating a bulk action that syncs the selected entries with an external service using fetch, and shows the result of each iteration.
 Asyncronous Bulk Action
yarn webiny scaffold extension headless-cms/bulk-action-asynchronousExtension source code, and the accompanying content model, can be found here.
For the IconButton component, the onAction prop can accept any method. In the current scenario, we are using the showConfirmationDialog method to open a dialog.
showConfirmationDialog is designed to receive a callback function, which will be executed when the users confirm their action. You can pass any callback function to this method or use the processInSeries method from the useWorker hook.
processInSeries requires a callback as its first parameter. This callback is provided with the current item of the list being iterated and report: use this information to collect the result of the operation and indicate whether it was successful or not. The second parameter is the chunk size, which determines how many items are processed in each batch. You can adjust this value to control the size of each batch.
showResultsDialog is used after the completion of the sending process to present the user with a summary of the actions performed, including information about successful entries sent and any errors encountered during the process. This allows the user to review a detailed report of the entire operation.
By declaring the modelIds prop, you can define in which Content Model Entry List you want to show your bulk action. If you exclude this prop, the bulk action will be registered for all models in the system. For instance, in the given example, next time you open the article content model browser and choose one or multiple entries, the defined bulk action will be shown.
Bulk Action via Background Task
When working with large datasets, performing bulk actions in the background is essential for maintaining a smooth user experience. Webiny allows editors to perform bulk actions asynchronously in the background, eliminating the need for sequential processing on the client side. This functionality is powered by the Webiny background task feature, which simplifies large-scale operations.
In this tutorial, we’ll walk you through creating a plugin to enable bulk actions in the background. You don’t need to be familiar with the background task infrastructure, as Webiny provides simplified APIs that allow you to focus on your business logic.
By the end of this article, you’ll learn how to:
- Create a bulk action task that runs in the background.
- Develop an admin plugin that manages triggers and background processes for the specific task.
 Bulk Action via Background Task
yarn webiny scaffold extension headless-cms/bulk-action-background-taskExtension source code, and the accompanying content model, can be found here.
Defining the Bulk Action Task
When creating a bulk action task, it’s important to define both the logic for listing and processing entries. Another critical aspect of bulk action tasks is state management. As entries are processed, their state must change to ensure they aren’t queried multiple times during subsequent listing operations. This is particularly important when dealing with large datasets. Without a mechanism to mark entries as processed (e.g., by updating a field), the system could repeatedly process the same items, leading to inefficiency and redundancy.
In this example, we update the entry title with a unique tag (e.g., the current year) during the bulk action. This not only serves the purpose of the task but also prevents the entry from being listed again in subsequent operations, as the title no longer matches the filtering criteria.
The bulk action task uses two classes:
ListLatestEntriesUpdatedThisYear: Lists the entries that haven’t been updated yet, filtering out entries where the title already includes the current year.PrependCurrentYearToTitle: For each entry, it appends the current year to the title and saves the new revision.
Building the Admin Plugin
In this section, we will create an admin interface to trigger the bulk action. You will observe similarities with other task definitions. A critical aspect is defining how to invoke the background task when selecting all entries.
The admin plugin must accommodate two methods for processing entries:
- Invoking the newly defined Bulk Action Task using its name in PascalCase (
UpdateYear). - Providing the client-side code that executes while processing the entries.
At this stage, please note that real-time status updates on background tasks are not yet supported. Users will need to manually refresh the page to view the current status of their tasks.
Discover Bulk Actions
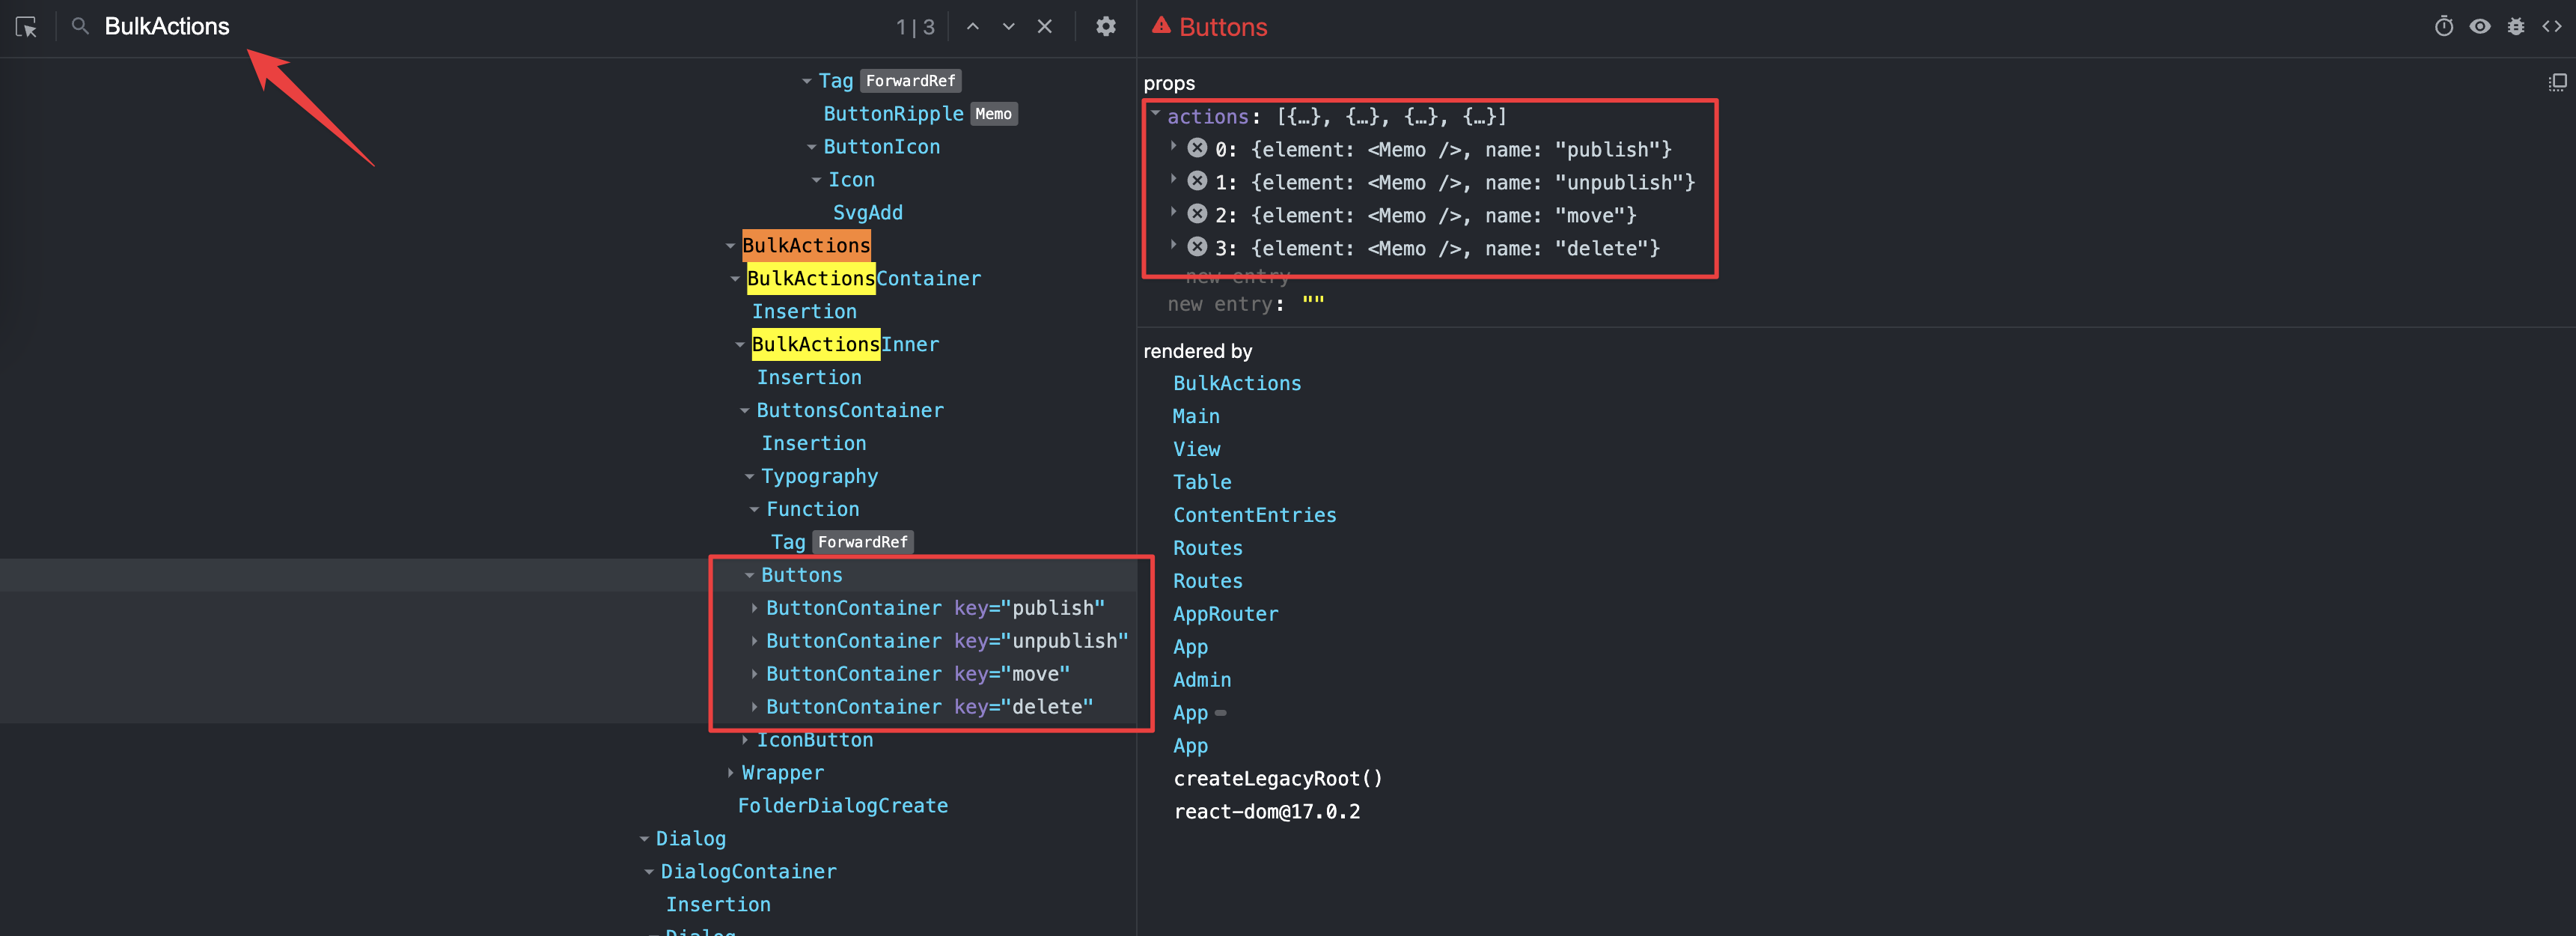
This section demonstrates how you can discover the names of existing bulk actions. This is important for further sections on positioning, removing, and replacing bulk actions.
The easiest way to discover existing bulk actions is to use your browser’s React Dev Tools plugins, select at least one entry and look for the Buttons element inside BulkActions. From there, you can either look for actions prop or look at the child elements and their keys:
 Discover Existing Bulk Actions
Position a Bulk Action
To position your custom bulk action before or after an existing action, you can use the before and after props on the <Browser.BulkAction> element:
 Position Your Action Before Another Action
Remove a Bulk Action
Sometimes you might want to remove an existing bulk action. All you need to do is reference the action by name and pass a remove prop to the <Browser.BulkAction> element:
Replace a Bulk Action
To replace an existing bulk action with a new action element, you need to reference an existing action by name and pass a new component via the element prop: