Release Notes > Older Releases > 5.36.0
Upgrade From 5.35.x to 5.36.0
Learn how to upgrade Webiny from 5.35.x to 5.36.0.
Before upgrading to 5.36.0, please ensure your Webiny project is using the new project
setup, introduced with Webiny
5.29.0. In case you did not already migrate, please visit the migration
guide.
- how to upgrade Webiny from 5.35.x to 5.36.0
Make sure to check out the 5.36.0 changelog to get familiar with the changes introduced in this release.
Step-by-Step Guide
The following steps will guide you through the upgrade process. Please note that this guide assumes you are using the new project setup, introduced with Webiny 5.29.0. In case you did not already migrate, please visit the migration guide.
1. Upgrade Webiny Packages
Upgrade all @webiny/* packages by running the following command:
Once the upgrade has finished, running the yarn webiny --version command in your terminal should return 5.36.0.
2. Run the Upgrade Command
The next step is to run the project upgrade:
3. Deploy Your Project
Proceed by redeploying your Webiny project:
Additional Notes
With this release, we significantly improved our file uploading capabilities, enabling support for files up to a whopping 5TB in size. Remember to review the default Maximum file upload size limit you find within the File Manager Settings page (Main Navigation -> Settings -> File Manager).
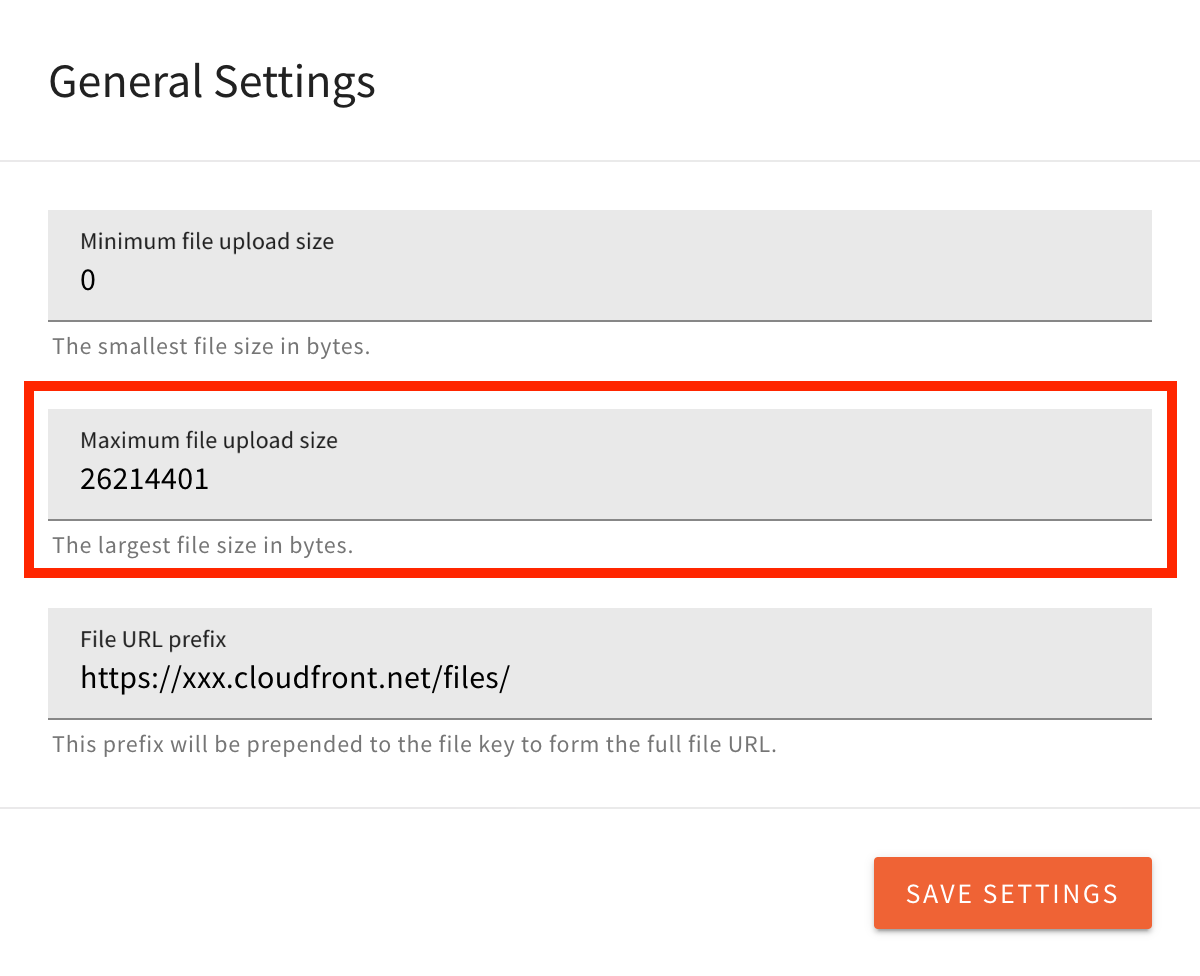 File Manager Settings - Maximum file upload size
Make sure you deploy the entire system using the command shown above! You have to deploy all apps before using the system. Partial deploys may cause the upgrade to be applied incorrectly.
As stated in the Upgrade Webiny section, we recommend that you
first deploy your changes into one of your pre-production environments, like dev or staging.
Learn more about different deployment environments in the CI/CD / Environments key topic.