Headless CMS > Advanced
Import/Export Content Models
Learn how to import and export content models in Webiny Headless CMS.
- how to export content models
- how to import content models
Webiny Headless CMS allows you to export all your content models as a JSON file. This is useful if you want to migrate your content models to another project or if you want to share them with other developers.
Similarly, you can use the generated JSON file to import those same content models into your project. This tutorial will guide you through the process of exporting and importing content models.
Exporting Content Models
To export one or more content models navigate to your Content Models view inside the Headless CMS application.
From the Side Menu, Click Content Modeling >Models.
✔️ The Content Models screen opens.- Click the Export all models icon.
✔️ The export action will generate a JSON file containing all your content models.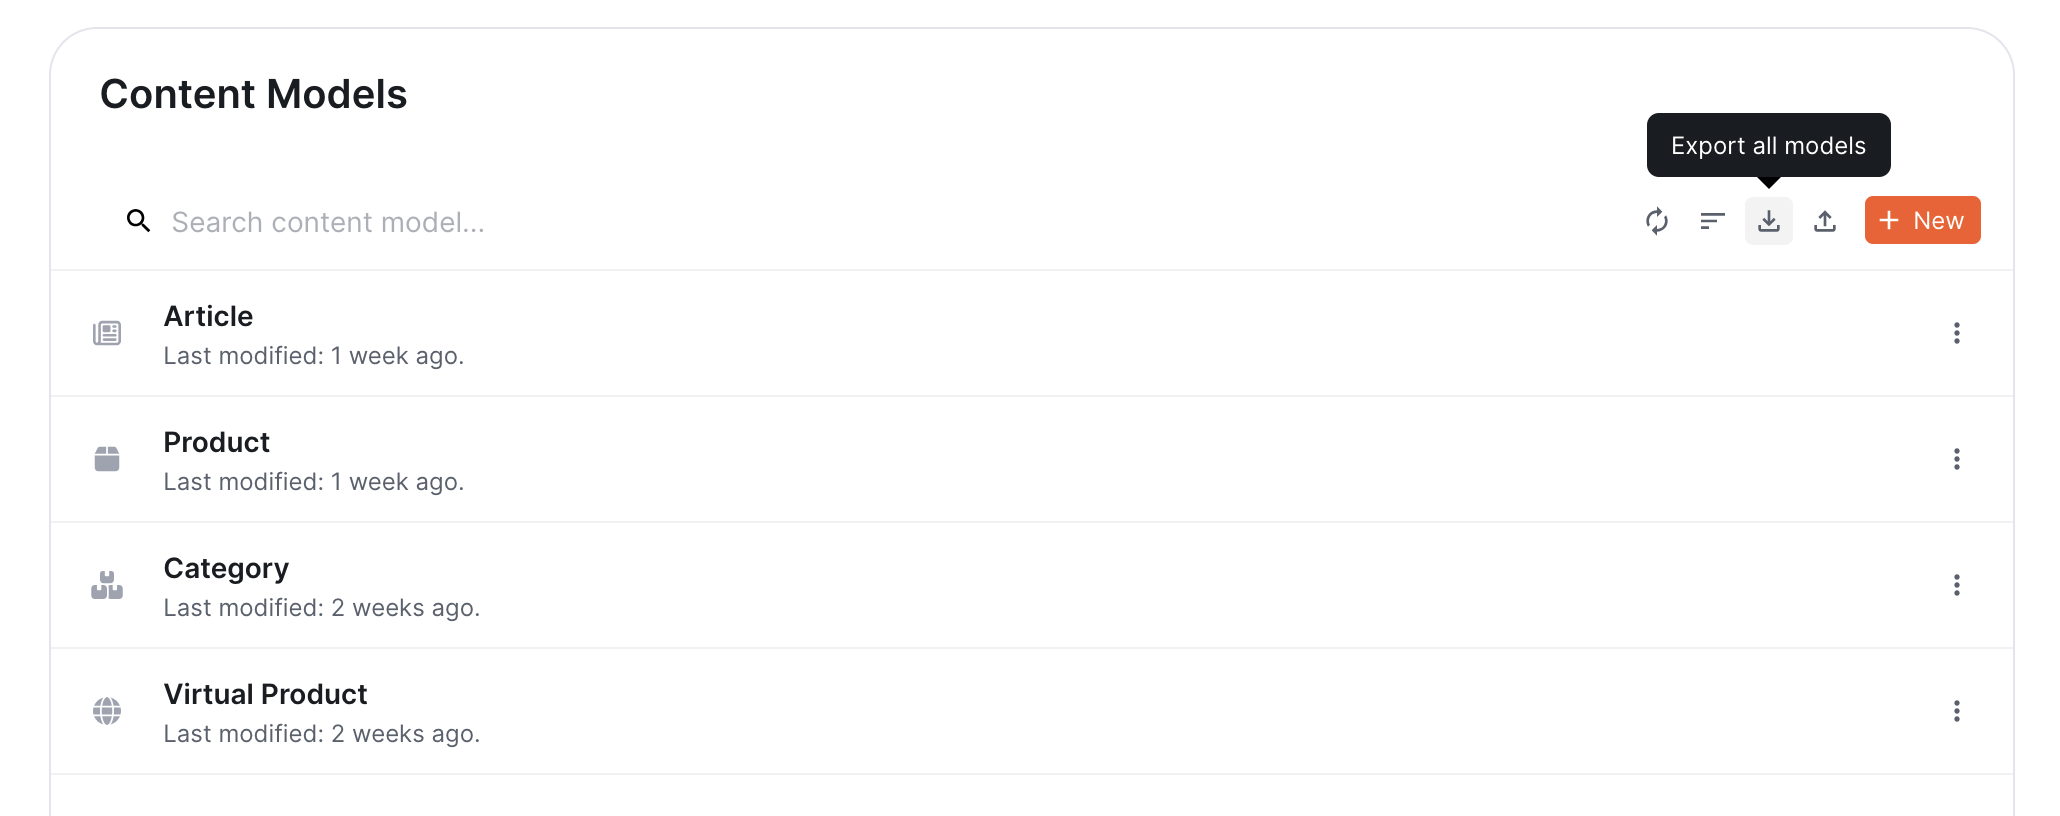 Headless CMS - Export Content Models(click to enlarge)
Importing Content Models
To import content models, navigate to your Content Models view inside the Headless CMS application.
From the Side Menu, Click Content Modeling > Models.
✔️ The Content Models screen opens.- Click the Import models icon.
✔️ The system will ask you to provide an export file.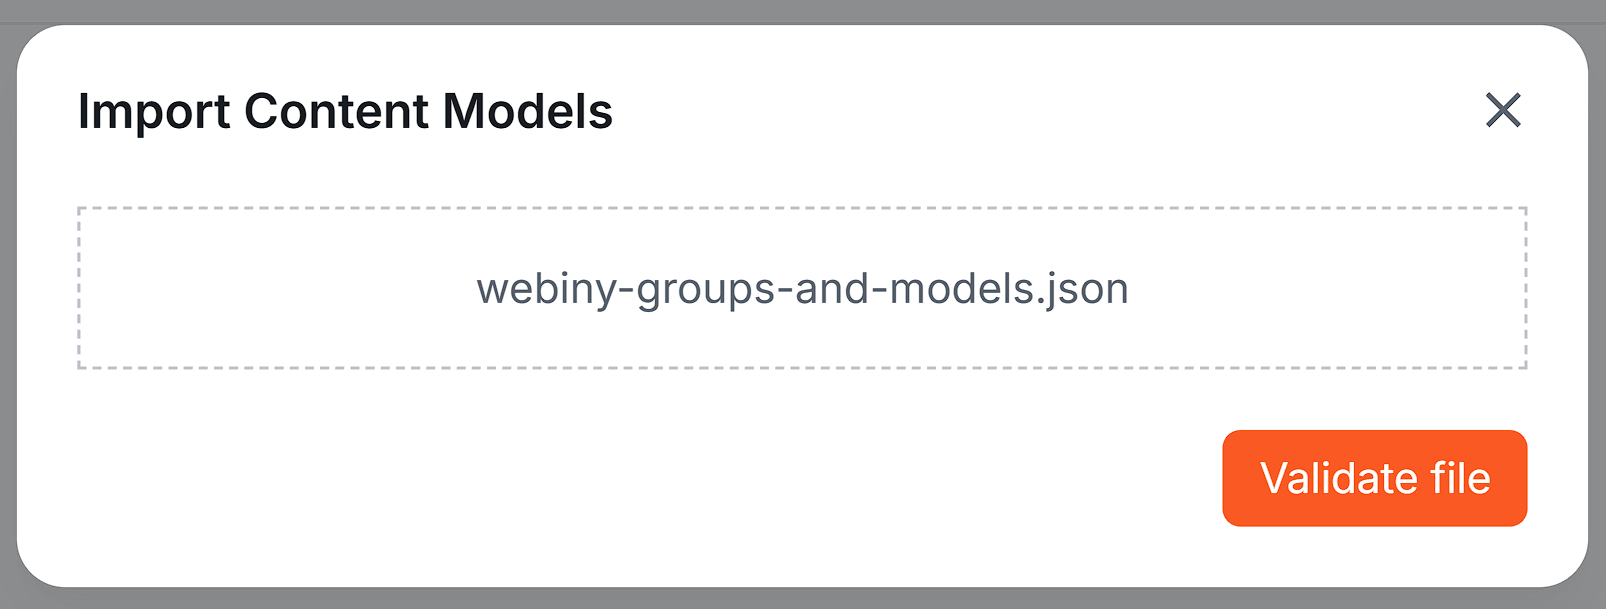 Headless CMS - Export Content Models(click to enlarge)
 - Select the file you want to import and click Validate file.
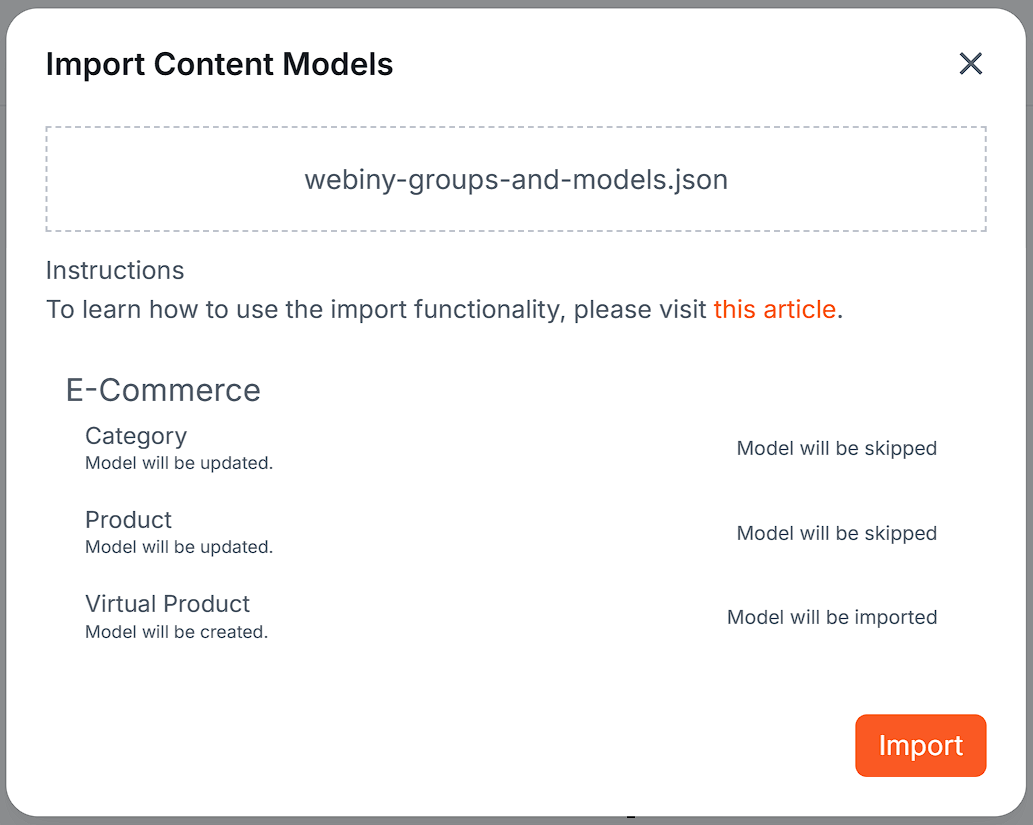
✔️ The validation action will check the file and display a list of content models that can be imported.
 Headless CMS - Import Content Models(click to enlarge)
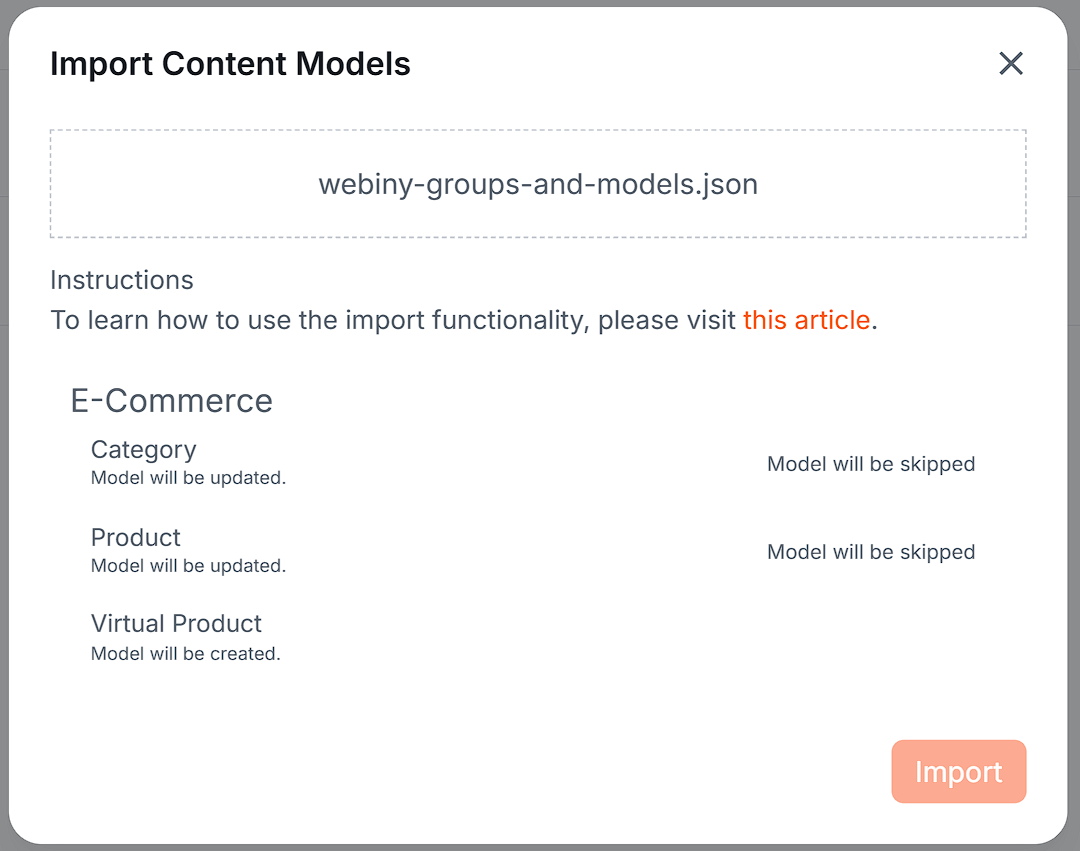
 - Click the Model will be skipped label in front of the title of the Content Models you want to import. From the list you can choose which content model you want to import and which ones you want to skip.
 Headless CMS - Import Content Models(click to enlarge)
Note that if you select to import a specific content model that references one or more content models that are also part of the export file, the system will automatically select those referenced content models as well. If you wish to skip them, you can just go back and exclude them from the import.
 Headless CMS - Import Content Models
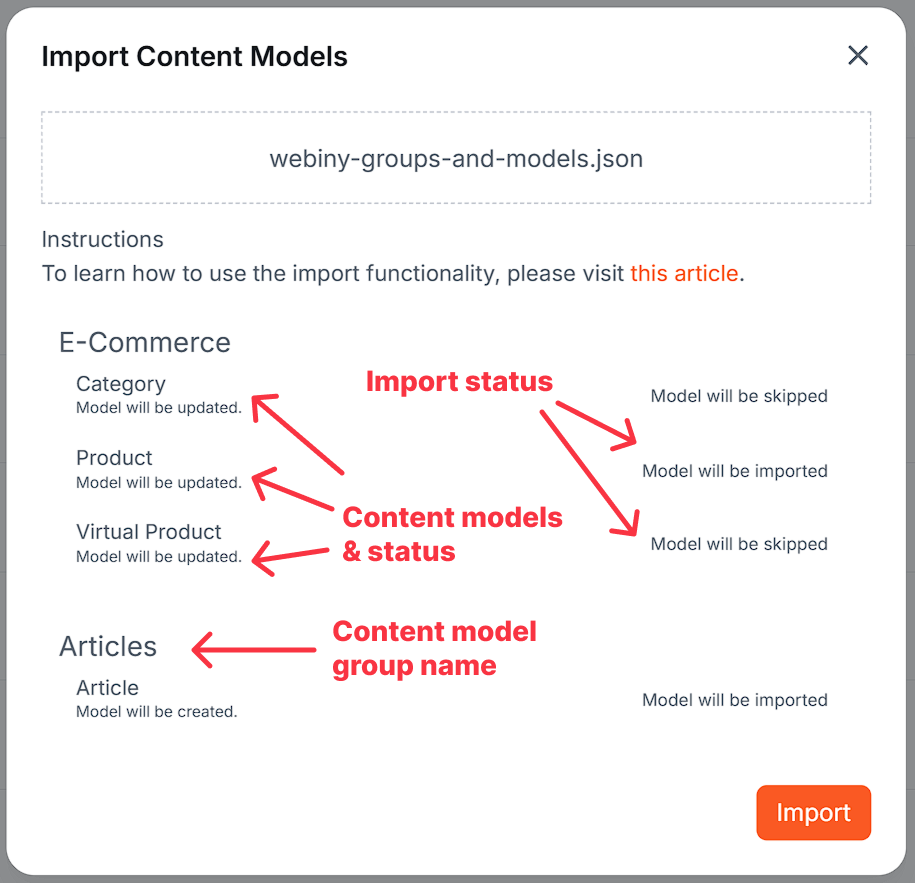
All the content models are grouped in their respective content model groups. Those groups will be automatically created for you upon importing the file if such a group already doesn’t exist.
Inside the group section, you will have a list of individual content models that belong to that group. You can select which content models you want to import and which ones you want to skip by clicking the button on the right-hand side.
Also, underneath the content model name you will have a status for the content model. This status tells you if this content model will be updated (meaning the content model already exists) or created (meaning the content model currently doesn’t exist).
- Finally, once you have selected which content models you want to import. Click Import to start the import process.
 Headless CMS - Import Content Models
✔️ The import process can take a few seconds to finish as it needs to validate all the information. Once the process is done you will see the status screen with the results of the import process.
From the same status screen, you can proceed to import additional content models just by selecting them and clicking the Import button again. In case you want to finish the import process, just click outside the content model dialog.