Headless CMS > API Playground
API Playground
Explore and test your Headless CMS GraphQL APIs using the built-in API Playground
- How to access the API Playground from Webiny Admin?
- What are the five areas of the playground interface?
- How to explore the schema using the Documentation Explorer?
- How to switch between the Manage, Read, and Preview APIs?
Overview
The API Playground is a built-in GraphQL IDE that comes with every Webiny project. It allows you to explore and test your Headless CMS APIs directly from the Webiny Admin — no frontend code required. It provides tabs for all three Headless CMS APIs (Manage, Read, and Preview), as well as the main Webiny GraphQL API.
Accessing the API Playground
- Open the Webiny Admin in your browser
- Click the Support icon at the bottom of the left sidebar
- Click API Playground from the menu that appears
You’ll see tabs at the top for:
- Main API — Core Webiny GraphQL API
- Headless CMS - Manage API
- Headless CMS - Read API
- Headless CMS - Preview API
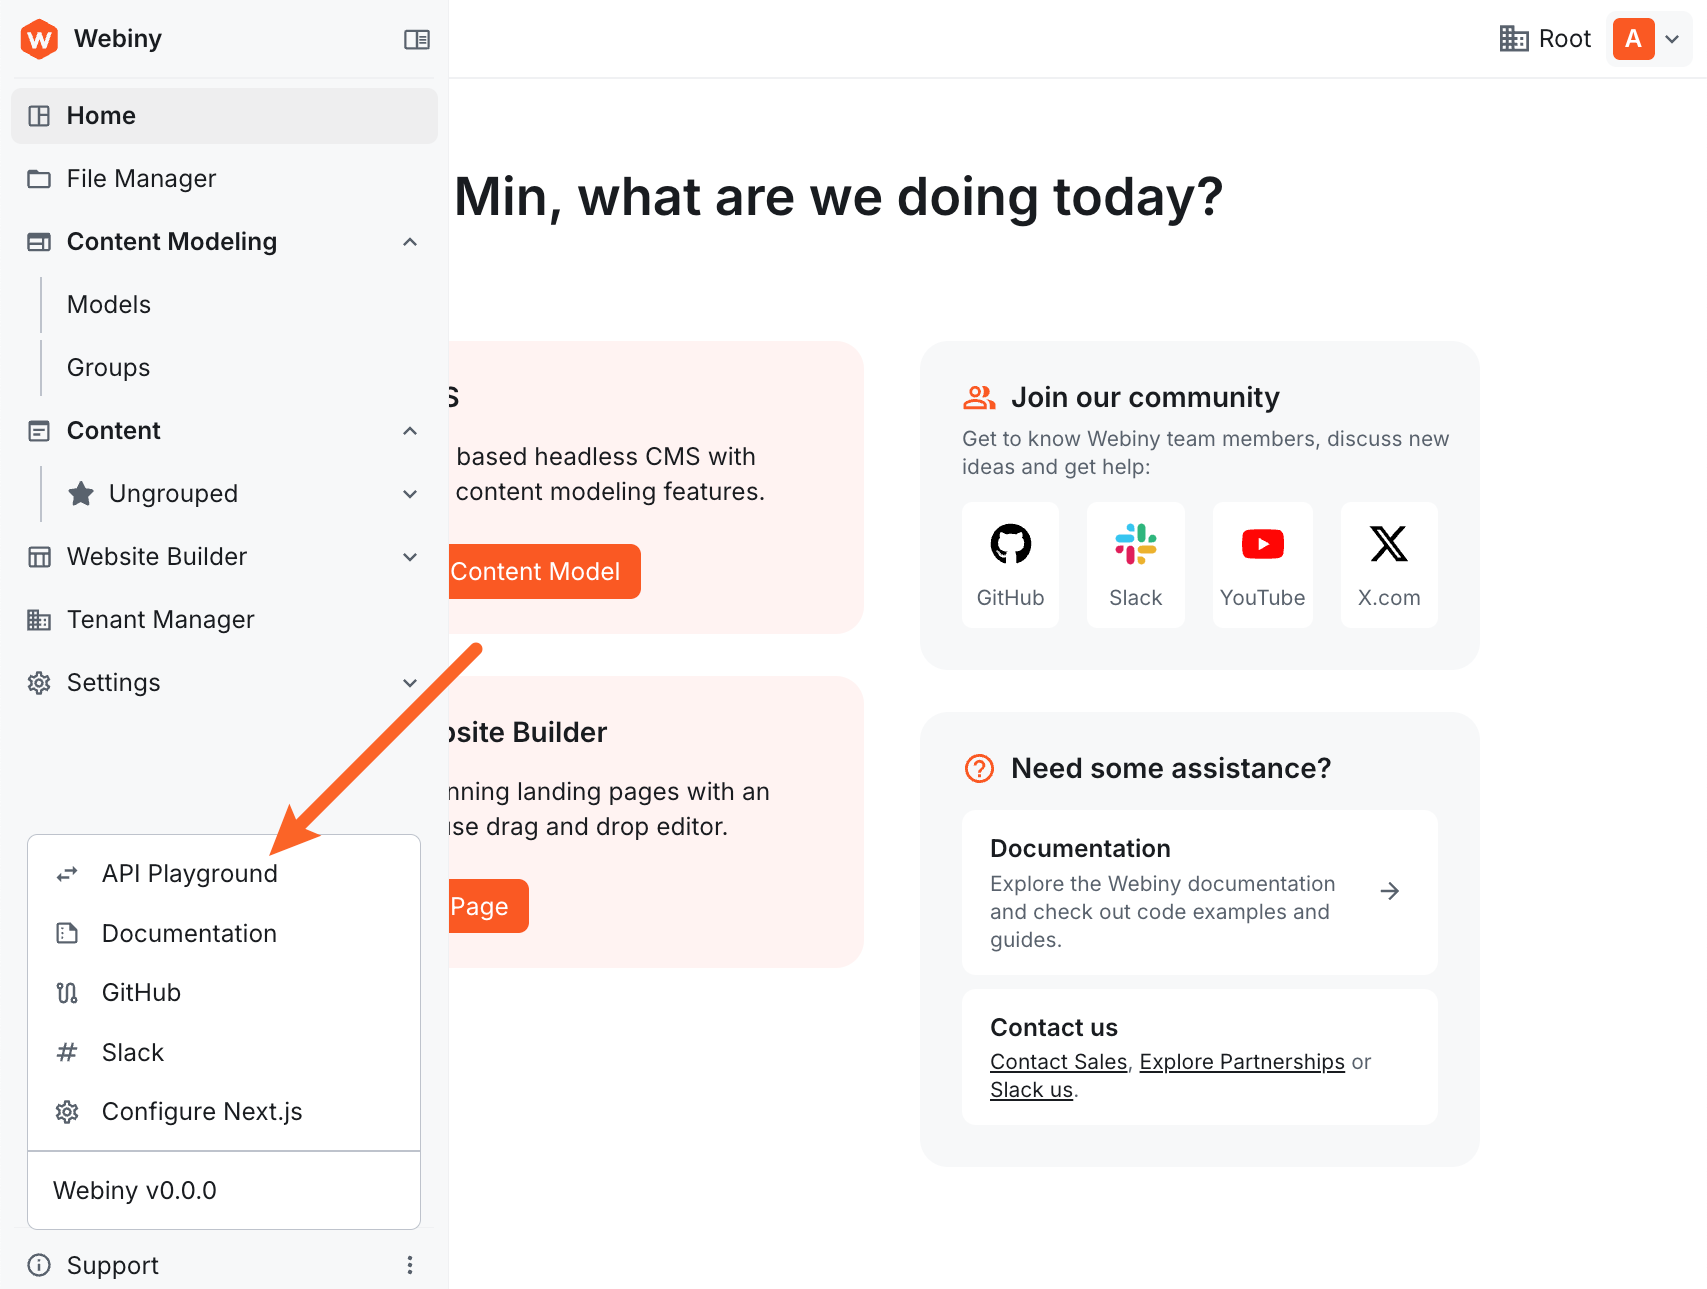 Webiny Admin sidebar showing the Support menu with API Playground option
When using the API Playground inside Webiny Admin, you are automatically authenticated as the currently logged-in user. No need to add authentication headers manually.
The Playground Interface
The playground has five key areas:
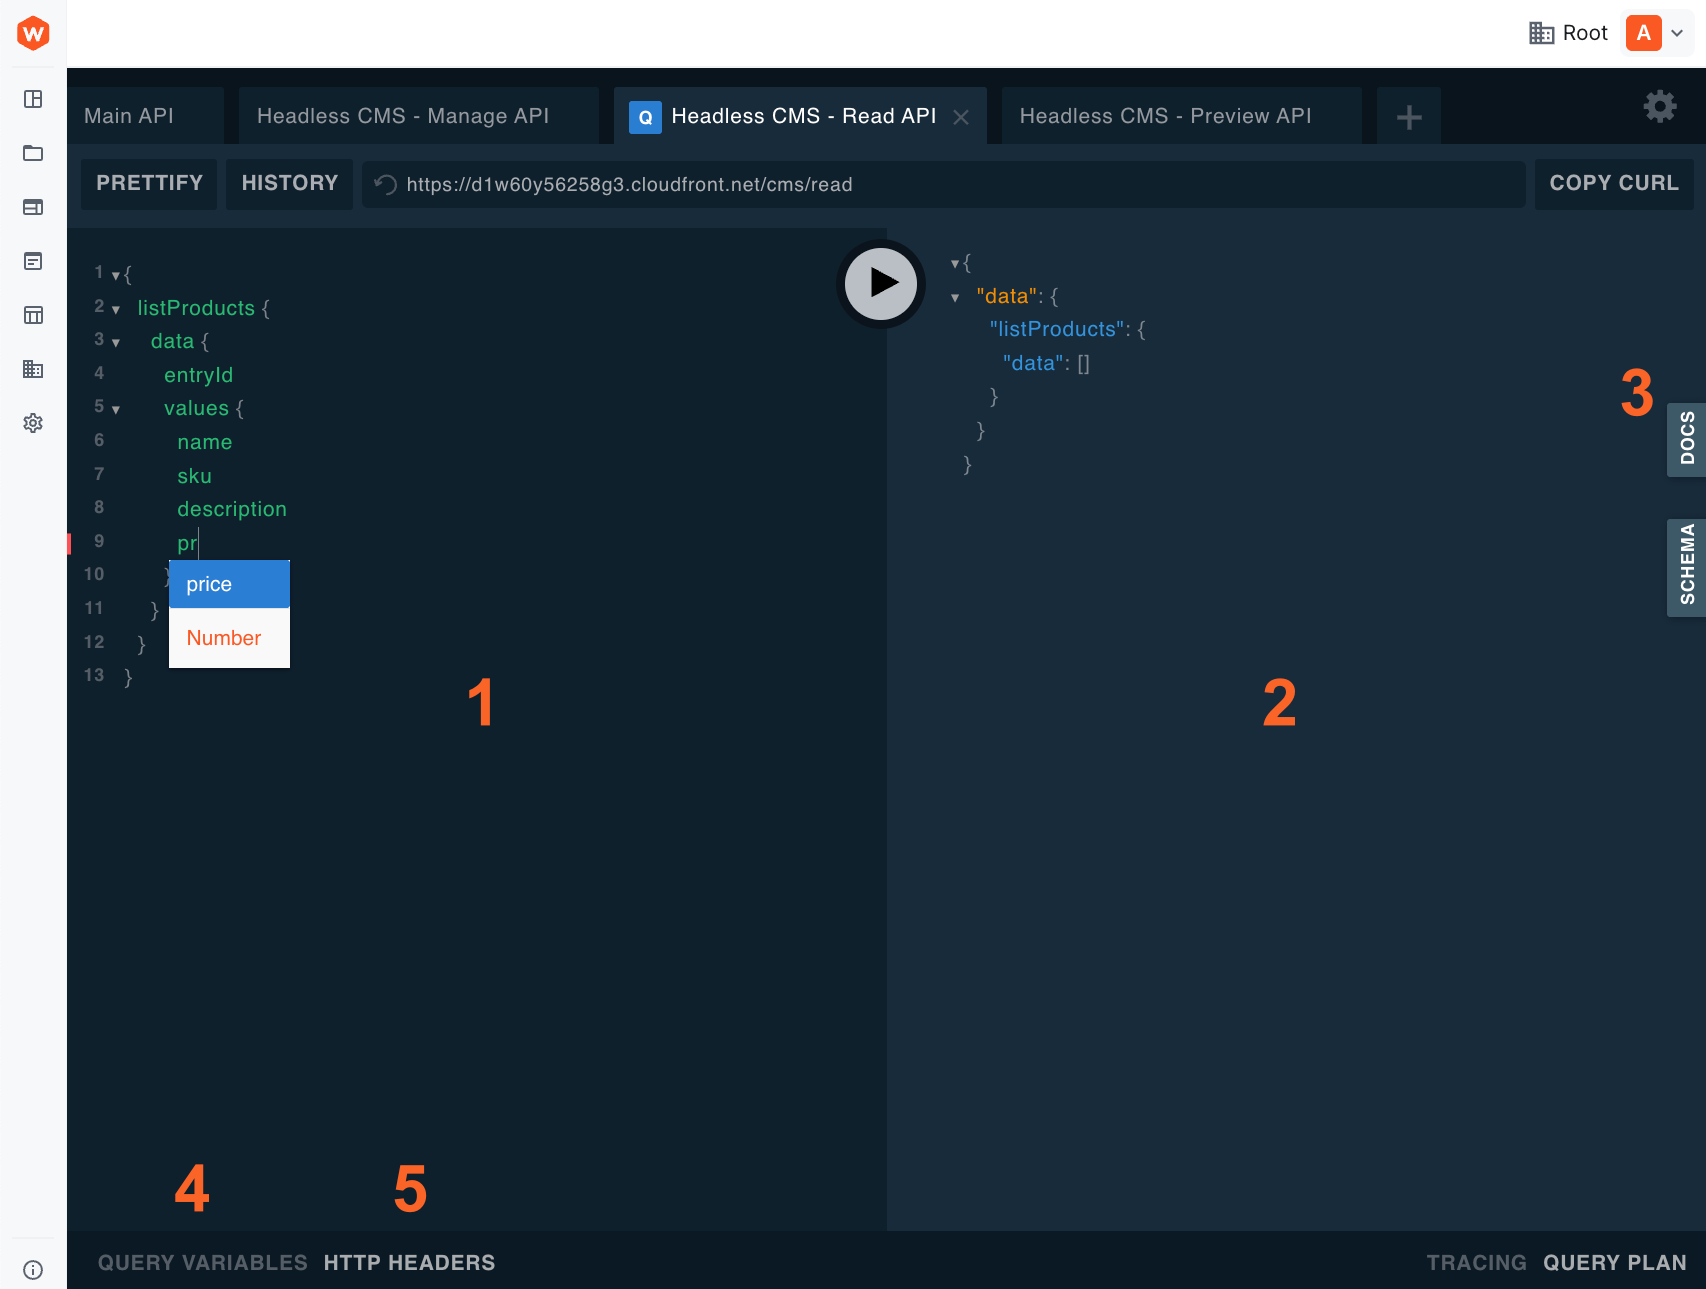 API Playground interface with the five key areas labeled: Query Editor, Response Panel, DOCS button, Query Variables, and HTTP Headers
1. Query Editor
The left panel where you write GraphQL queries and mutations. Features syntax highlighting, auto-completion (Ctrl+Space / Cmd+Space), and inline error detection.
Queries are not saved persistently. If you navigate away or refresh the page, your work will be lost. Copy any queries you want to keep to a local file.
2. Response Panel
The center panel displaying the result of your query in JSON format, including any error messages and execution time.
3. Documentation Explorer
Click the DOCS button on the right to open the schema documentation. It lists all available queries and mutations, their arguments, field types, and nested type definitions. The documentation is auto-generated from your content models and updates automatically when you add or modify a model.
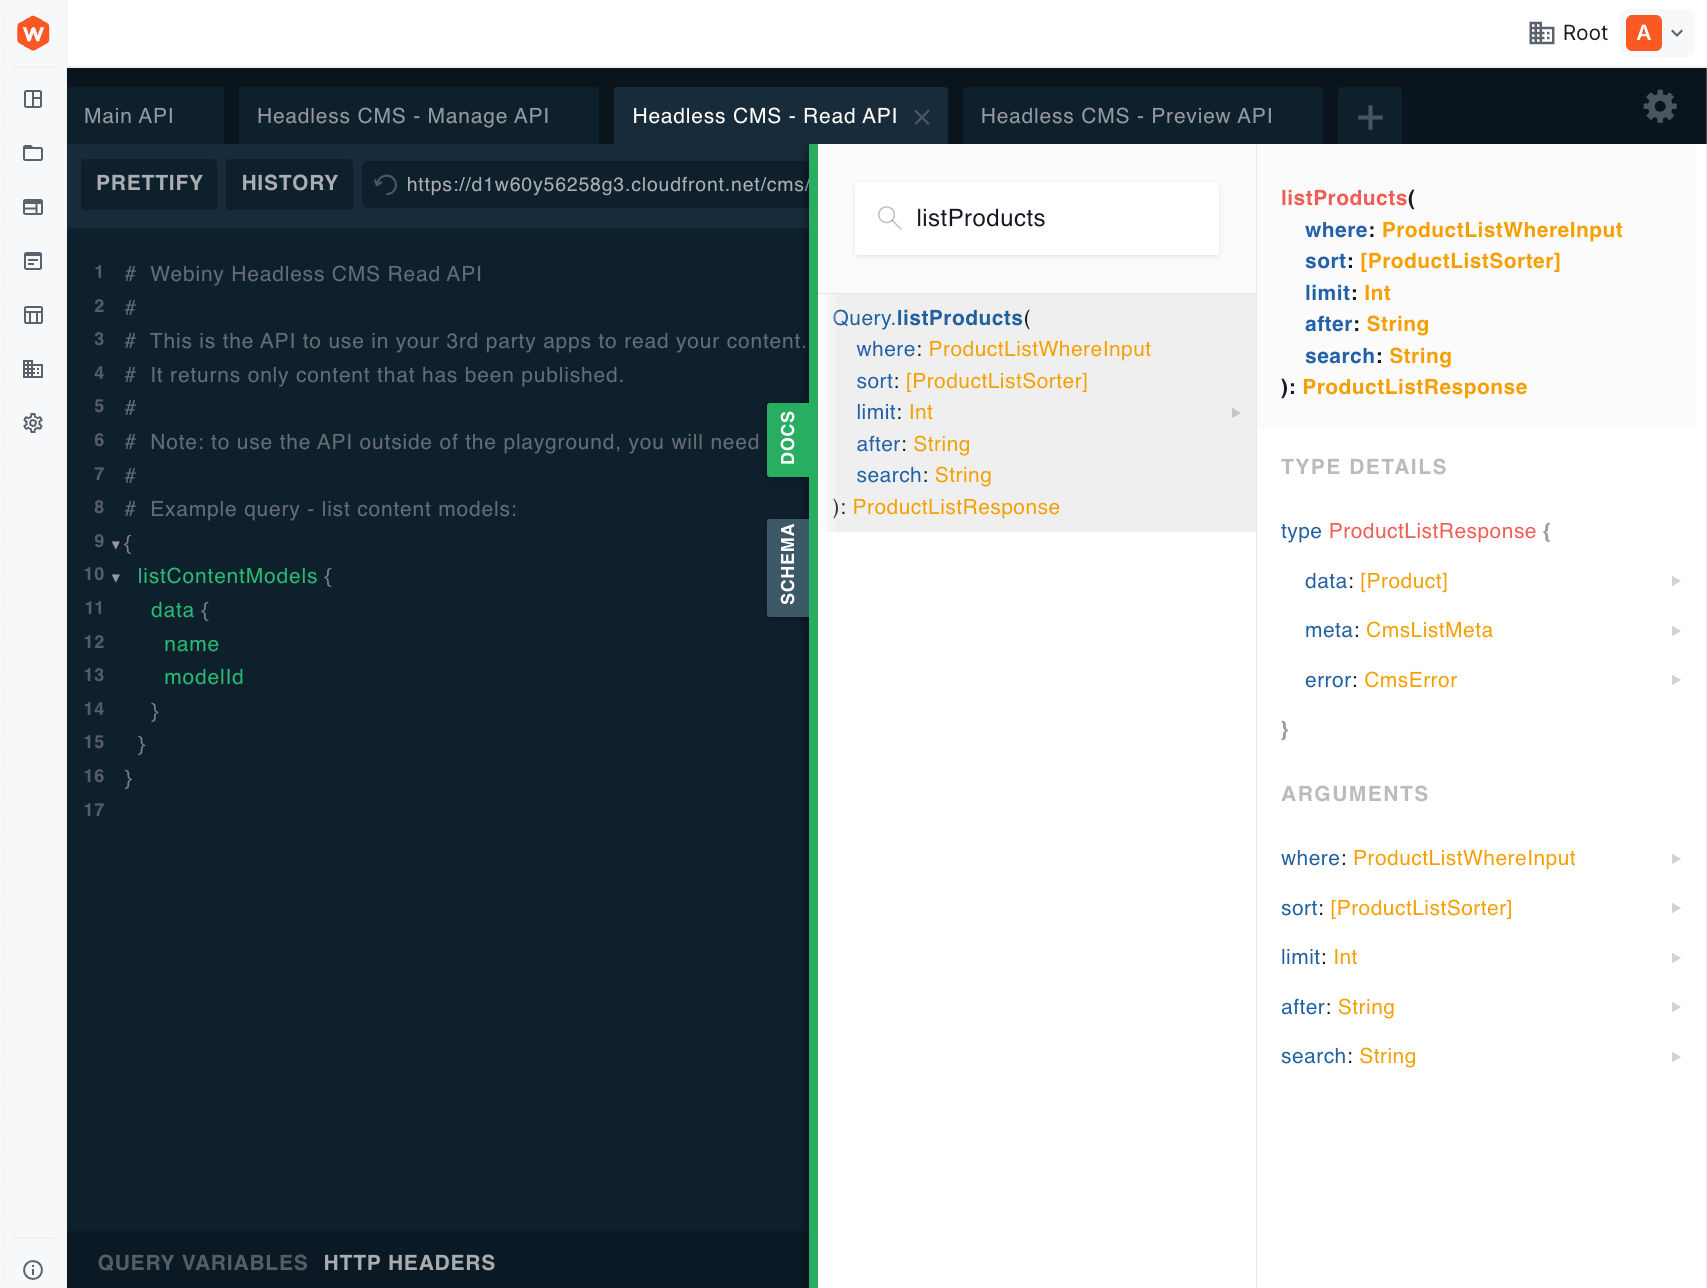 Documentation Explorer showing a query with its type information and arguments
4. Query Variables
The bottom-left tab where you define variables for your queries. Using variables makes queries reusable and avoids hardcoding values inline.
5. HTTP Headers
The bottom-right tab for configuring request headers. This is where you add your API key when calling the API from outside Webiny Admin:
Exploring the Schema
The Documentation Explorer is the best way to discover what your API exposes.
To explore a content model:
- Click the DOCS button to open the documentation panel
- Browse queries or mutations at the root, or use the search bar to find a specific operation (e.g.,
listProducts) - Click into the operation to see its return type and arguments
- Navigate deeper by clicking on types to explore their fields
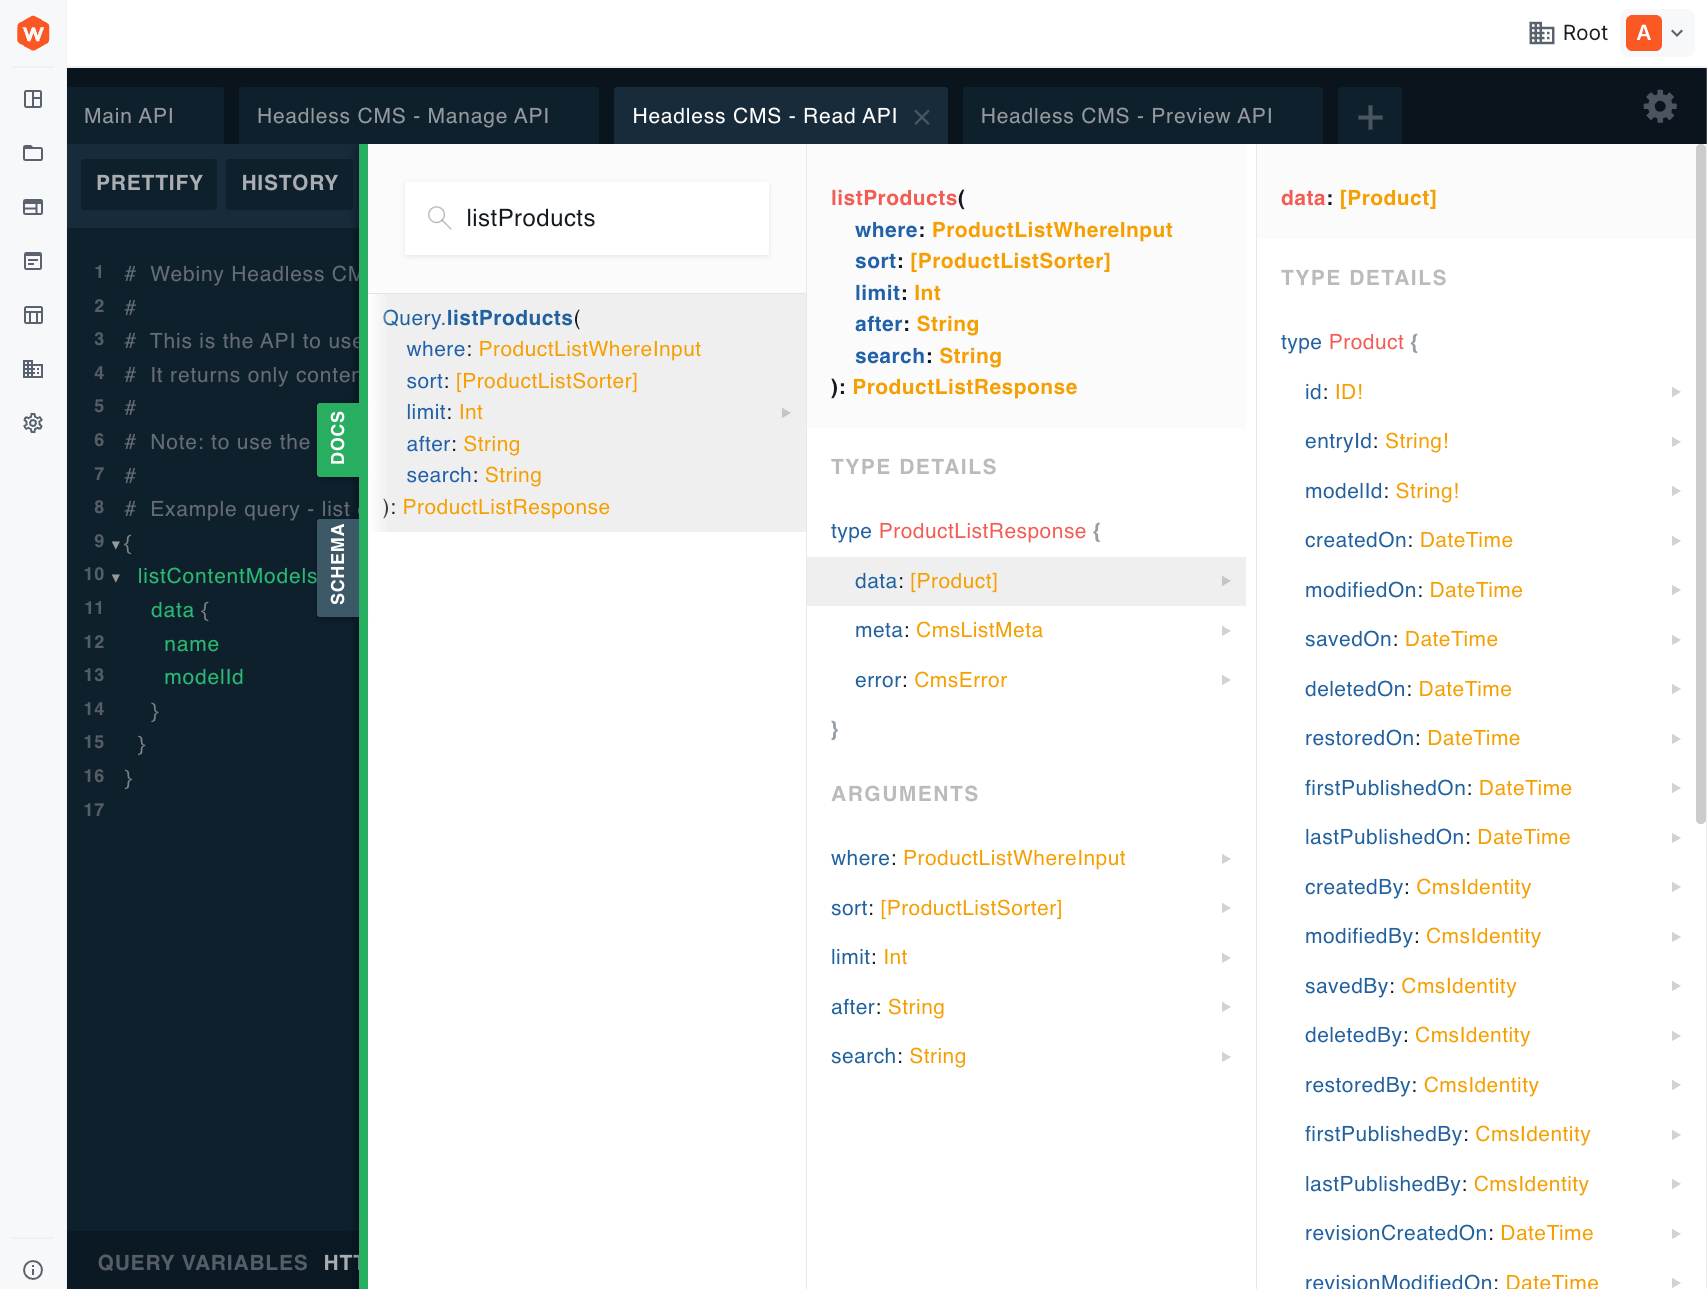 Documentation Explorer showing Product model fields after navigating through listProducts to the Product type
Switching Between APIs
Click the tabs at the top of the playground to switch between APIs. Each tab provides the same interface but with a different schema and capabilities:
- Manage API — Full CRUD, all revisions, includes mutations
- Read API — Published content only, no mutations
- Preview API — Latest revisions including drafts, no mutations
For a detailed explanation of how the APIs differ, see GraphQL API Overview.