Core Development Concepts > Scaffolding
Full Stack Application
Learn how to use the Full Stack Application scaffold.
This feature is available since v5.13.0.
- main features of the Full Stack Application scaffold
- how to continue developing on top of the generated application code
Overview
The Full Stack Application scaffold creates a new full stack application which consists of a simple React application on the frontend, and the supporting GraphQL HTTP API on the backend, powered by AWS Lambda and Amazon DynamoDB.
In order to create a new full stack application, behind the scenes, the scaffold is relying on the existing GraphQL API and React Application scaffolds.
Features
Frontend and Backend Applications
The Full Stack Application scaffold creates everything that you might need in order to start creating a new full stack application. It creates two project applications, one that holds your frontend, and the other one that holds your backend application.
The frontend application is powered by React and is created with the React Application scaffold. On the other hand, the backend application is powered by a GraphQL API and is created with the GraphQL API scaffold.
For more information on specific features that these two scaffolds include, we recommend you check out the dedicated React Application and GraphQL API guides.
Clear Organization
The full stack application is created within a single folder, which contains both frontend and backend project applications. More on the organization of files and folders can be found in the Development section below.
Linked Automatically
The scaffold automatically ensures that the React application pulls the URL over which the deployed GraphQL API is accessible. In other words, once you start the application locally, you can immediately start using the included Apollo GraphQL (v2) client to issue GraphQL queries and mutations.
GraphQL API Interaction Example
During the scaffold’s setup wizard, users get to choose whether they want to also include a simple GraphQL API interaction example code. In other words, the scaffold will create an additional page in your React application and extend the GraphQL API with a basic set of CRUD queries and mutations (using the Extend GraphQL API scaffold).
To check out the example, start your React application locally and open it in your browser. Then, in the top left corner of the screen, click on the A Simple GraphQL API Example link:
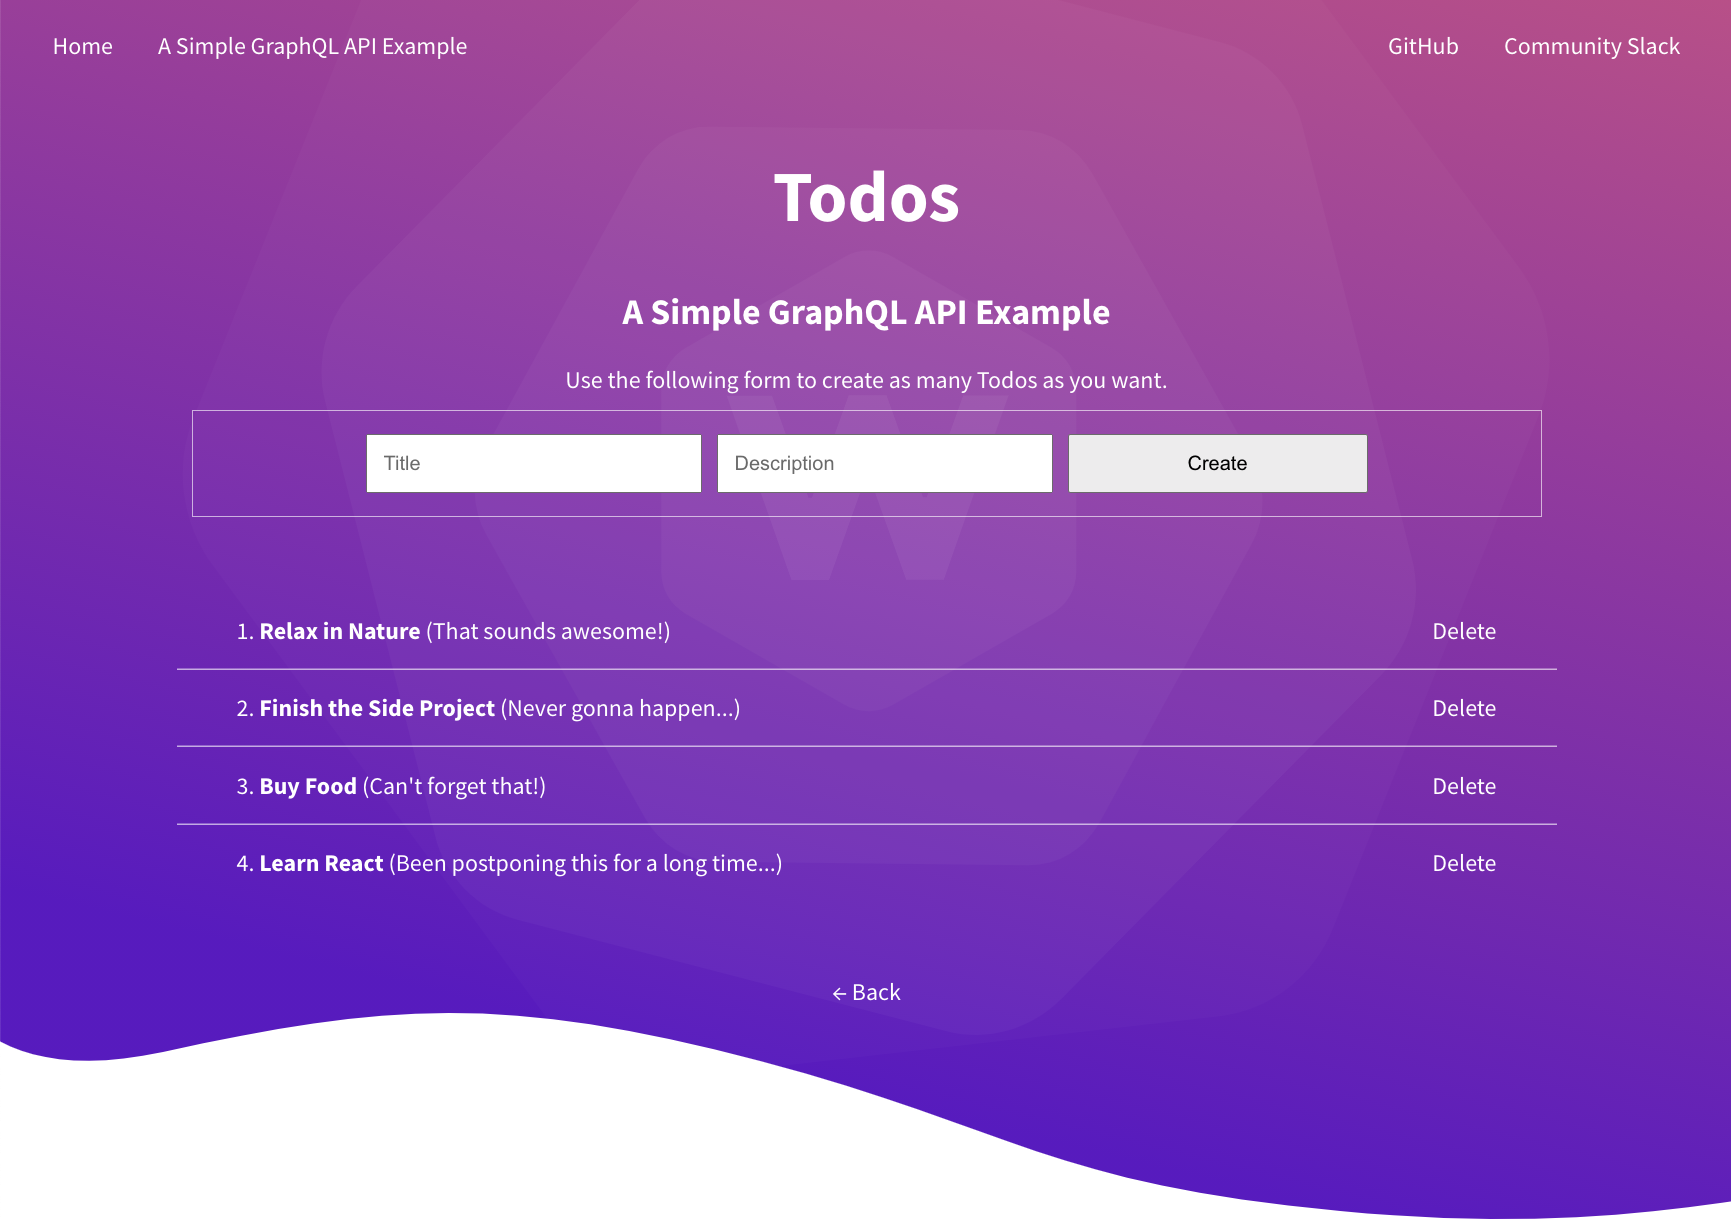 GraphQL API Interaction Example
Check out the React Application scaffold’s Development section to learn how to start the React application locally.
Development
Usage
In order to use this scaffold, from your project root, simply run the webiny scaffold command:
Then, from the list of all available scaffolds, select Full Stack Application and follow the on-screen instructions.
Essential Files and Folders
The following is brief overview of the essential files and folders that are created during the scaffolding process. For more information, we encourage you to check out the dedicated React Application and GraphQL API guides.
GraphQL API
api
The project application folder that holds the newly created React application.
api/code/graphql/src/
Contains the GraphQL API application code. This is where you’ll be defining the GraphQL schema, resolver functions, business logic, authentication / authorization logic, writing tests, and potentially more.
api/code/graphql/src/plugins
This is where you’ll be creating plugins, either manually or via other scaffolding utilities, for example via the Extend GraphQL API scaffold.
Do have in mind that every plugin (or a collection of plugins) you create also needs be imported and registered in the api/code/graphql/src/index.ts entrypoint file.
api/pulumi
This is the folder that contains all of the GraphQL API’s cloud infrastructure code. In it, we have the dev and prod folders, which represent the cloud infrastructure resources that will be deployed into development and production environments, respectively.
React Application
app
The project application folder that holds the newly created React application.
app/code/src/
Contains the React application code. This is where you’ll be creating your application’s pages, shared React components, defining routes, styles, and more.
app/code/src/plugins
Contains plugins, like RoutePlugin plugins that define application routes or ApolloLinkPlugin plugins that define Apollo links.
app/pulumi/
This is the folder that contains all of the React application’s cloud infrastructure code.
Deployment
Once you’ve completed the scaffold’s wizard and the files have been created, in order to actually access the GraphQL API, you need to deploy it. This can be done as usual via the webiny deploy command, or, even easier, if you’re about to jump straight into coding, by running the webiny watch command. This command will not only deploy the changes, but also start a new watch session, which will automatically redeploy further application code changes, as you perform them (more on this below).
In order to fully deploy your full stack application, you need to run the following two commands:
Note that, for the first deploy, the order matters. Because of the fact that the React application is relying on the already deploy GraphQL API, the GraphQL API should always be deployed first.
During the scaffold’s setup wizard, you will be asked if you want to immediately deploy the created GraphQL API. If you decide not to do it, you can deploy it later, as usual, with the webiny deploy command.
Development Using the Watch Command
The most straightforward way to continue developing on top of the created code would be via the webiny watch command.
In order to get started, from your project root, via two separate terminal sessions, simply run the following commands:
If you’re just working on one side of your application, for example on your GraphQL API, you don’t necessarily need to run both webiny watch commands.
Extending the GraphQL API
The new GraphQL API can be extended in two ways. Be sure to check the Extending GraphQL API section in the GraphQL API scaffold’s guide.
Extending the React Application
On the React application side, you can start by creating new pages, in the similar fashion it’s already done with the existing example pages. Be sure to check the Creating First Pages section in the GraphQL API scaffold’s guide.
FAQ
How Does Security (Authentication and Authorization) Work?
Please note that, by default, the authentication and authorization logic isn’t included in the created code. In other words, all of the created GraphQL query and mutation operations can be performed by anonymous (not logged-in) users and all pages can be accessed by anybody. In most cases, this is not the desired behaviour.
Luckily, with a couple of built-in utilities, this can be relatively easily added. Please check out the existing tutorials to learn how to implement these on your own.
Do I Need to Deploy the Created GraphQL API in Order Develop My React Application?
Technically, no, but you probably won’t get too far. In almost all cases, your React application will need to interact with an already deployed GraphQL API, in order for it to work.