Core Development Concepts > CI/CD
Set Up CI/CD
Learn how to set up a CI/CD pipeline for your Webiny project.
This feature is available since v5.7.0.
- how to use the built-in scaffold to set up your CI/CD in no time
Overview
In order to set up your own CI/CD workflow faster (with all of the concepts, steps, and strategies explained in the CI/CD key topics), we recommend you use the built-in CI/CD scaffold.
To use it, simply run the following command from your project root:
Once the list of all available scaffolds is shown, select the Set up CI/CD option and continue by answering the questions that follow.
Different CI/CD Providers
At the moment, the scaffold allows you to set up your CI/CD with GitHub Actions only. But in the future, we would certainly like to also bring support for more providers, depending on the interest from the community.
If you plan to use a different CI/CD provider, you can still create your workflows manually, by following all of the recommendations outlined in CI/CD key topics. Also, if you think your provider should be supported out of the box, please open an issue or contact us.
GitHub Actions
GitHub Actions are often a good choice when it comes to setting up your own CI/CD, simply because of its tight integration with other existing GitHub concepts and resources.
You must be running a public repo or a private repo under a GitHub Enterprise account.
The current GitHub CI/CD set up relies on GitHub Environments. Environments are only available in public repositories - for all GitHub products - or private repositories in GitHub Enterprise.
If you’re running a private repository in a non-GitHub Enterprise account, you will get the following installation error, and won’t be able to use this scaffold today.
Upon running this scaffold, note that you will need to paste your GitHub account’s personal access token. You can choose to use an existing one, or even better, create a new one simply by clicking on the following link.
What Actions Will the Scaffold Perform for Me?
No matter whether you choose to set up your CI/CD within an existing GitHub code repository or create a new one, during the scaffolding process, the following actions will be taken on your behalf:
- push GitHub actions workflows
- create protected
dev,staging, andprodbranches - set
devas the default branch - create
dev,staging, andprodcode repository environments
The created workflow files follow workflows described in the CI/CD key topics section. Before running them, you’re free to inspect and adjust them to your needs.
Workflows rely on GitHub Environments in order to establish environment protection rules and store all of the necessary secrets, for example AWS credentials or Pulumi Backend.
Next Steps
Once the scaffolding has finished, these are the steps we recommend you follow:
1. Ensure dev Branch Contains the Latest Code
While moving through the setup wizard, you get to choose whether you want to create a brand new GitHub code repository, or use an existing one.
In case of the former, note that, apart from the initial GitHub Actions workflows, the created code repository will be empty. In other words, during the scaffolding process, your project files are not automatically pushed into it.
In order to do that yourself, you can run the following commands:
In case of the latter, if you’ve picked an existing GitHub code repository, then most likely your project was already previously pushed into it, and no additional actions are needed.
2. Delete Previous Default Branch (Optional)
By default, for every new code repository, GitHub sets the main (previously master) branch as the default one. Since during the scaffolding process, the dev branch was set as the new default, you can delete the previous one.
When scaffolding inside of an existing repository, just double-check if the new dev and previous default branch are in sync. We don’t want to accidentally end up with lost code commits.
3. Setup Environments
Finally, go to your code repository settings and navigate to the Environments settings. In here, you should be able to see three different environments that were created during the scaffolding process:
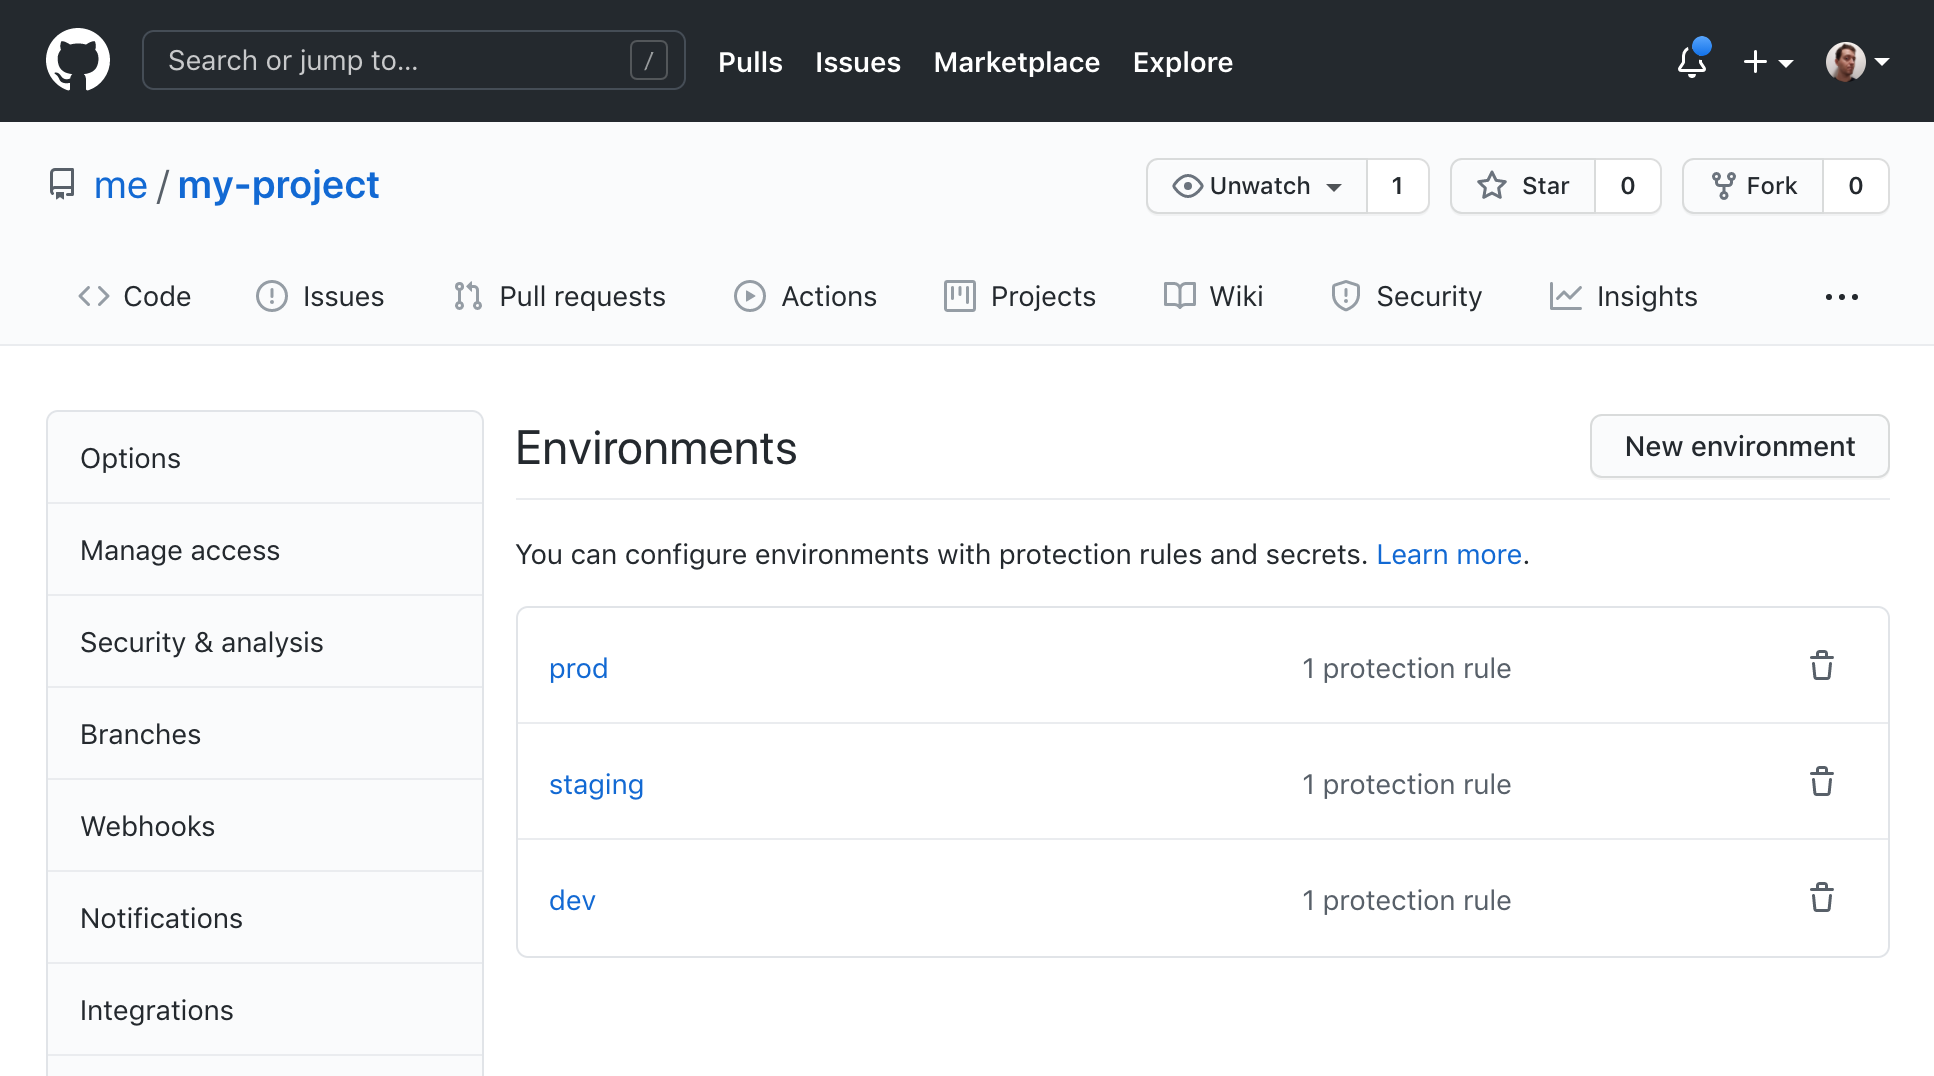 GitHub Environments
Respectively, these environments are assumed every time a change is pushed into dev, staging, and prod branches, in the build-test job within created devPush.yml, stagingPush.yml, and prodPush.yml workflows.
These enable two things:
- provide deployment secrets - AWS credentials and Pulumi Backend.
- establish environment protection rules - by default, every push to one of the long-lived branches requires a deployment approval on your behalf (you can edit this list via environments settings)
In order to enable automatic deployments, for each environment, you’ll need to set the following secrets:
1. AWS_ACCESS_KEY_ID, AWS_SECRET_ACCESS_KEY, and AWS_REGION
AWS_ACCESS_KEY_ID and AWS_SECRET_ACCESS_KEY represent credentials of an AWS account that will be used to deploy necessary cloud infrastructure resources, into the specific environment. Note that, as stated in the CI/CD key topics, we recommend every environment (dev, staging, prod) uses its own AWS account. So, these should be different for each environment.
Learn how to create AWS credentials in the Configure AWS Credentials guide.
With credentials, we also need to specify the AWS region via the AWS_REGION environment variable.
2. PULUMI_SECRETS_PROVIDER and PULUMI_CONFIG_PASSPHRASE
Upon deploying cloud infrastructure resources with Pulumi, we need to specify the secrets provider. As the name itself suggest, this feature enables us to store deployment-related secrets, for example API keys, connection credentials, and similar.
And although Webiny does not store nor rely on this feature by default, we still need to define the PULUMI_SECRETS_PROVIDER and PULUMI_CONFIG_PASSPHRASE environment variables. This is simply a requirement set by the Pulumi CLI.
To learn more about secrets and how Pulumi handles them, please visit the official documentation.
We suggest you use “passphrase” as the value of the PULUMI_SECRETS_PROVIDER secret, and, for the PULUMI_CONFIG_PASSPHRASE secret, that you simply generate a random string as its value.
Be careful not to lose the generated PULUMI_CONFIG_PASSPHRASE secret value. Because if you do, you won’t be able to redeploy already deployed cloud infrastructure resources. You will have to do it from scratch, which means you could potentially lose sensitive data.
3. WEBINY_PULUMI_BACKEND
The last piece of the puzzle is the WEBINY_PULUMI_BACKEND secret, which determines the Pulumi backend that we want to use in order to store our cloud infrastructure state files. At the moment, here we recommend you use one of the following two options.
Either you simply manually deploy an Amazon S3 bucket within the AWS account that’s about to be used to deploy your project into a specific environment, or alternatively, use the Pulumi Service. In case of the former, just set the S3 URI, for example s3://my-project-pulumi-state-files-dev. In case of the latter, simply paste the Pulumi Service Access Token.
If you choose to use Amazon S3 as the backend and you are using multiple AWS Accounts as recommended, note that you will end up with creating multiple buckets, one within each AWS account. Each Amazon S3 bucket will only store cloud infrastructure state files for a specific shared environment.
For more information on backends, we recommend you read the Cloud Infrastructure State Files key topic.
4. Start Developing
To start developing, based on the GitHub Flow, the first step of every developer would be to simply create a new branch from the default dev branch. Once ready, we submit a pull request, again against the dev branch.
Read more about the GitHub Flow in the Version Control key topic.
Note that, at this point, the staging and prod branches will still be empty, and no deployments will occur until you actually merge the dev branch into staging, and later the staging branch into production. Still, if you want to deploy these too, simply do the merging immediately, without waiting for first code changes from developers to arrive.