Webiny Enterprise
Setup Multi-Tenancy
Learn how to configure multi-tenancy in your Webiny project
Webiny Enterprise or Webiny Business license is required to use this feature.
This feature is available since Webiny v5.19.0.
- how to enable multi-tenancy in the existing Webiny project
- how to assign custom domains to each tenant
Overview
There are several steps involved in enabling multi-tenancy:
- adding an environment variable used at build time
- importing a Tenant Manager module to be able to manage tenants
- adding a Lambda@Edge function to the Pulumi configuration
- creating a certificate in AWS ACM, and linking it with CloudFront distribution
Cloudfront will be used for TLS termination, and AWS ACM for certificate management. Customers may use other 3rd party CDNs for those steps. If that’s the case, please get in touch so we can support you through the setup.
The following sections guide you through the process in a step-by-step manner.
1) Prepare the Project
Your project needs to be at version 5.19.0 to use this feature.
Please follow the upgrade guide to upgrade your project to the appropriate version.
Alternatively, you can create a new >=5.19.0 project, by running:
2) Add New Dependencies
We need to add several new packages to the project.
Add Tenant Manager module dependency to the GraphQL API dependencies:
Add Tenant Manager module dependency to the Admin app dependencies:
Add a package with custom AWS components for Pulumi to the root package.json:
3) Import Tenant Manager
Open api/code/graphql/src/index.ts, and import the Tenant Manager plugin:
Then, add the plugin to the Lambda handler, below securityPlugins. See an example in the image below:
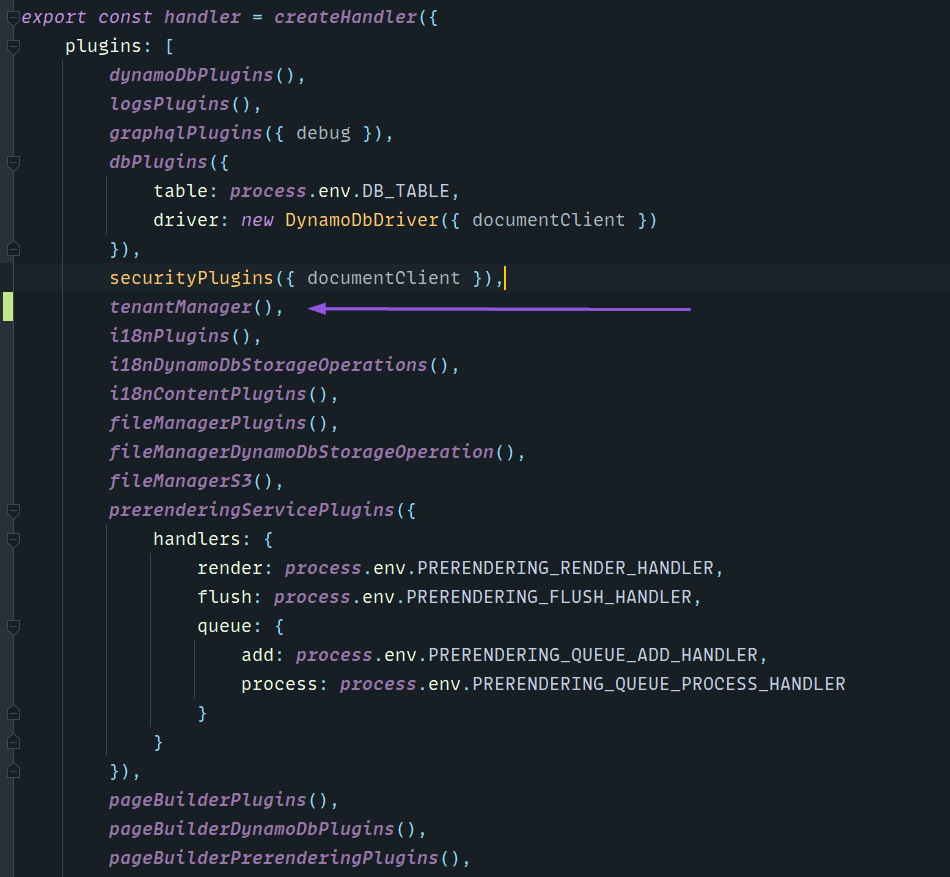 Enable Tenant Manager plugin.
Now we need to enable the Tenant Manager module in the Admin app. In your apps/admin/code/src/App.tsx, add the following:
4) Set Environment Variable
Open .env in the root of your project, and add a new ENV variable:
This variable will be picked up by the build process for both the API functions, as well as React applications, and multi-tenancy logic will be enabled in the applicable apps.
5) Create a Certificate in AWS ACM
Before we modify the infrastructure setup, and deploy the project, we’ll need to have a valid certificate in AWS ACM. Go to https://console.aws.amazon.com/acm/home?region=us-east-1#/certificates/request and request a new certificate, or import an existing one.
Once the domains in the certificate are verified, we can proceed to the Pulumi configuration. For more information on creating certificates and validating hostnames, please go to What Is AWS Certificate Manager? - AWS Certificate Manager
6) ConfigurewebsiteInfrastructure
To handle request routing, we need to have a Lambda@Edge function, which will map each request to an appropriate tenant, and rewrite the request to the appropriate folder in the S3 bucket, where the prerendered page snapshots are stored.
NOTE: we only want to modify the
deliverydistribution, as that’s the one that will be hit by visitors, and serve prerendered content.
There are several changes we need to do on the CloudFront distribution:
- enable
Hostheader forwarding - add a Lambda function association for
origin-requestevent - assign the ACM certificate you created in step 5)
- add custom domain aliases
Open apps/website/pulumi/delivery.ts and add the following changes:
For the acmCertificateArn, use the ARN of the certificate you created in step 5).
For aliases, enter the custom domains supported by your certificate. You can use wildcards to support multiple subdomains.
7) Deploy Your Project
Now it’s time to deploy the entire project. We need to deploy everything: api, admin, and website. The easiest way to do all 3 at once, is by running the following:
Don’t forget to CNAME your custom domain to the CloudFront distribution of the website application.
To find your CloudFront website domain, run yarn webiny info --env=dev and look for the Website URL.
8) Configure Custom Domains for Tenants
Once your project is deployed, open your admin app. To configure a custom domain for the root tenant, hover over the Root Tenant label in the top app bar, and click it. This will open a settings dialog, where you can configure custom domains for your root tenant.
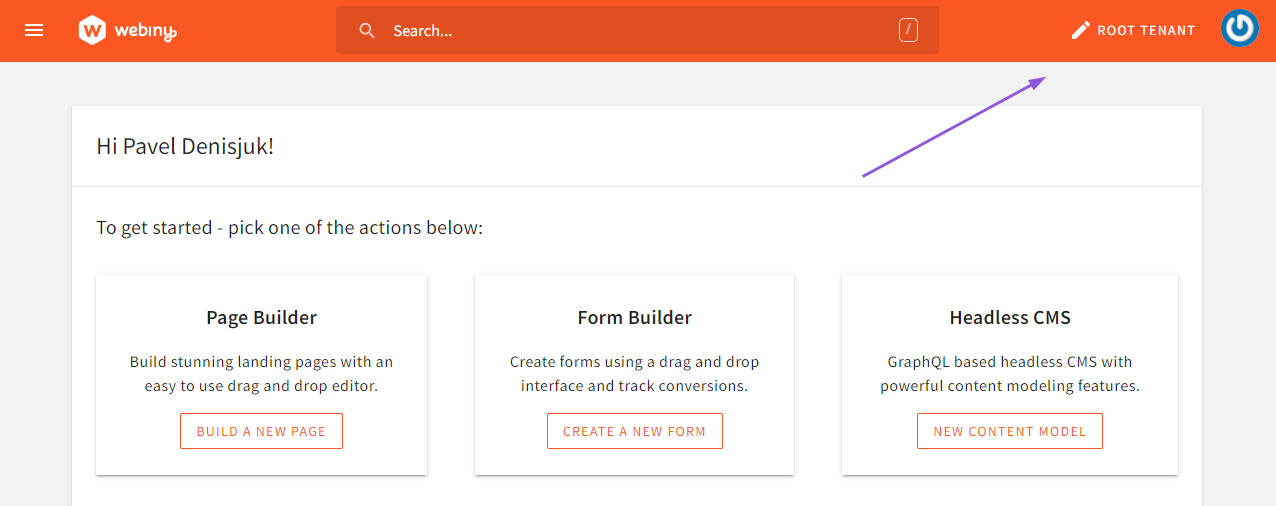 Open Root Tenant Settings Dialog.
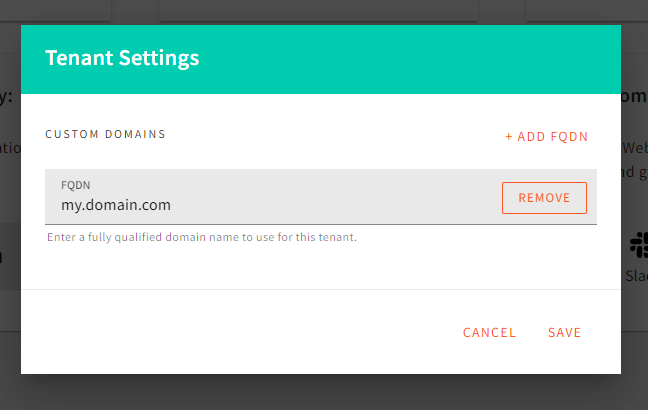 Configure Root Tenant Custom Domains.
If you don’t have a custom domain for your root tenant, you should enter your CloudFront CDN domain here. Otherwise, the Lambda@Edge router will not be able to route the request to your root tenant website.
To find your CloudFront website domain, run yarn webiny info --env=dev and look for the Website URL.
For your sub-tenants, domain configuration is located in the tenant form:
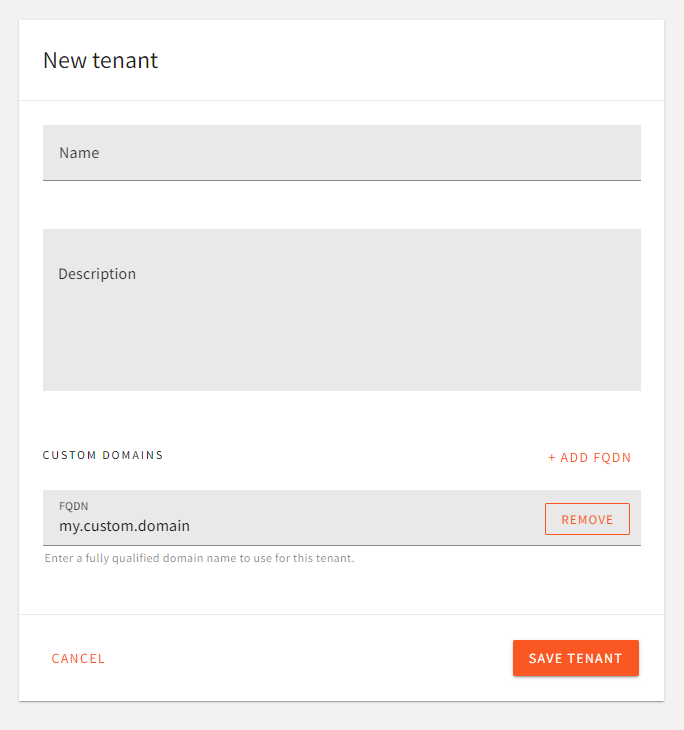 Domain Settings For Sub-Tenants.
FAQ
I'm Receiving a Pulumi Error Saying Something About Cloudfront Request Headers.
You may occasionally run into an error that goes something like this:
This one is usually resolved by refreshing the Pulumi state of the website project application:
NOTE: there’s a space between
--andrefresh.
After this, running the deploy command goes back to normal.
Pulumi Throws an Error While Deleting My Lambda@Edge Function
You’re probably seeing the following error:
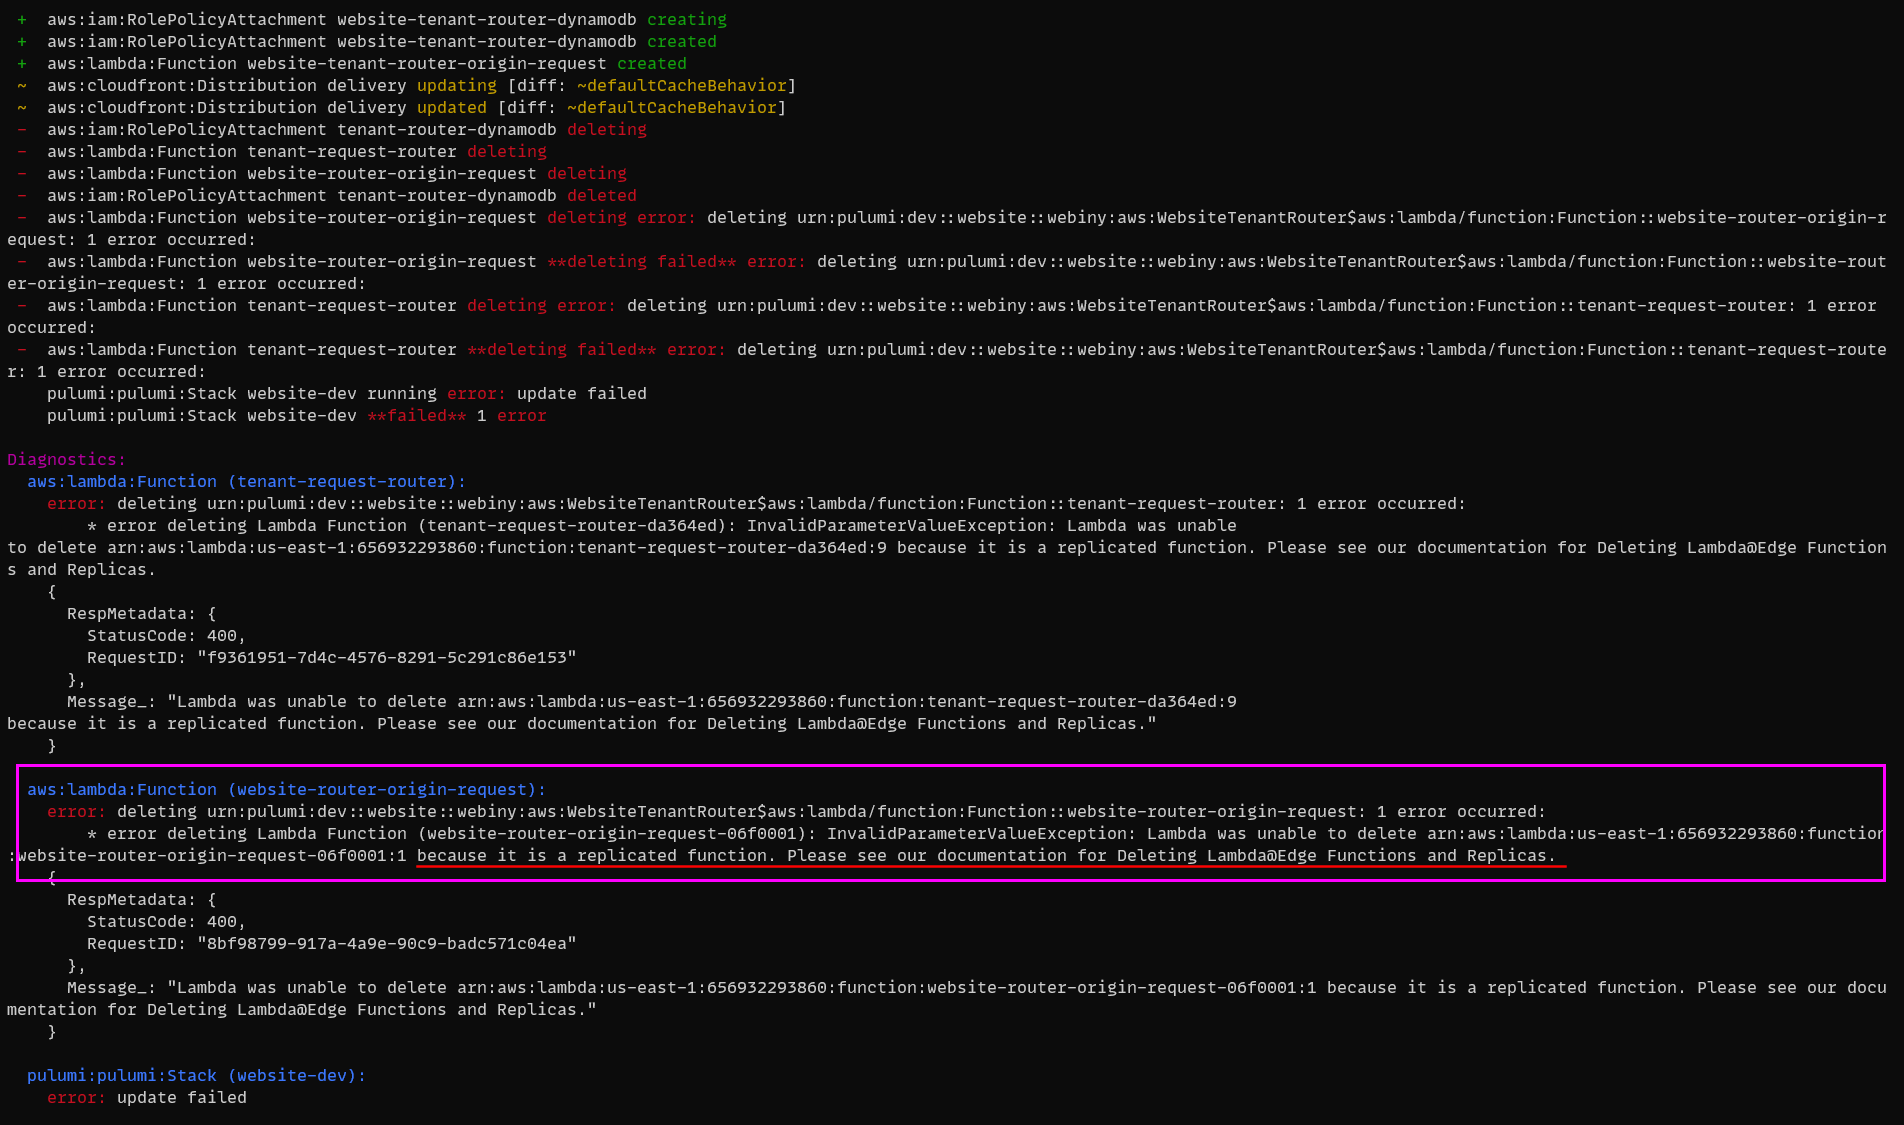 Error Deleting Lambda@Edge Function.
Lambda@Edge functions are replicated to all AWS Edge locations. This means that this particular function will not be deleted until AWS removes it from all the Edge locations. Even thought this error looks terrible, your deploy went just fine. Give it a couple of minutes, and re-deploy. You’ll see that, after some time, your old Lambda@Edge function will be deleted successfully.
Pulumi Throws an Error When Creating the Website Cloudfront Distribution
You can’t have the same FQDN configured in more than 1 CF distribution under the same account. If you do, then you will see the following error.
Go back to the CF distribution where that hostname is configured, remove it - if it’s safe to do so - and re-run the webiny deploy command.