Admin Area > New App Tutorial
Security Overview
Learn how you can secure your applications.
- what are security permissions and how to use them in code
- how to add custom permissions UI to permissions editor in Admin Area
In order to follow this tutorial, you must use Webiny version 5.9.0 or greater.
Learn more about the Webiny Security Framework in the Security Framework key topics section.
With the 5.37.0 release, the term security group was replaced with security role. Do note that, in order to avoid introducing breaking changes, on the code level the term security group is still being used.
Overview
In the previous two sections, we’ve seen how we can quickly extend our GraphQL API and Admin Area application, by creating a standalone Car Manufacturers module.
In this tutorial, we continue working on our module by adding a layer of security around it. With it, we want to achieve the following:
- prevent users from executing GraphQL API queries and mutations, if they don’t have the necessary security permissions
- prevent users from accessing modules we’ve added into the Admin Area application, if the user doesn’t have the necessary security permissions
Note that in order to implement both behaviors, we are relying on security permissions, which is the first step of implementing a security layer for our application, and is the first topic we cover in this introduction section.
If you want to learn more about the main GraphQL API and how it works on the cloud infrastructure level, check out the GraphQL Requests page of the Cloud Infrastructure - API key topics section.
The code that we cover in this tutorial can also be found in our GitHub examples repository .
.
Security Permissions
It all starts with security permissions.
On the code level, security permissions are just plain JavaScript objects, which allow us to perform identity authorization. In other words, these objects contain information that tells us which resources an identity (for example, a logged-in user) can access, and which it cannot.
“Can this user access this GraphQL query?”, “Can this user edit this particular piece of data?”, or “Can this user view this particular piece of user interface?”, are just some questions that security permission objects can answer for us.
Except for the required name property, these objects don’t follow any strict structure, which means that while we’re developing our custom application, we can structure them in any way that fits our needs and business logic.
A simple security permission object might look something like the following:
Assigning Security Permissions to Identities
Within Admin Area application’s security model, security permissions are assigned to identities via security role.
Every identity (for example, a logged-in user) belongs to exactly one security role. But, note that a single security role can have multiple security permissions objects assigned to it, allowing or preventing access across multiple Webiny and your custom applications.
This can be seen while creating a new security role via the security roles module.
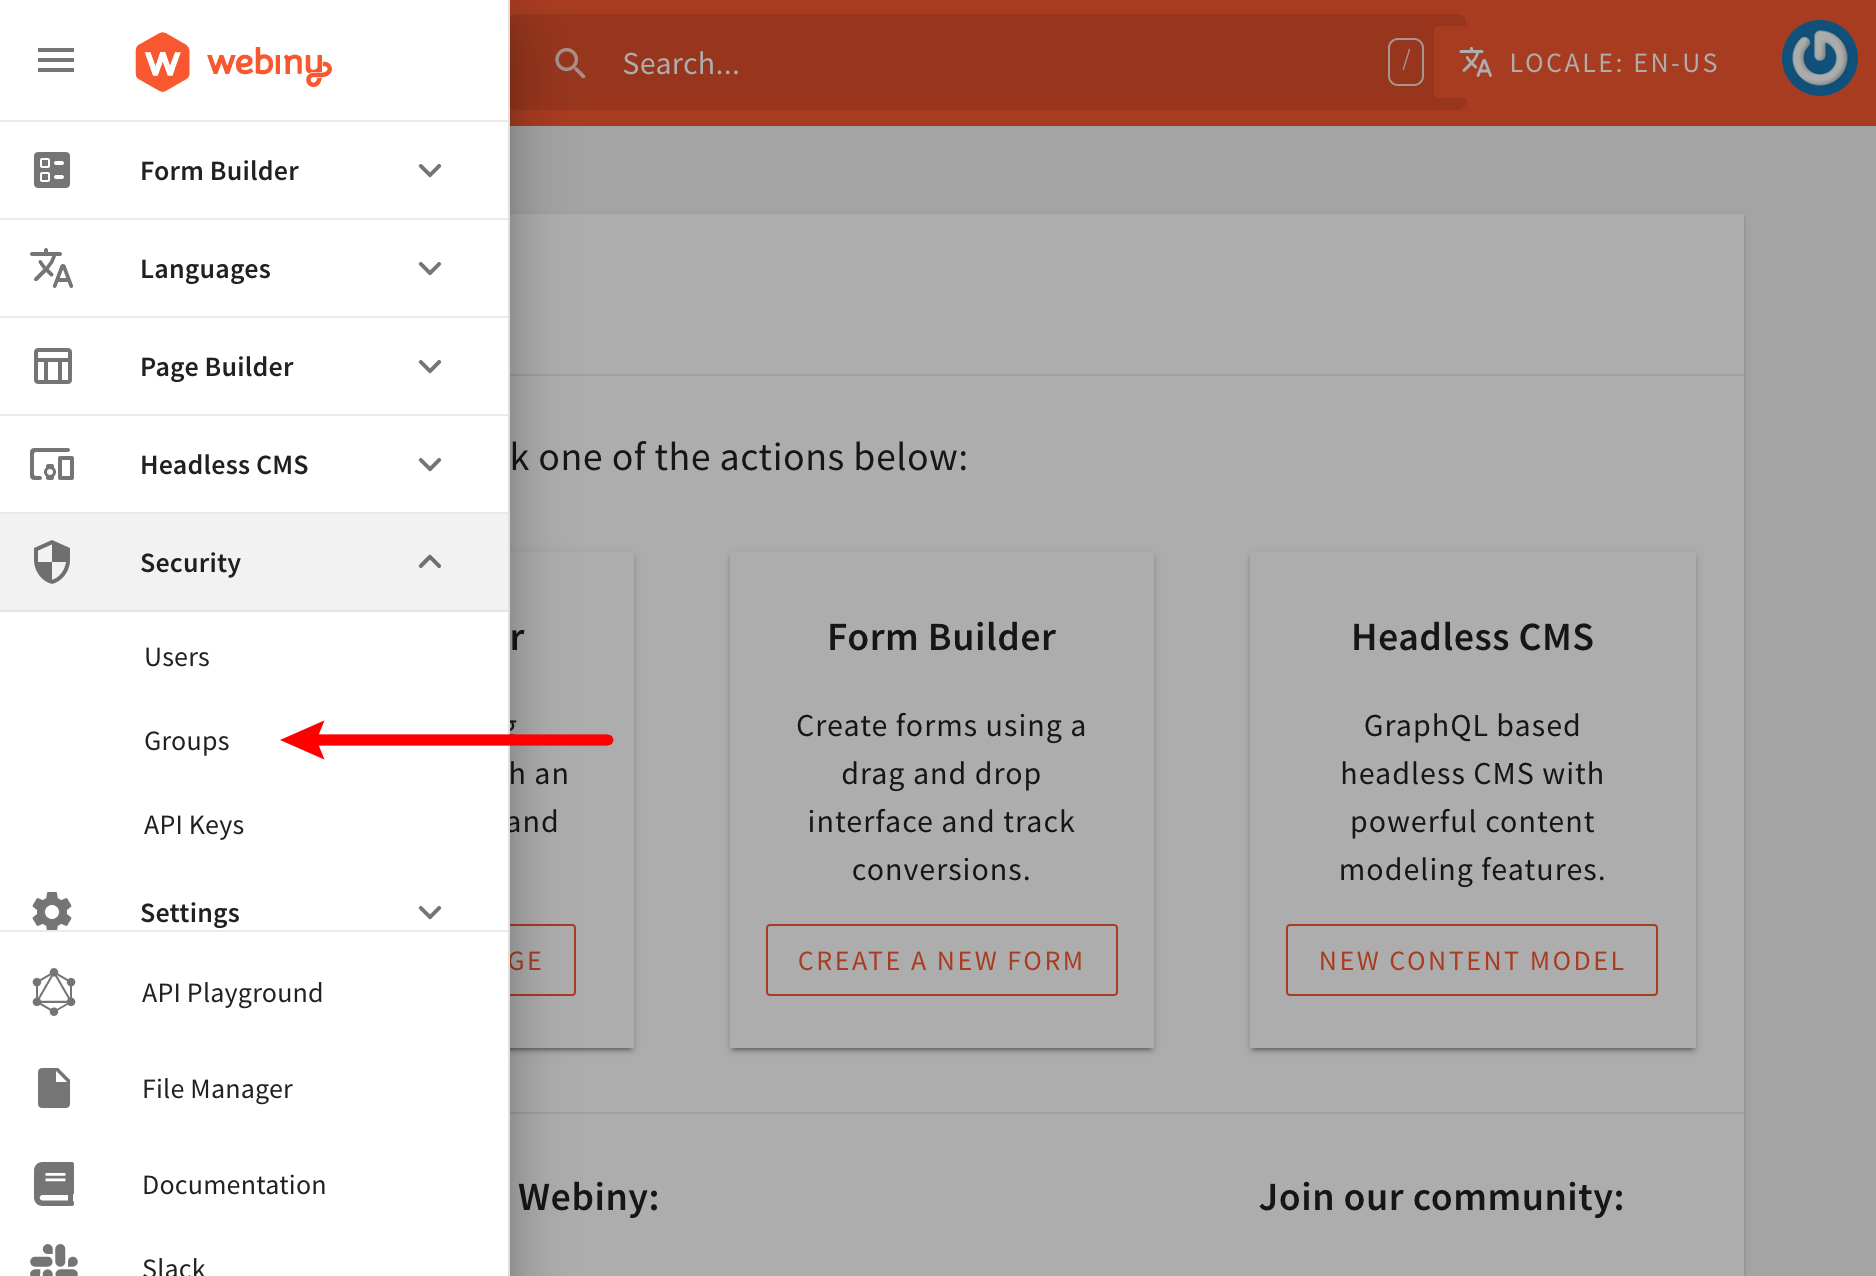 Security Roles Module
By default, we get to specify permissions for every installed Webiny application:
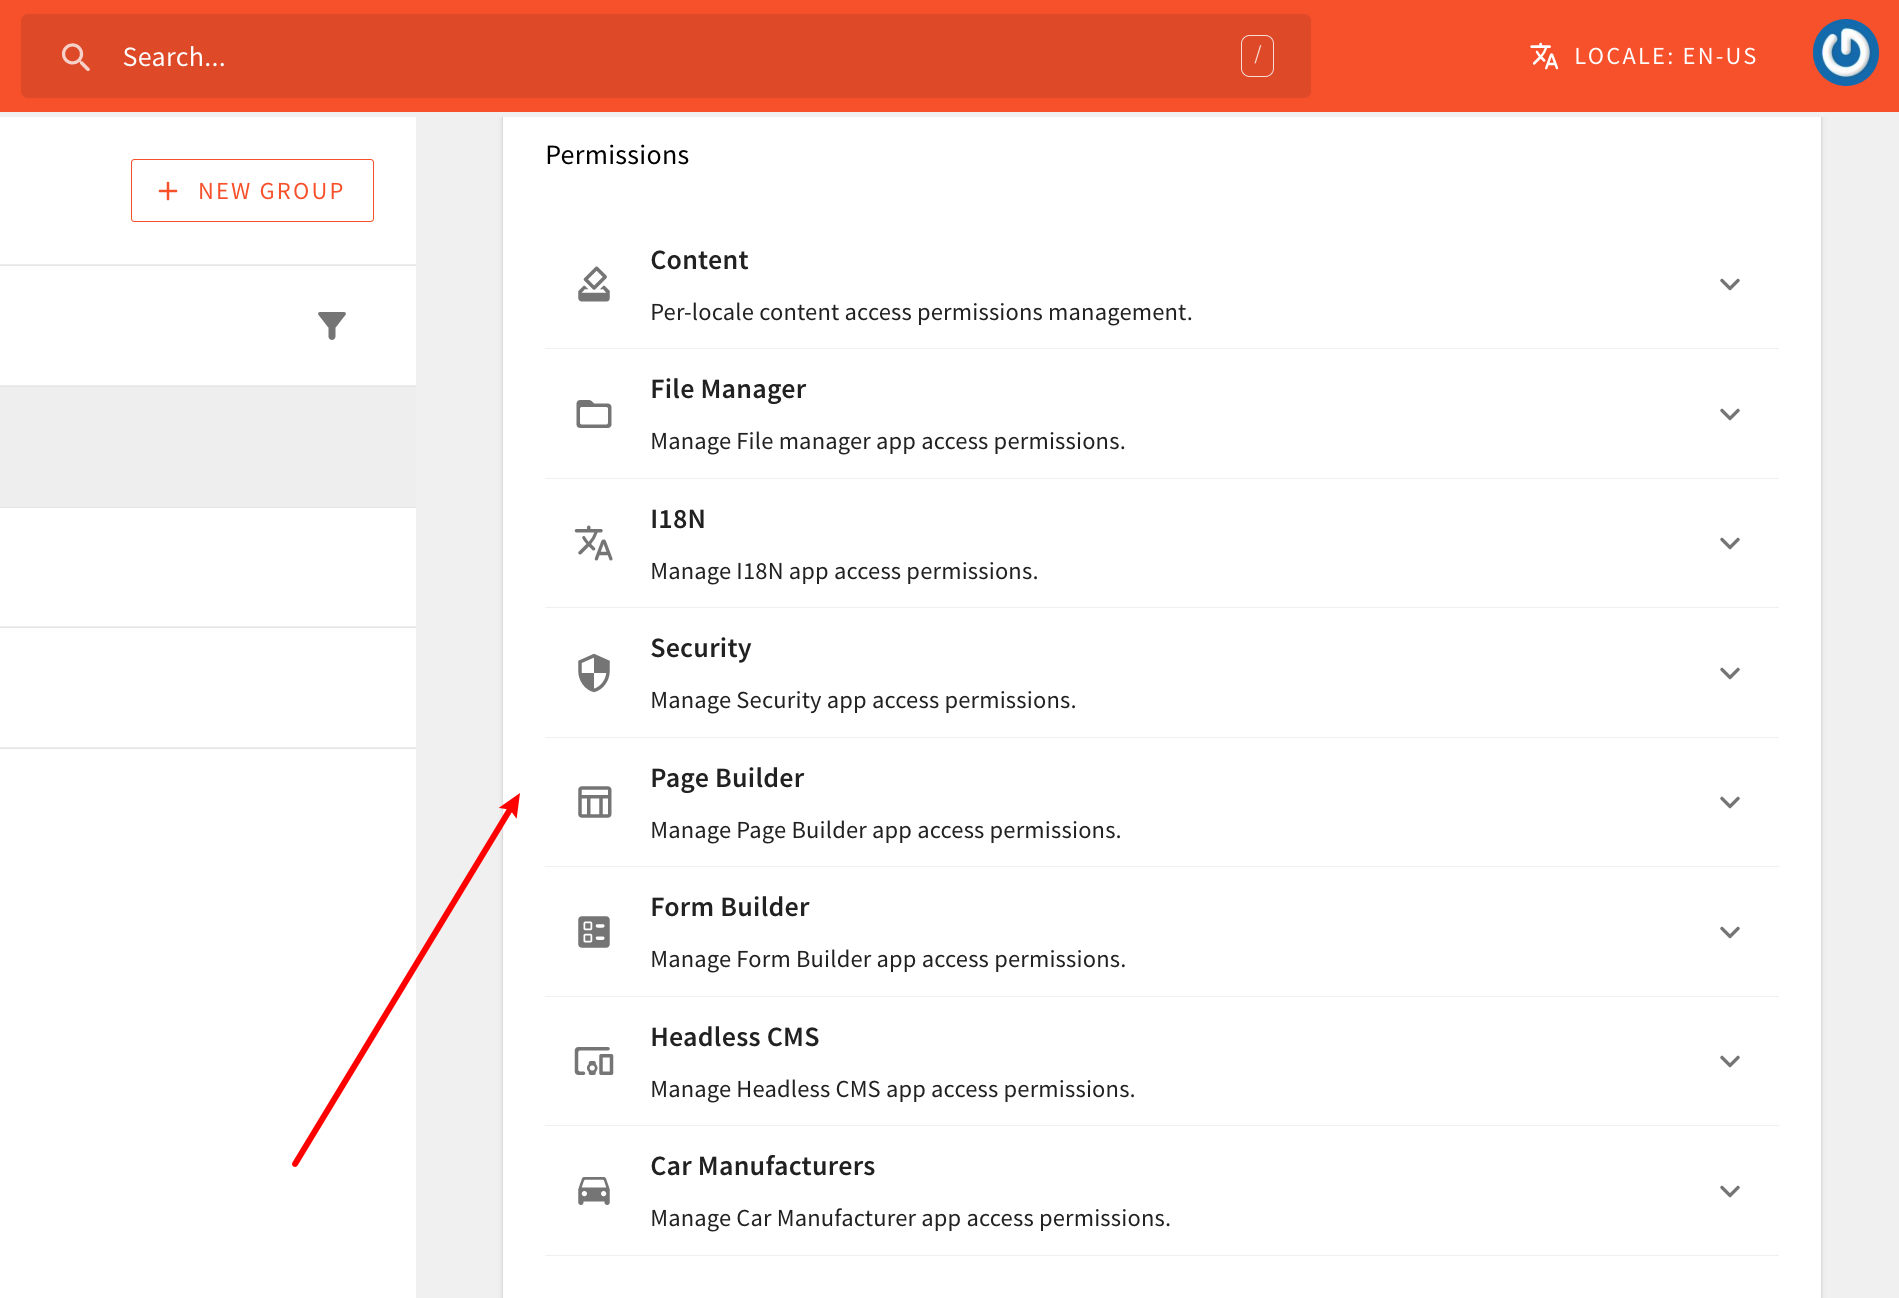 Only a Single Security Role Allowed
Making changes in one or more of these sections will, internally, result in one or more permission objects to be created. And, once we submit the form, all of the different permission objects that were created in the process, are sent to the GraphQL API and stored in the database (along with other general security role information - name, slug, and description).
Ultimately, no matter if we’re performing authorization on the API side or in the UI, via a couple of built-in code utilities, we can retrieve identity’s security role and all of the permissions it contains. With that data, we can then determine whether a user has access to a particular API resource or a section in the UI (more on this in the following sections).
Creating Custom Security Permissions
By adding a new permissions section in the security role form that we’ve seen above, we can allow logged-in users to manually toggle access for our own custom features, for all identities that are linked with the particular security role.
Continuing with the car manufacturers example that we’ve used in previous tutorials, we could add a new Car Manufacturers section, and offer a couple of different options to the logged-in user:
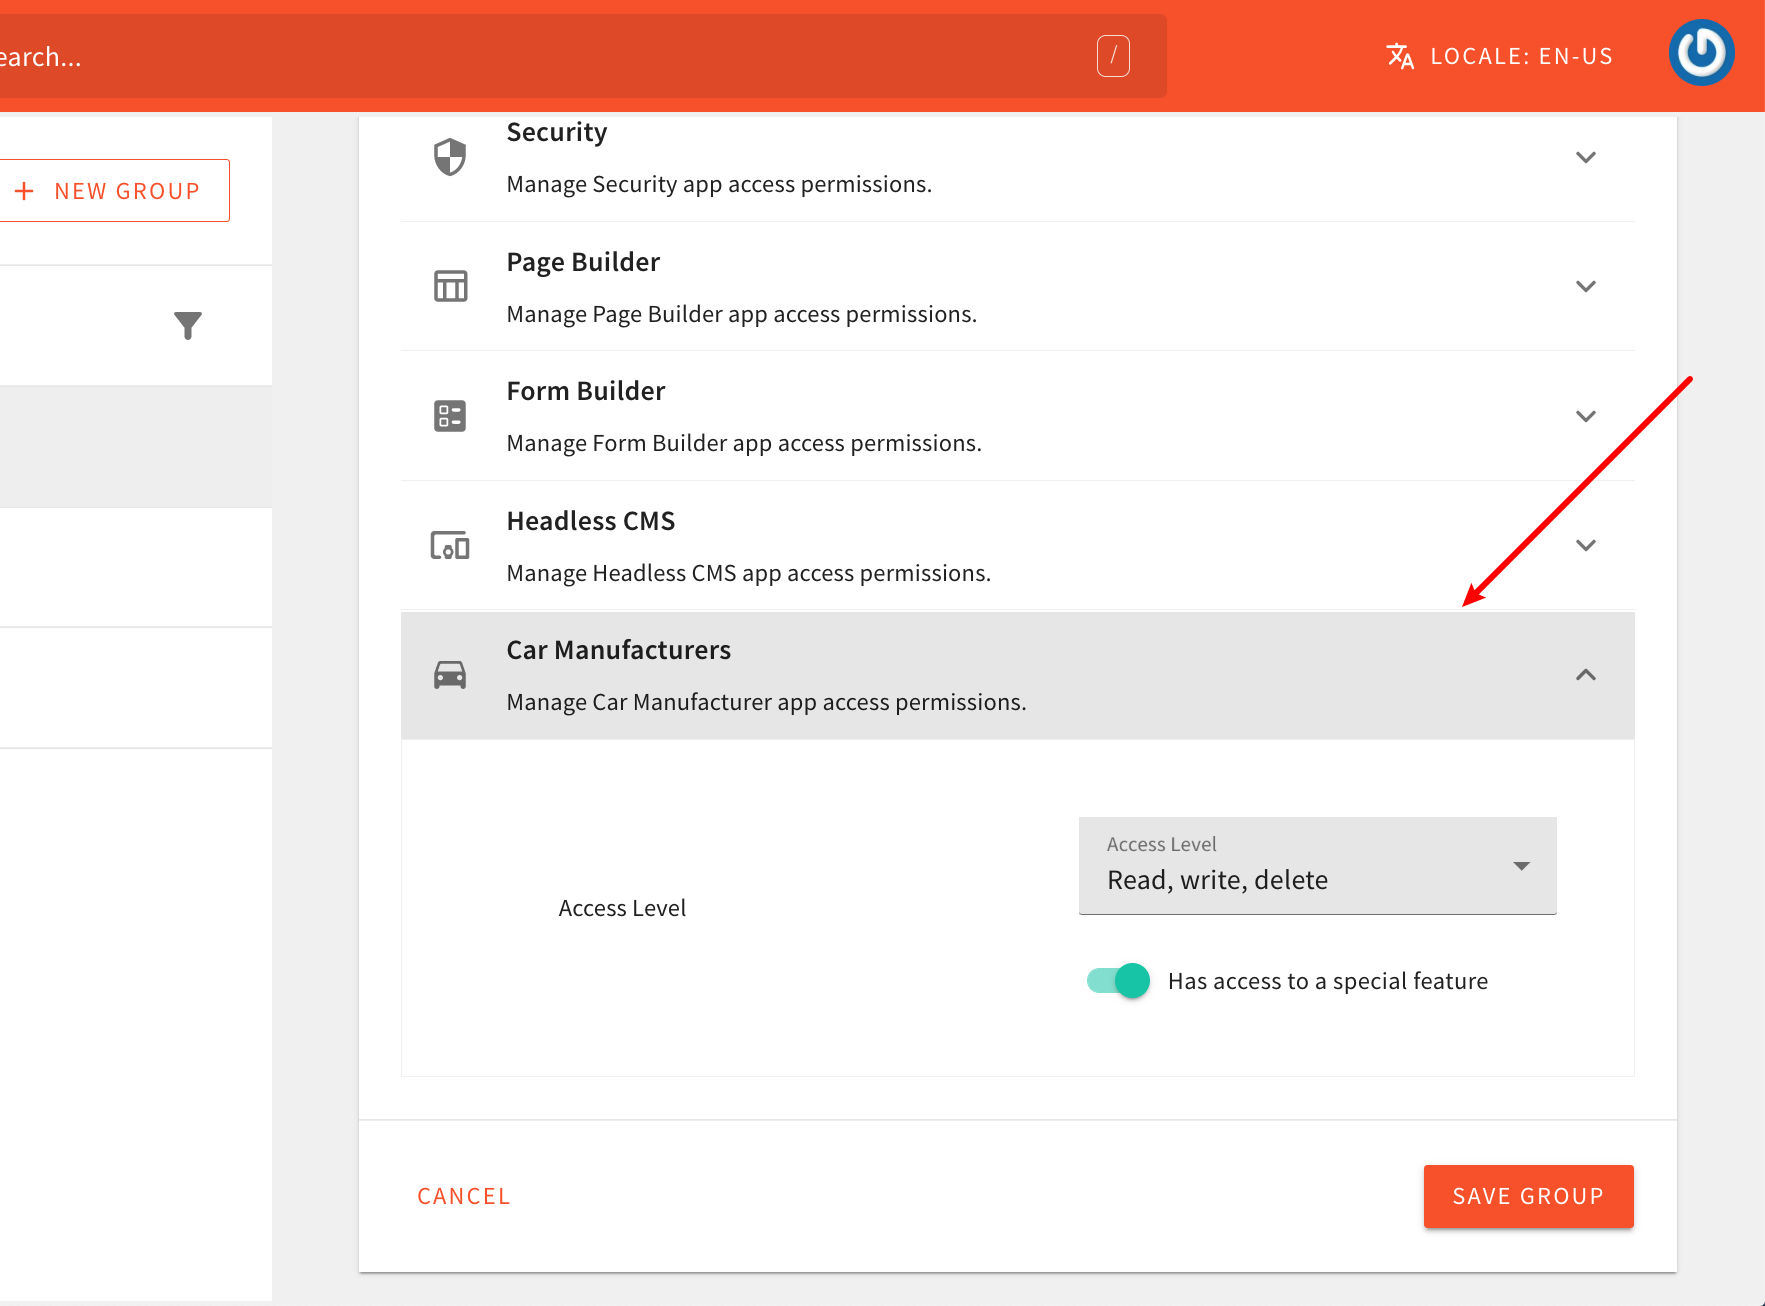 Added Security Permissions Group
To achieve this, within the Admin Area application, we need to register the following PermissionRendererPlugin plugin:
In order to actually compile the code changes we’re about to make and see them in browser, we need to run the following Webiny CLI command:
To learn more, check out the Use the Watch Command guide.
Feel free to copy and paste the shown code into your project and use it as a starting point. When doing that, please note the following:
- the
permissions.tsxfile is a new file that we created, it wasn’t initially there - the code uses a custom
directions_car-24px.svg SVG icon which you’ll also want to copy into your project (otherwise the build will fail)
After you do that, just make sure that the plugin is actually imported in the apps/admin/code/src/plugins/scaffolds/carManufacturers/index.ts file:
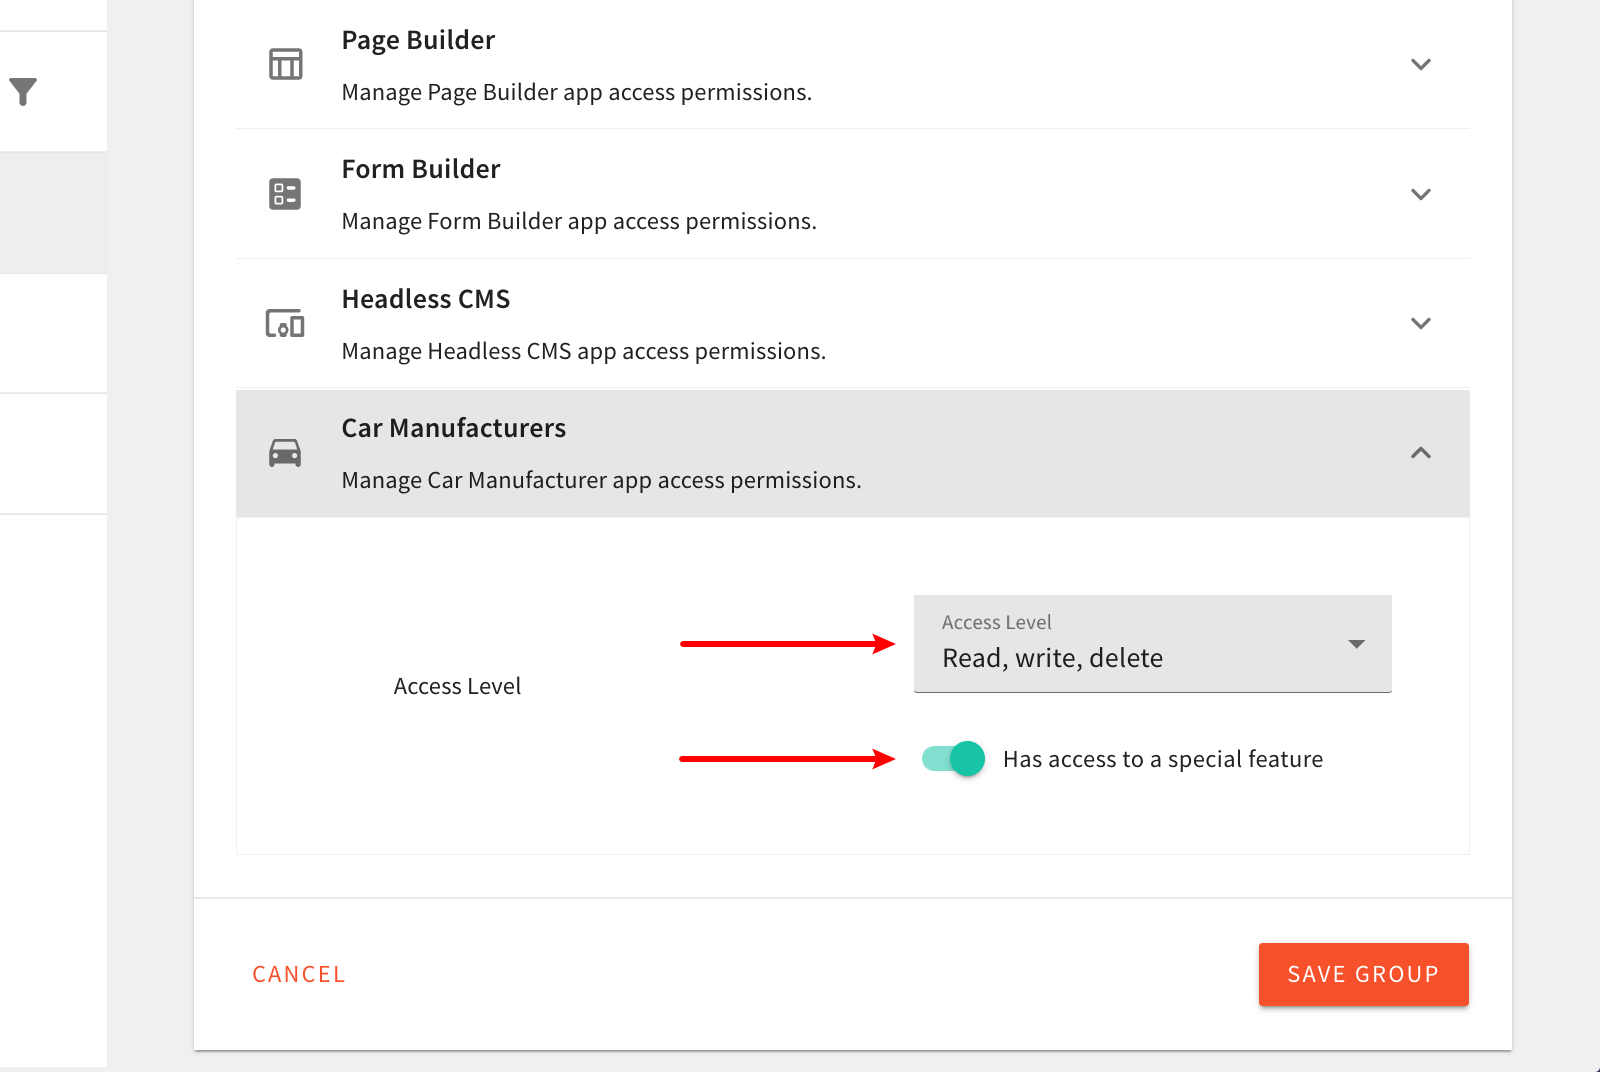
By completing this step, we’ve added the new Car Manufacturers permissions section in the security role form. logged-in users can now create new (or extend existing) security roles, and give access to our new Car Manufacturers module. For example, one security role can allow only reading car manufacturers data, while the other one may allow all three primary actions - read, write, and delete, and even allow access to the imaginary special feature.
Now that we have this new security permissions section, let’s create the new Car Manufacturers security role, that enables full access to our new Car Manufacturers module. We’ll need this security role in order to perform some manual testing down the road.
 New Car Manufacturers Security Role
Note that, at this point, nothing will actually happen for identities that have or don’t have these newly added permissions in their security role. We still need to implement the actual authorization logic, both on the GraphQL API and Admin Area side, which we cover in the following sections.
Content Locales
While creating the new Car Manufacturers security role, you might have noticed you immediately get to define access on a locale level.
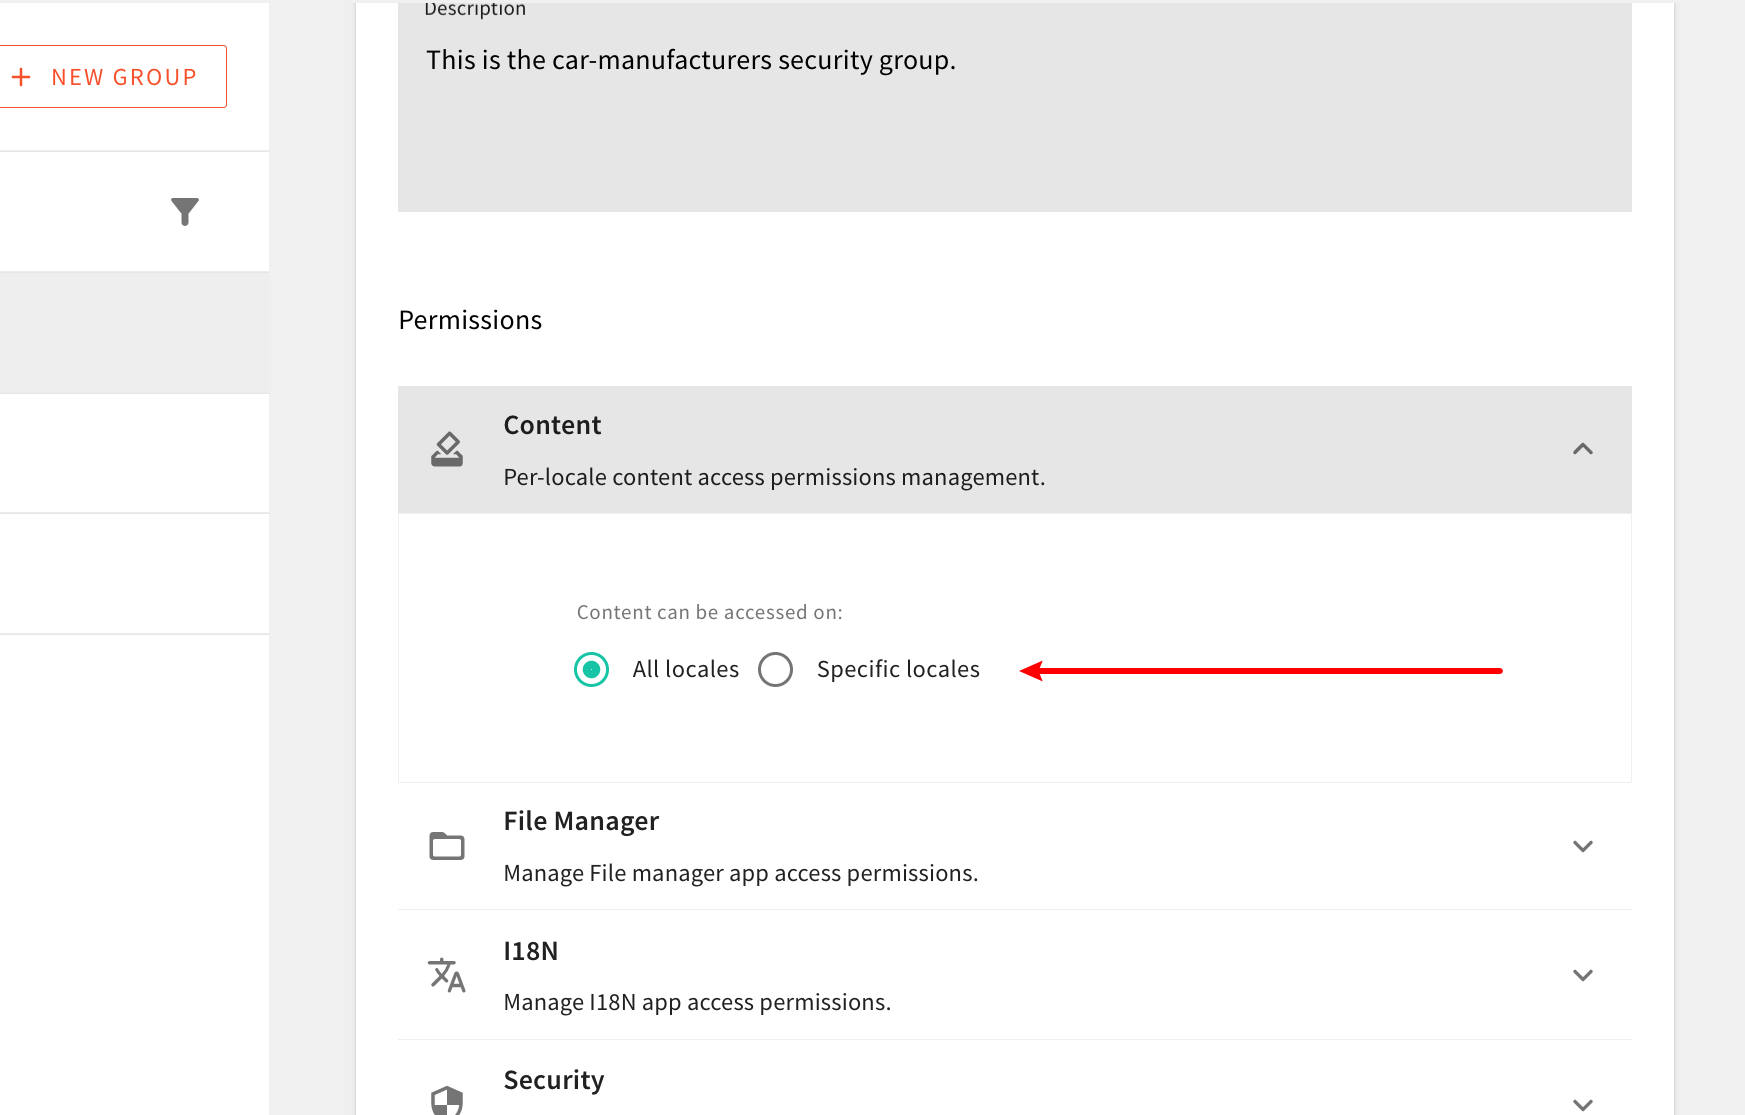 Define Access on a Locale Level
This is because, out of the box, the Admin Area application is designed to be a multi-locale system, and as such, it gives you the ability to specify which locales an identity can access. Note that you cannot specify different permissions for different locales. All of the permissions you specify in one or more permission sections will be applied to all allowed locales.
For now, know that we will need to take this into account while performing the authorization checks in the following section. Also, for purposes of this tutorial, upon creating the new Car Manufacturers security role, we can select All Locales, to allow access across all locales.
FAQ
Can I Assign Multiple Security Roles to a Single Identity (User)?
Multiple security roles can be assigned to a single identity (user) via Teams.
What Does therwdStand For?
It stands for read, write, and delete.
Can I Define My Security Permission Objects Differently From What It's Used This Tutorial?
Yes. The rwd and hasSpecialFeature properties are not required and you can define your security permission objects in any way you like or need. For example, if you don’t prefer the rwd approach we showed here, you could create standalone hasRead, hasWrite, and hasDelete properties instead.
We just thought the rwd approach is lightweight and simple to understand.
Is It Possible to Create a Checkbox Which Would Immediately Allow Full Access to My Module?
Sometimes, permissions sections may grow in size. And in that case, it might be easier to have a simple checkbox that would enable full access to your module, instead of having the user click through all of the available permissions.
So, if you’ve reached this point, then it might make sense to extend your security permissions object, with a special boolean fullAccess property, and take that into account while performing GraphQL API and Admin Area application authorization (covered in following sections of this tutorial).