Admin Area > New App Tutorial
Get Started
Learn how to use the existing Extend Admin Area scaffold in order to start extending your Admin Area application in no time.
- how to use the Extend Admin Area scaffold to get started in no time
In order to follow this tutorial, you must use Webiny version 5.9.0 or greater.
Extend Admin Area Scaffold
The best way to start extending the Admin Area application would be to use the Extend Admin Area scaffold, which will automatically generate all of the fundamental application pieces for us. On the application code level, this includes the necessary plugins which create the following:
- in the Admin Area application: a new route, menu item, and a CRUD view
- in the GraphQL API: supporting GraphQL query and mutation operations
So, in our terminal of choice, from our project root, let’s run the following command:
Running this command should give us the following list of available scaffolds:
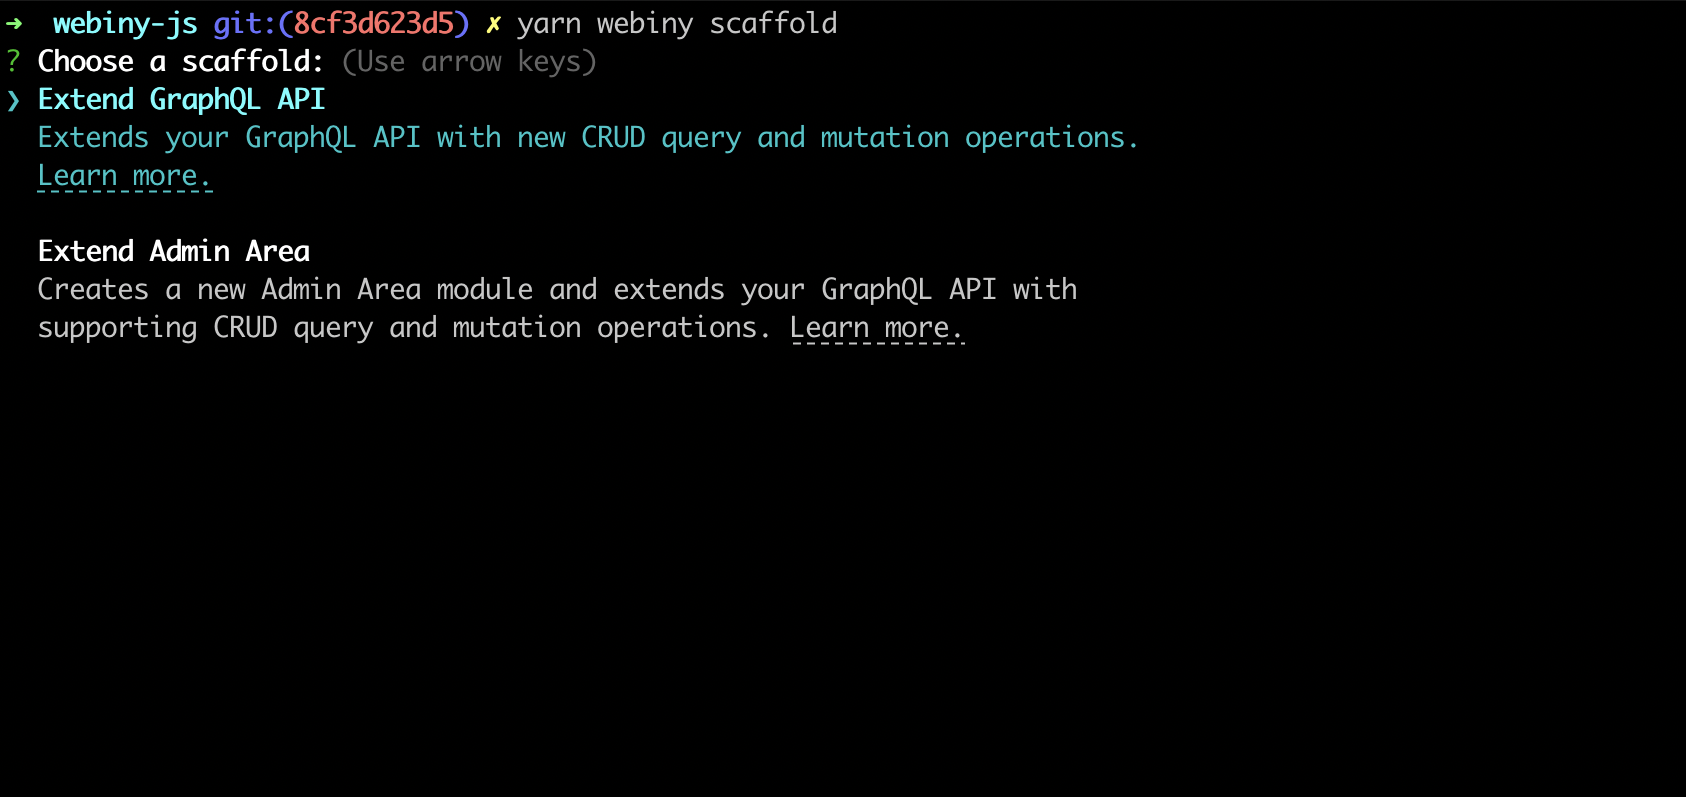 Scaffolds List
Once we’ve selected the Extend Admin Area scaffold from the list, we’ll get presented with the following three questions:
- the path to our GraphQL API’s plugins folder (
apps/api/graphql/src/pluginsby default) - the path to our Admin Area application’s plugins folder (
apps/admin/src/pluginsby default) - the name of the initial entity
For the first two, we can just use the default paths by simply pressing the Enter key. As the answer to the last question, we’ll enter CarManufacturer.
Once we’ve answered all of the questions, after a quick confirmation step, scaffolding will start and eventually, we should end up with the following output in our terminal:
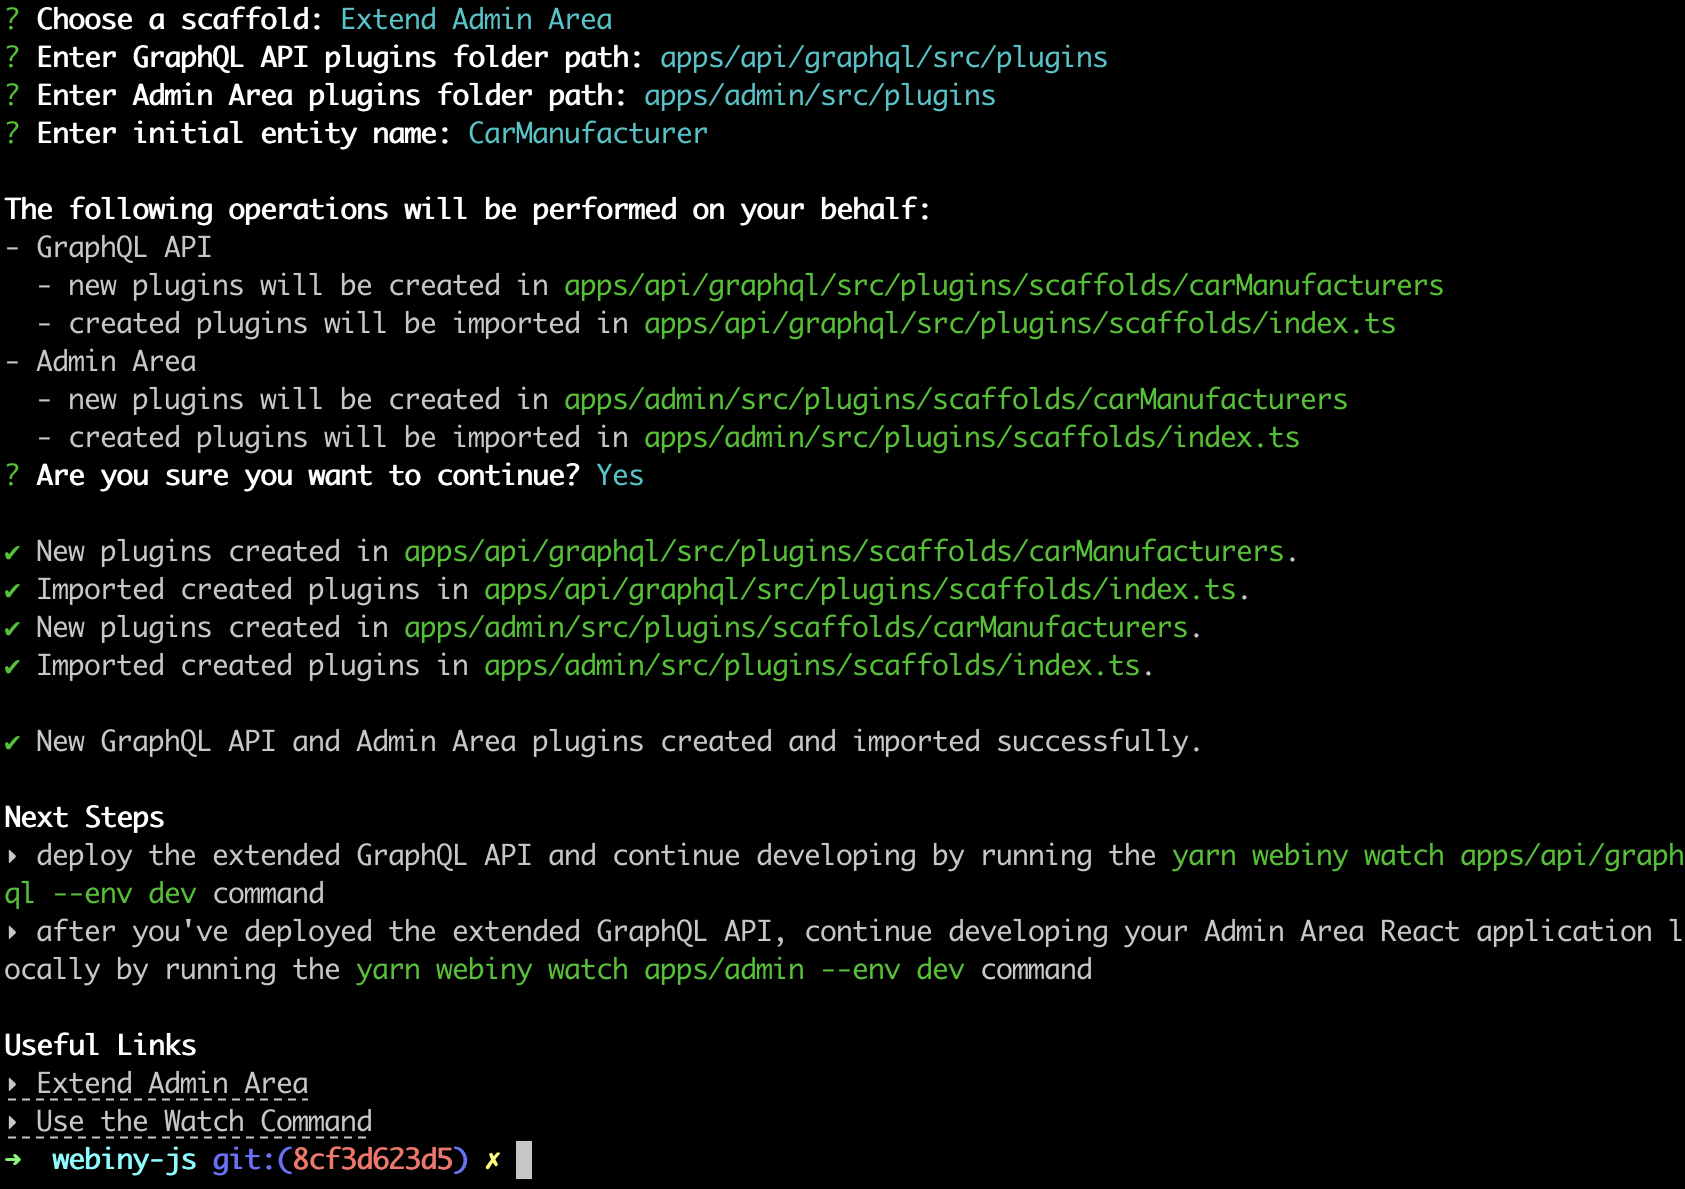 Extend Admin Area - Full Output
Using the Watch Command
In order to actually see the changes that the Extend Admin Area scaffold performed and continue developing, we will start two separate watch sessions. This can be achieved via the webiny watch command.
GraphQL API
The following command will start a new watch session on our GraphQL API application code:
A couple of notes here.
Watch Path
Instead of apps/api/graphql, note that we could’ve also passed apps/api as the first argument. But, that would initialize a watch session on the whole API project application, which is most probably not what we want. We only want to watch the GraphQL API application code that’s deployed as part of it, located within the apps/api/graphql path.
Initial Deployment
Upon initializing a new watch session, all of the application code changes that were performed during the scaffolding process will automatically be deployed into the cloud. Meaning, all of the new GraphQL query and mutation operations should be immediately visible in the remote GraphQL schema.
Running the yarn webiny info command in your Webiny project folder will give you all of the relevant project URLs, including the URL of your GraphQL API.
Admin Area Application
The following command will start a new watch session on our Admin Area application code:
No Initial Deployment
In contrast to the GraphQL API development, where the application code needs to be redeployed into the cloud as we’re making changes to it, Admin Area application can be developed locally. Meaning, once the watch command is run, no automatic deployments will be performed.
Final Result
Watch Commands
The following screenshot shows the two watch commands run side-by-side in two separate terminal sessions:
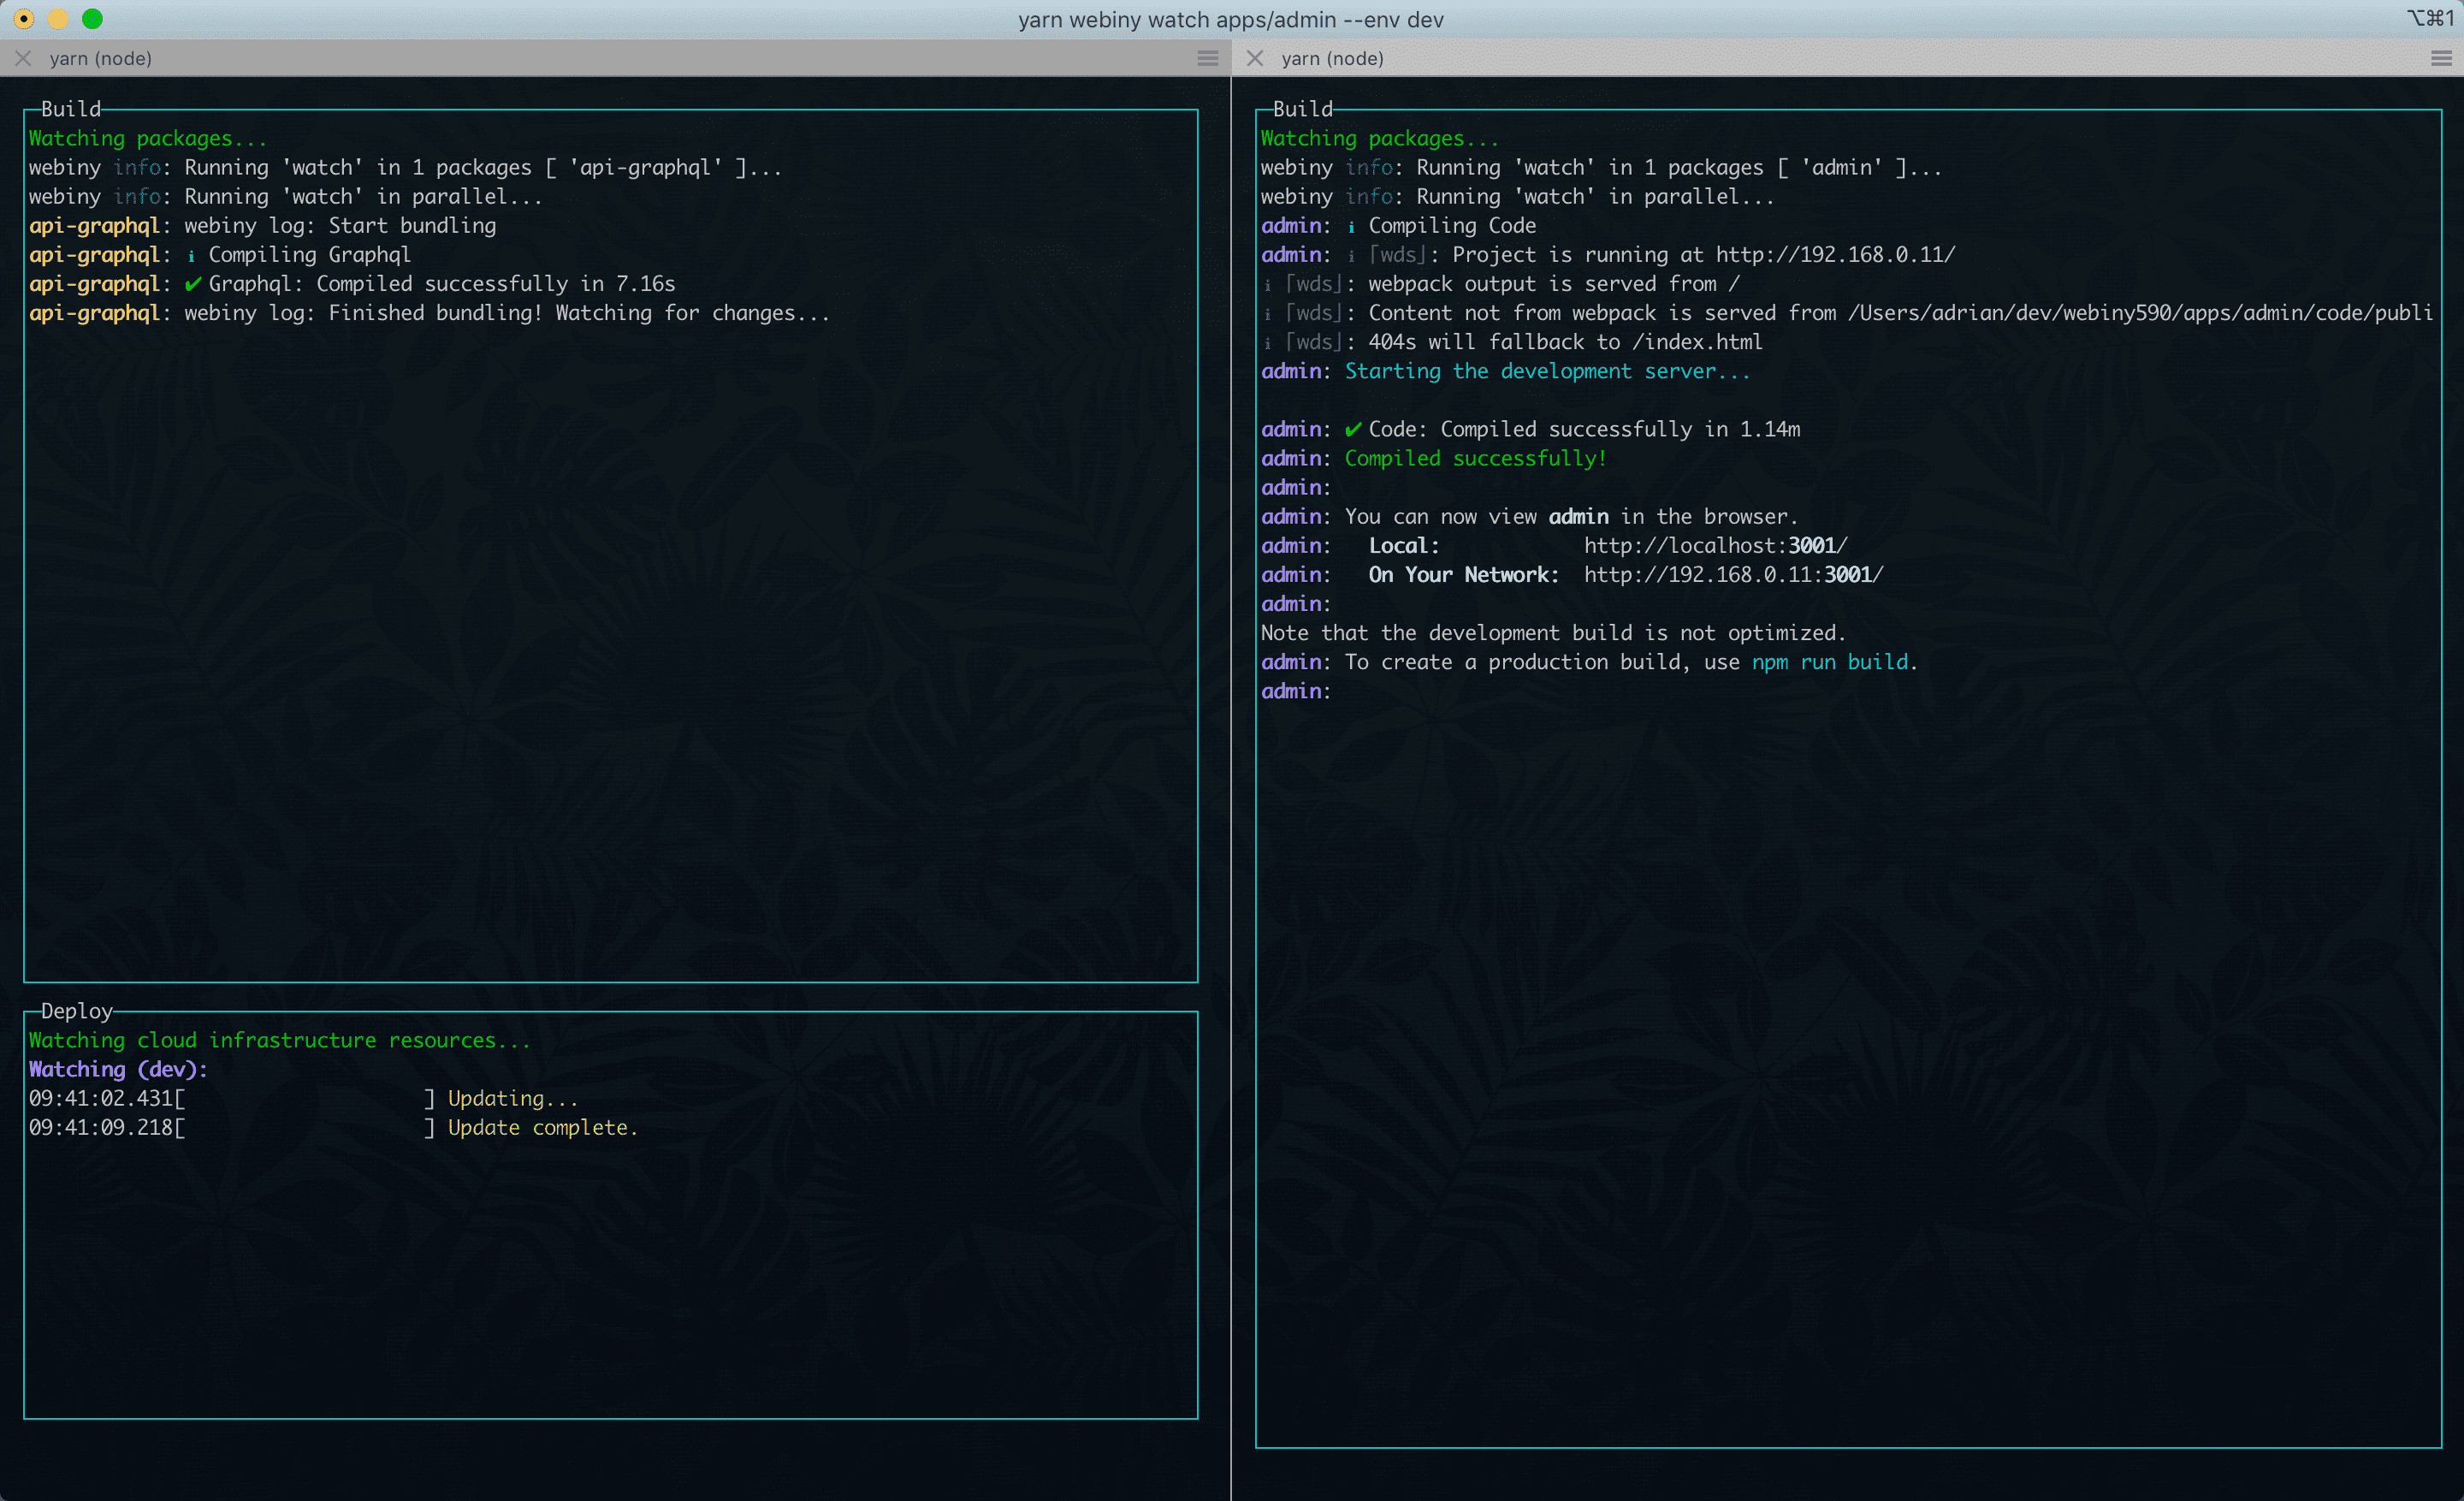 Watching Our Application Code
Admin Area Application
Once the two watch sessions have been started, in our Admin Area application, we should be able to see the new Car Manufacturers module and, via the generated CRUD view, perform essential CRUD operations.
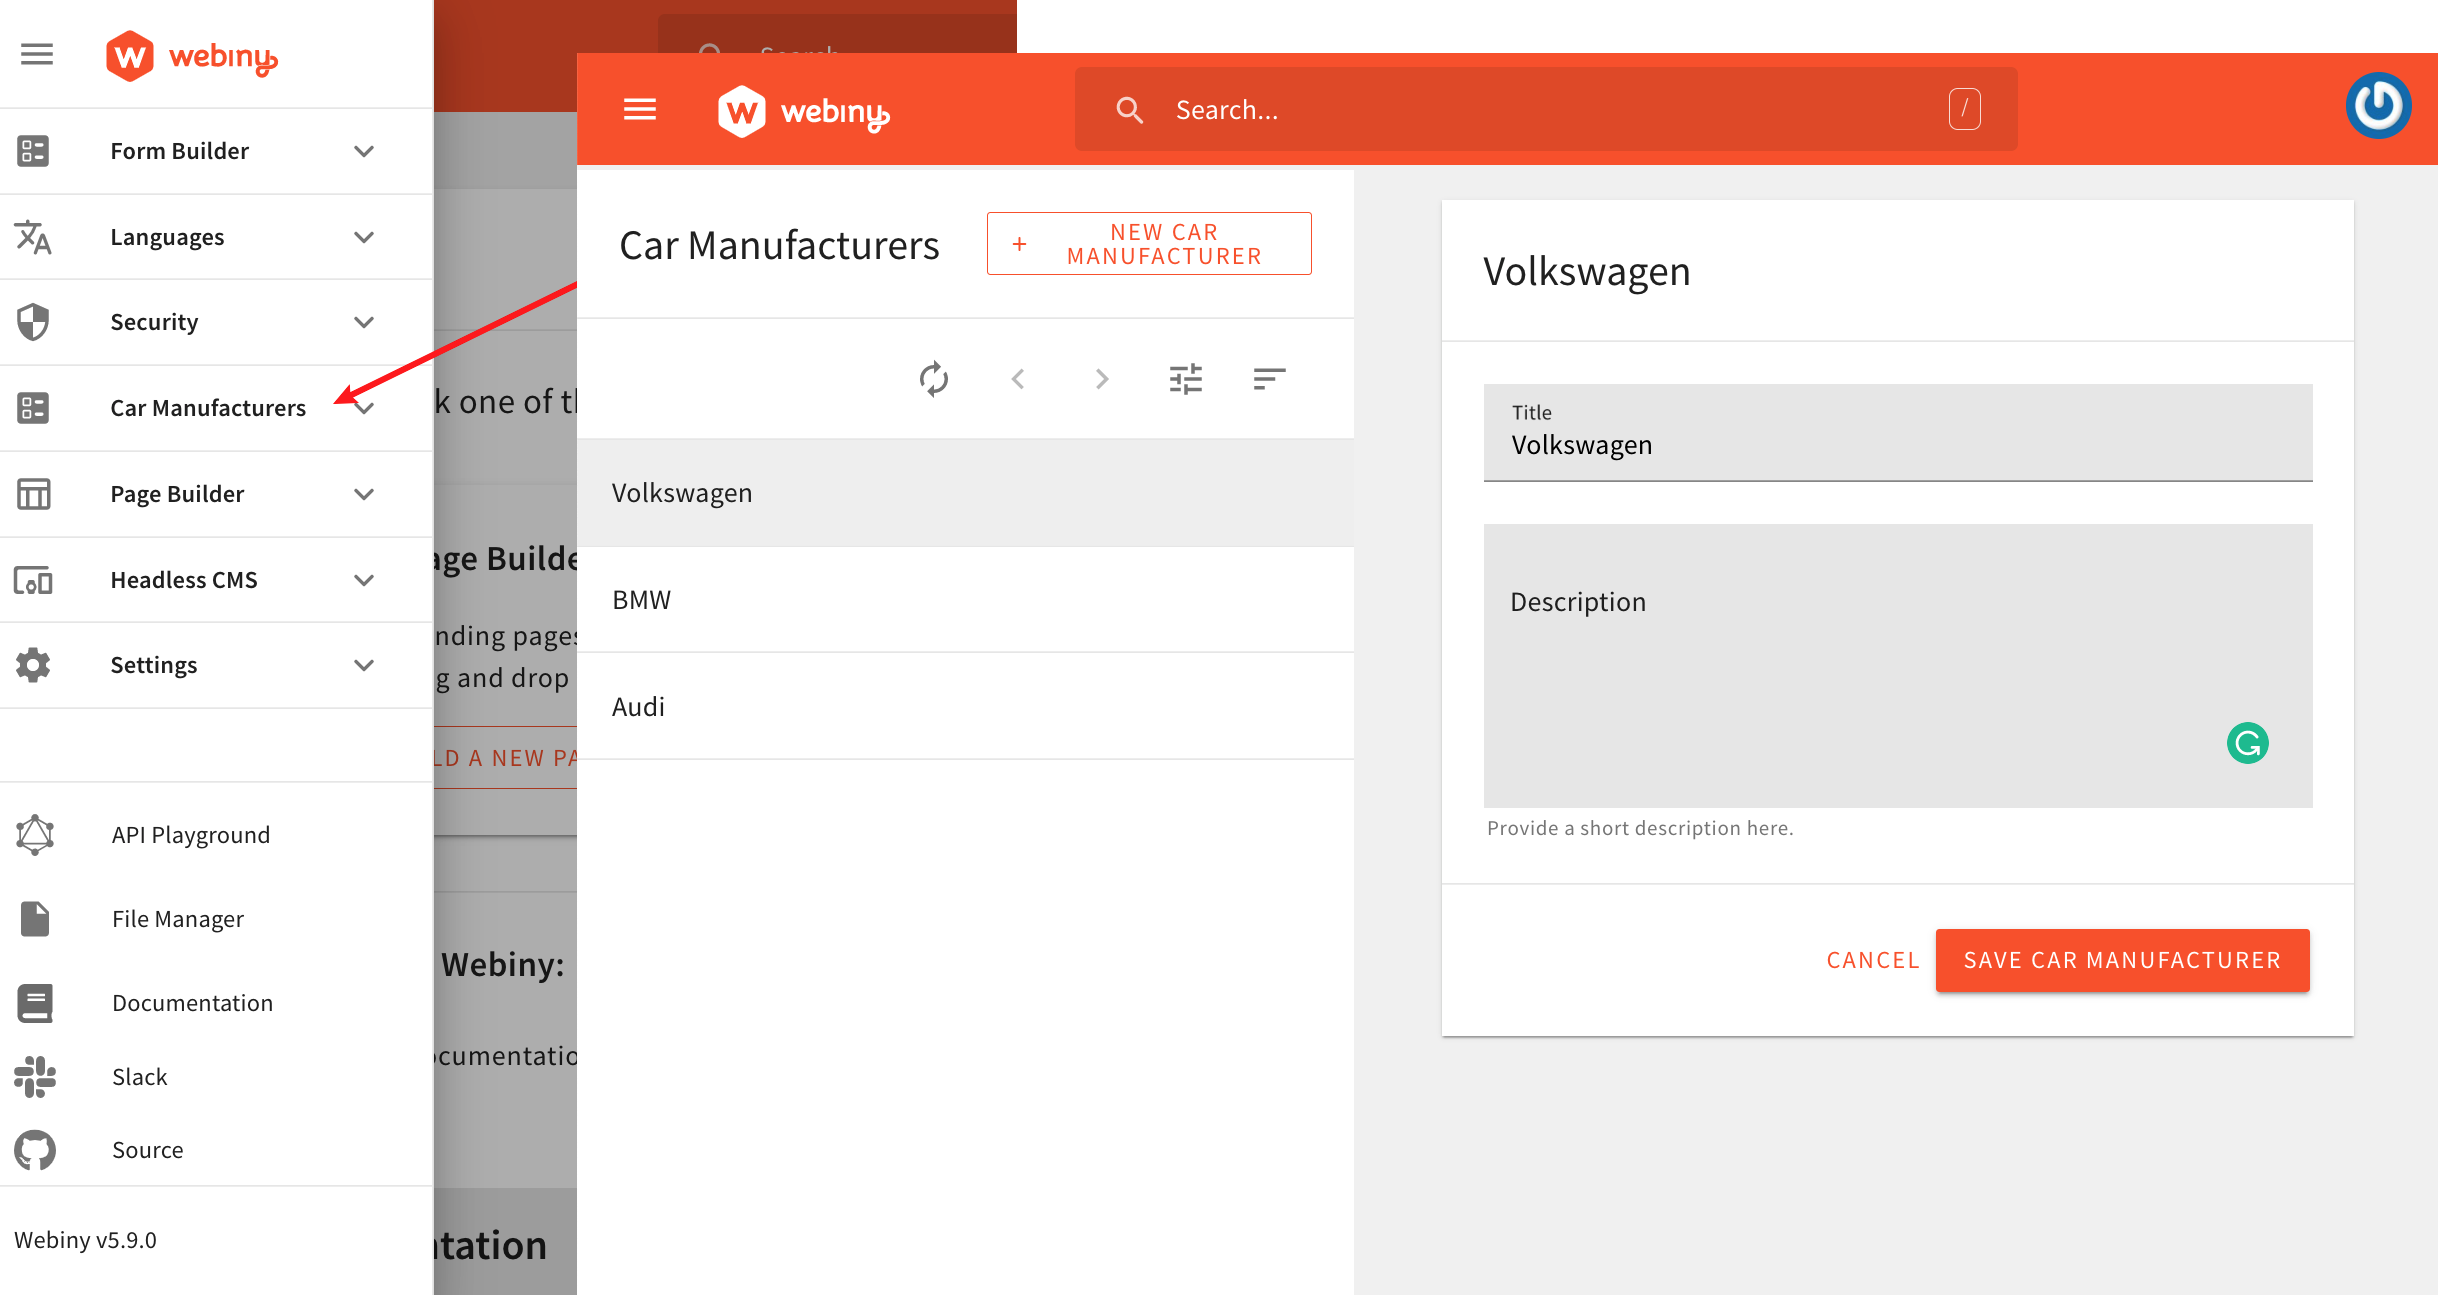 New Car Manufacturers Module
By default, the Admin Area application should be locally accessible via http://localhost:3001 .
.
Further Development
Once we got the initial Car Manufacturers Admin Area application module working, we can proceed by modifying and extending it to our needs.
Usually, on the GraphQL API side, we’d want to start by extending the CarManufacturer entity and our GraphQL schema with new attributes and fields, respectively. Once we’re done, we’d then continue by propagating the same changes to the Admin Area application, by adding new form fields to the CarManufacturersForm React component and updating relevant GraphQL queries and mutations.
To learn more, continue reading the following Extending Entities section.
FAQ
Which Database Is Used in the Generated GraphQL API Application Code?
The generated GraphQL API application code relies exclusively on Amazon DynamoDB for storing and retrieving data. Of course, you’re certainly free to bring your own databases and import different database clients, if need be.