Page Builder > Extending Functionality
Extend Page Settings
Learn how to extend page settings by introducing new fields to it.
This feature is available since Webiny v5.12.0.
- how to hook into the page settings views
- how to add new fields to the existing page settings views
Overview
Page settings UI within the Webiny Page Builder, by default, contains 3 major sections: General settings, Social media, and SEO settings.
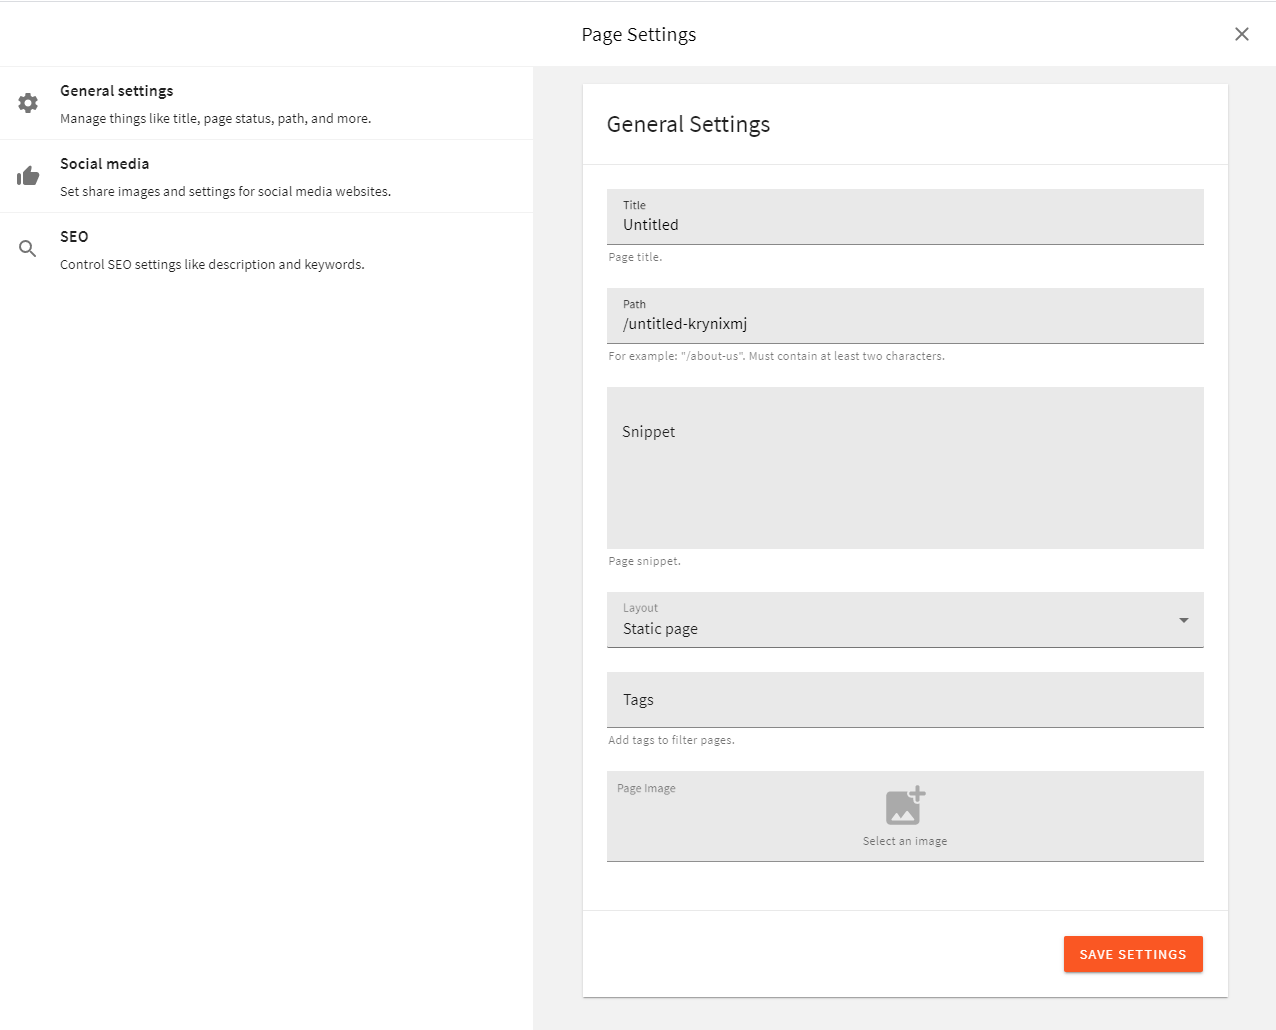 Page Settings View
Adding a new field to the page settings involves the following steps:
- Extend the GraphQL API to be able to handle the new field.
- Add a form field to the UI to represent the value from the GraphQL API.
- Add the new field selection to the GraphQL query that is sent from the browser to the GraphQL API.
In this example, we’ll add a password field to the General Settings.
Add a New Settings Field to GraphQL API
We need to extend the following GraphQL types: PbGeneralPageSettings for queries, and PbGeneralPageSettingsInput for mutations.
But GraphQL is just a router, and page settings have some strict validation rules, so extending a GraphQL type is not enough to push the data into the database. We need to manually grab the input value and assign it to the page settings data.
The following code takes care of all the things described above. j
The code above can be placed in the api/graphql/src/plugins/pageSettings.ts file, which doesn’t exist by default, so you will have to create it manually. Furthermore, once the file is created, make sure that it’s actually imported and registered in the api/graphql/src/index.ts entrypoint file.
With this plugin, once you redeploy the API project application, your GraphQL schema will contain the new password field:
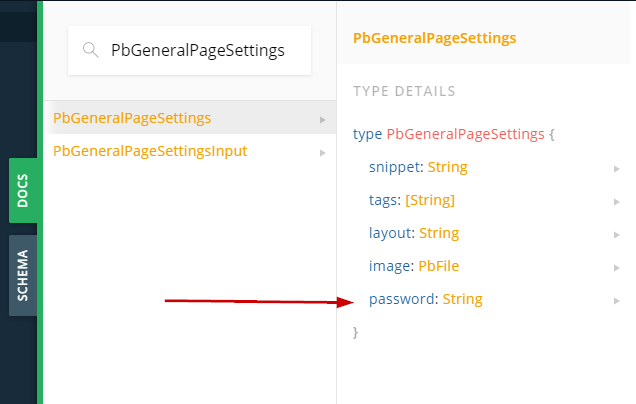 New Password Field in the Schema
Use the webiny watch command to continuously deploy application code changes into the cloud and instantly see them in action. For quick (manual) testing, you can use the built-in API Playground.
Add a Form Field to the UI
The view class responsible for the general settings is the GeneralSettingsView class. To modify it, we need to hook into it using the UIViewPlugin plugin. We also need to add the new field to the PbGetPage GraphQL query operation, which loads the page data.
And then, make sure to import your new UI plugin:
After your application rebuilds, the new field will be rendered in the settings view. Using this technique, you can add as many fields as you need. You can also hook into other page settings views, using their corresponding classes: SocialSettingsView and SEOSettingsView.
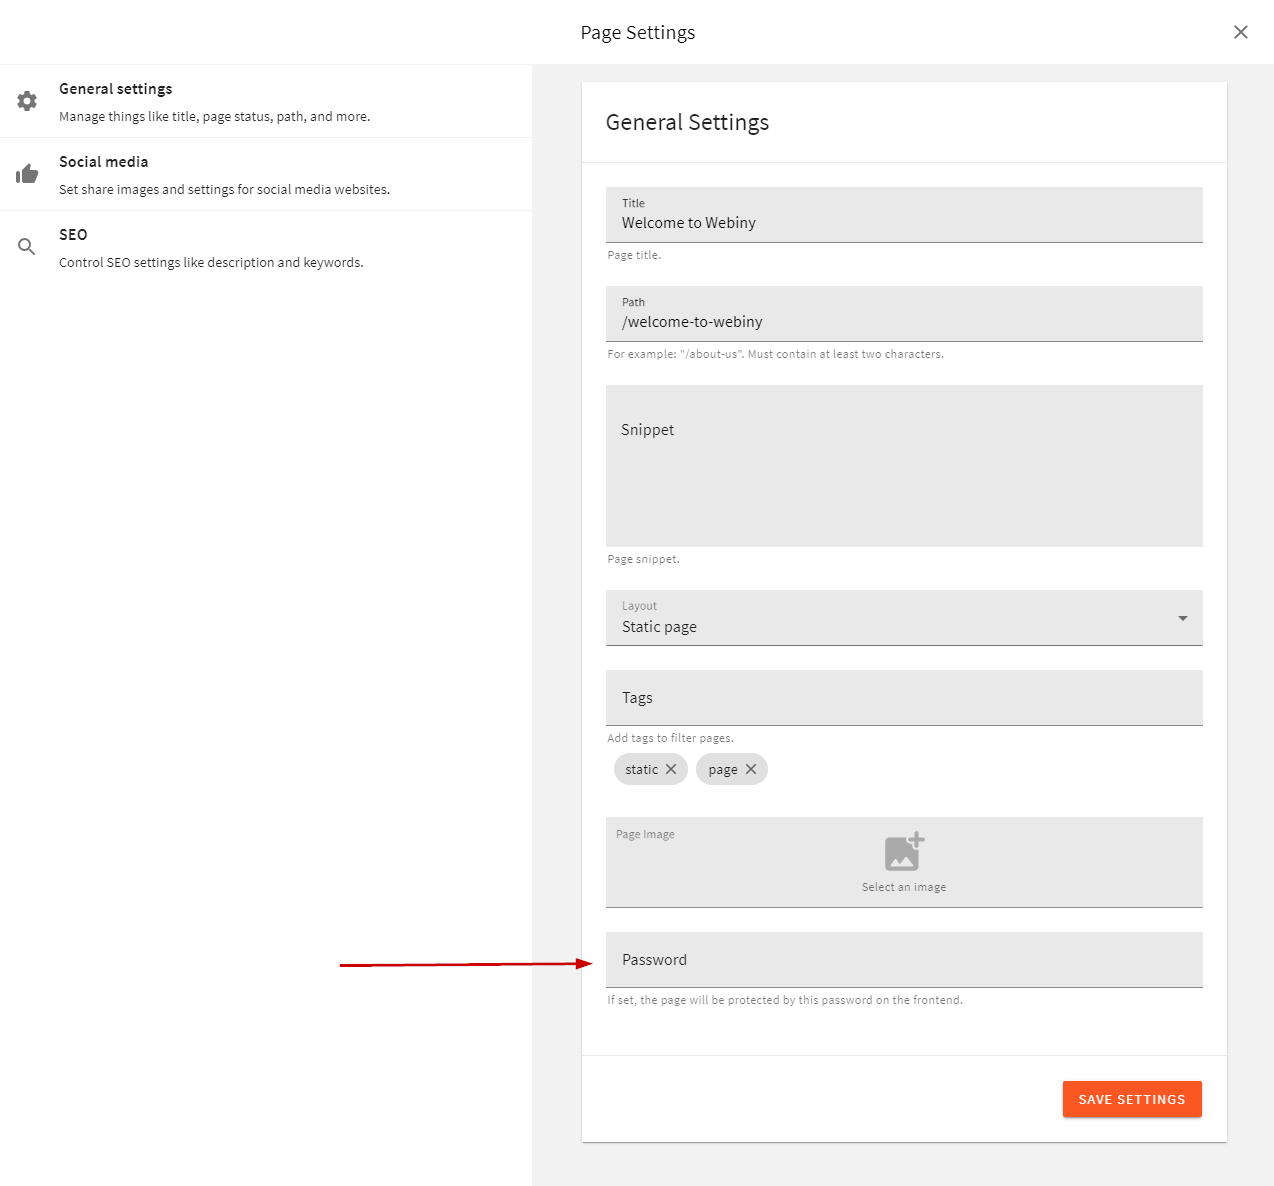 Password Field Added to the General Settings View
For the Admin Area, the work is done. You can now get and update the value of that new password field.
Add the New Query Selection in the Website Application
This step is optional. If you’re writing custom queries and are executing the GraphQL API calls yourself, you can skip this step.
Website application doesn’t know about the plugin we’ve added in the Admin Area application. If you want this new field to be automatically queried with the rest of the page data, you need to add a plugin, just like in the Admin Area app.
The code above can be placed in the apps/website/src/plugins/pageSettings.ts file, which doesn’t exist by default, so you will have to create it manually. Furthermore, once the file is created, make sure that it’s actually imported and registered in the apps/website/src/plugins/index.ts entrypoint file.
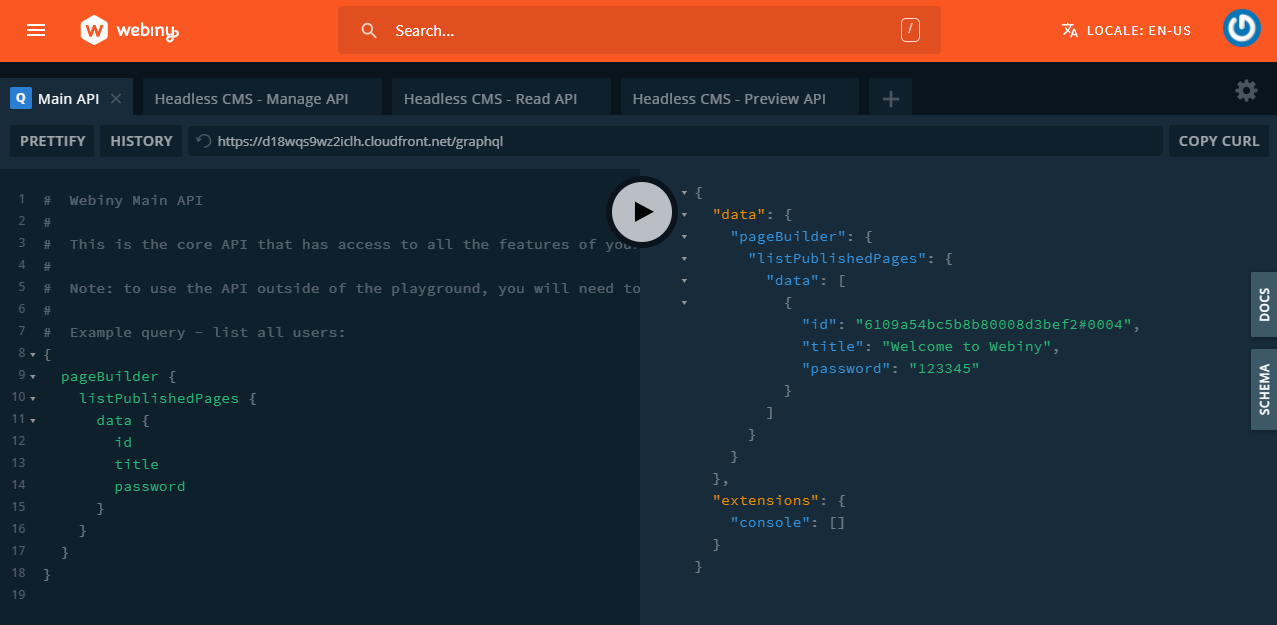
Once the application is rebuilt, the password field will be included in all PbGetPublishedPage GraphQL query operations:
 Password Is Now Returned from the API
Handling DateTime Fields
GraphQL DateTime type has a little peculiarity you should be aware of, to avoid unnecessary debugging.
When you add a DateTime scalar to your GraphQL Schema, and perform a mutation, that DateTime field will be converted to a Date object during input validation (performed by GraphQL Schema), and it will be passed as such to the resolver.
It’s the default behaviour of the DateTime scalar, from the graphql-scalars library, which Webiny uses.
The following example demonstrates how you should handle the DateTime fields in your code, when storing those fields to the database:
Add New Fields tolistPublishedPagesQuery
If you need to add your new fields to the output of the listPublishedPages query, there are a couple of things to know about this query.
List operations are performed on Elasticsearch, and the data that comes back from the ES index goes directly into GraphQL resolvers. The data that is stored in the ES index only contains partial page data, relevant for searching.
When you add new fields to page settings, that data is not stored to ES, unless you provide a plugin which will add that data to the index.
You also need to extend the PbPageListItem GraphQL type, which is returned from listPublishedPages, as it is different from the one used in getPublishedPage query.
The following example shows how you can add the new password field into the ES index, so that it becomes available in the listPublishedPages query:
With these plugins in place, you can now access the password field on the listPublishedPages query:
 Password Field in the listPublishedPages Query
After these plugins are deployed, you need to publish the page, to trigger ES index update. Only then your new data will be available for querying in the listPublishedPages query.