Release Notes > Older Releases > 5.11.0
Upgrade From 5.10.0 to 5.11.0
Learn how to upgrade Webiny from 5.10.0 to 5.11.0.
- how to upgrade Webiny from 5.10.0 to 5.11.0
Before continuing, make sure to take the necessary precautions, listed in the Overview section.
Make sure to check out the 5.11.0 changelog to get familiar with all the changes introduced in this release.
1. Upgrade Webiny Packages
Upgrade all @webiny/* packages by running the following command:
Once the upgrade has finished, running the yarn webiny --version command in your terminal should return 5.11.0.
Before moving on, make sure you commit all your changes.
2. Run the Upgrade Command
The next step is to run the project upgrade:
Once the upgrade command has finished, you can run the git status command to see all changes that the command performed.
3. Deploy Your Project
Finally, proceed by redeploying your Webiny project:
As stated in the Upgrade Webiny section, we recommend that you first deploy your changes into one of your pre-production environments, like dev or staging.
Learn more about different deployment environments in the CI/CD / Environments key topic.
Additional Notes
Pulumi V3 Upgrade
As stated in the Upgrade Webiny section, to prevent any data loss or other critical problems that might occur while upgrading, we recommend that you first deploy your changes into one of your pre-production environments, like dev or staging.
As mentioned in the changelog, from the 5.11.0 release, all Webiny projects will use Pulumi v3.
In terms of existing projects and upgrading, there shouldn’t be any major changes or extra steps that you’ll need to perform. But, there are a couple of things to have in mind.
Once you’ve run the above shown webiny upgrade command, the existing Pulumi CLI should automatically be removed from your project. And, upon redeploying your Webiny project (using the webiny deploy command), the new Pulumi CLI should be downloaded and installed, again automatically.
Furthermore, during the first deployment, in case you didn’t make any changes that would affect the deployment, you should only see a change in provider for each cloud infrastructure resource:
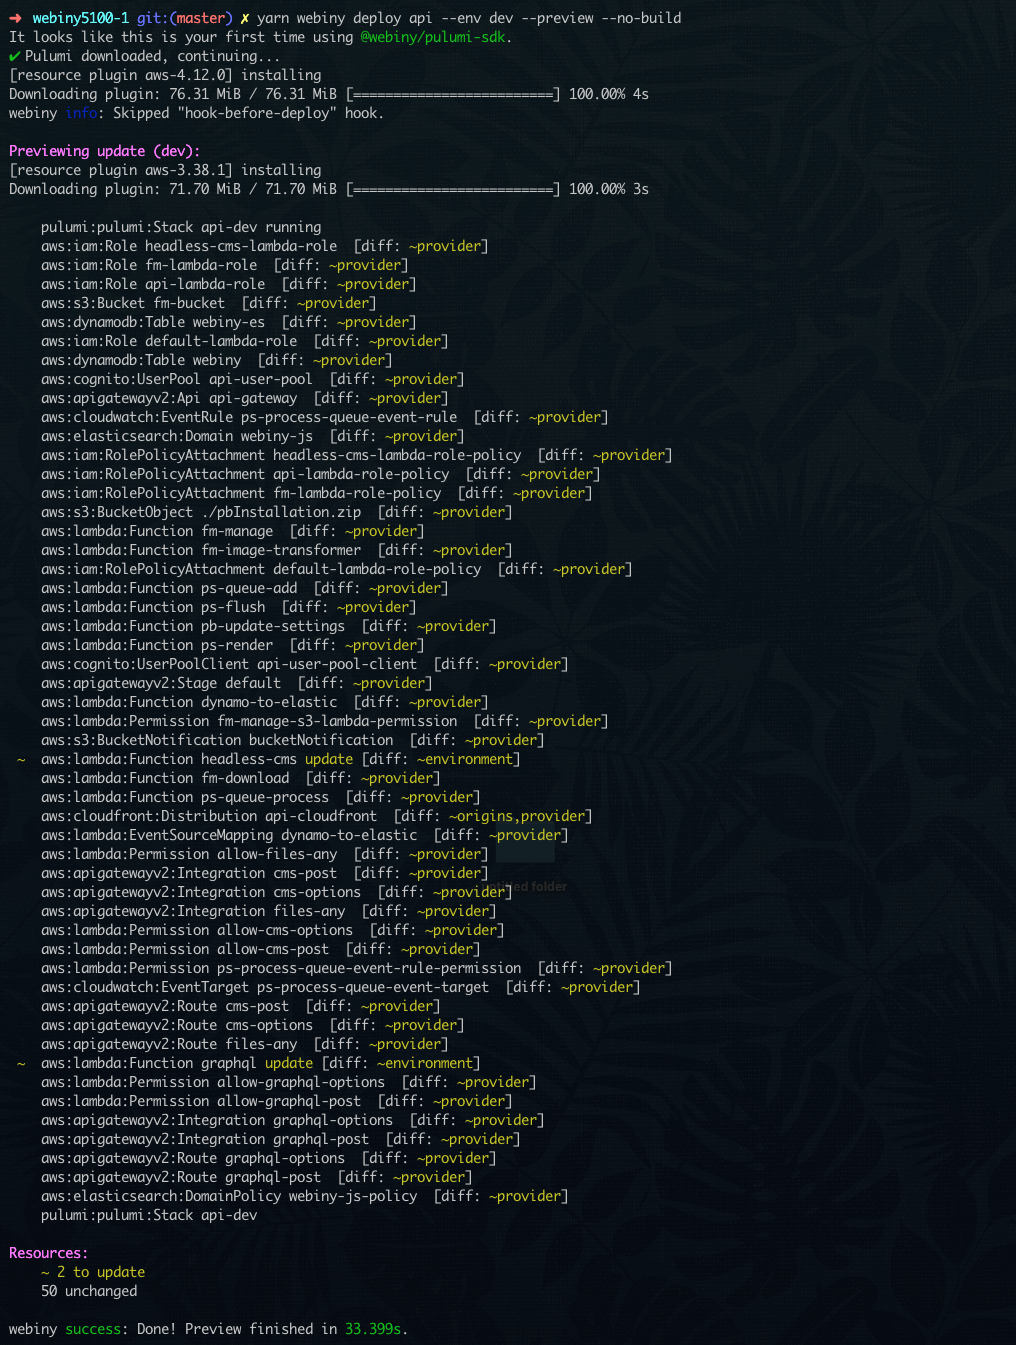 First Deploy After Upgrade
In order to test this out, we suggest you use the --preview flag, which will enable you to see all of the changes that will be performed in the new deployment, for example:
Troubleshooting
In case something is not behaving as expected, we recommend you check the following things.
If the suggested solutions to mentioned problems still don’t help, feel free to contact us via our community Slack, we’d be glad to provide additional assistance.
Ensure All Packages Are at the Exact Same Version
In a couple of cases, we’ve seen multiple versions of the @pulumi/pulumi package being used within a single Webiny project. This should not happen.
You can use the yarn why @pulumi/pulumi command to see which package versions are being used.
If it turns out that multiple package versions are being used, then try running yarn from your project root, or simply install all dependencies from scratch, for example by cloning the project and installing.
Ensure There Is No Pulumi CLI Globally Installed
A couple of times, we’ve seen the following error starting to occur, after a Webiny project was upgraded to 5.11.0:
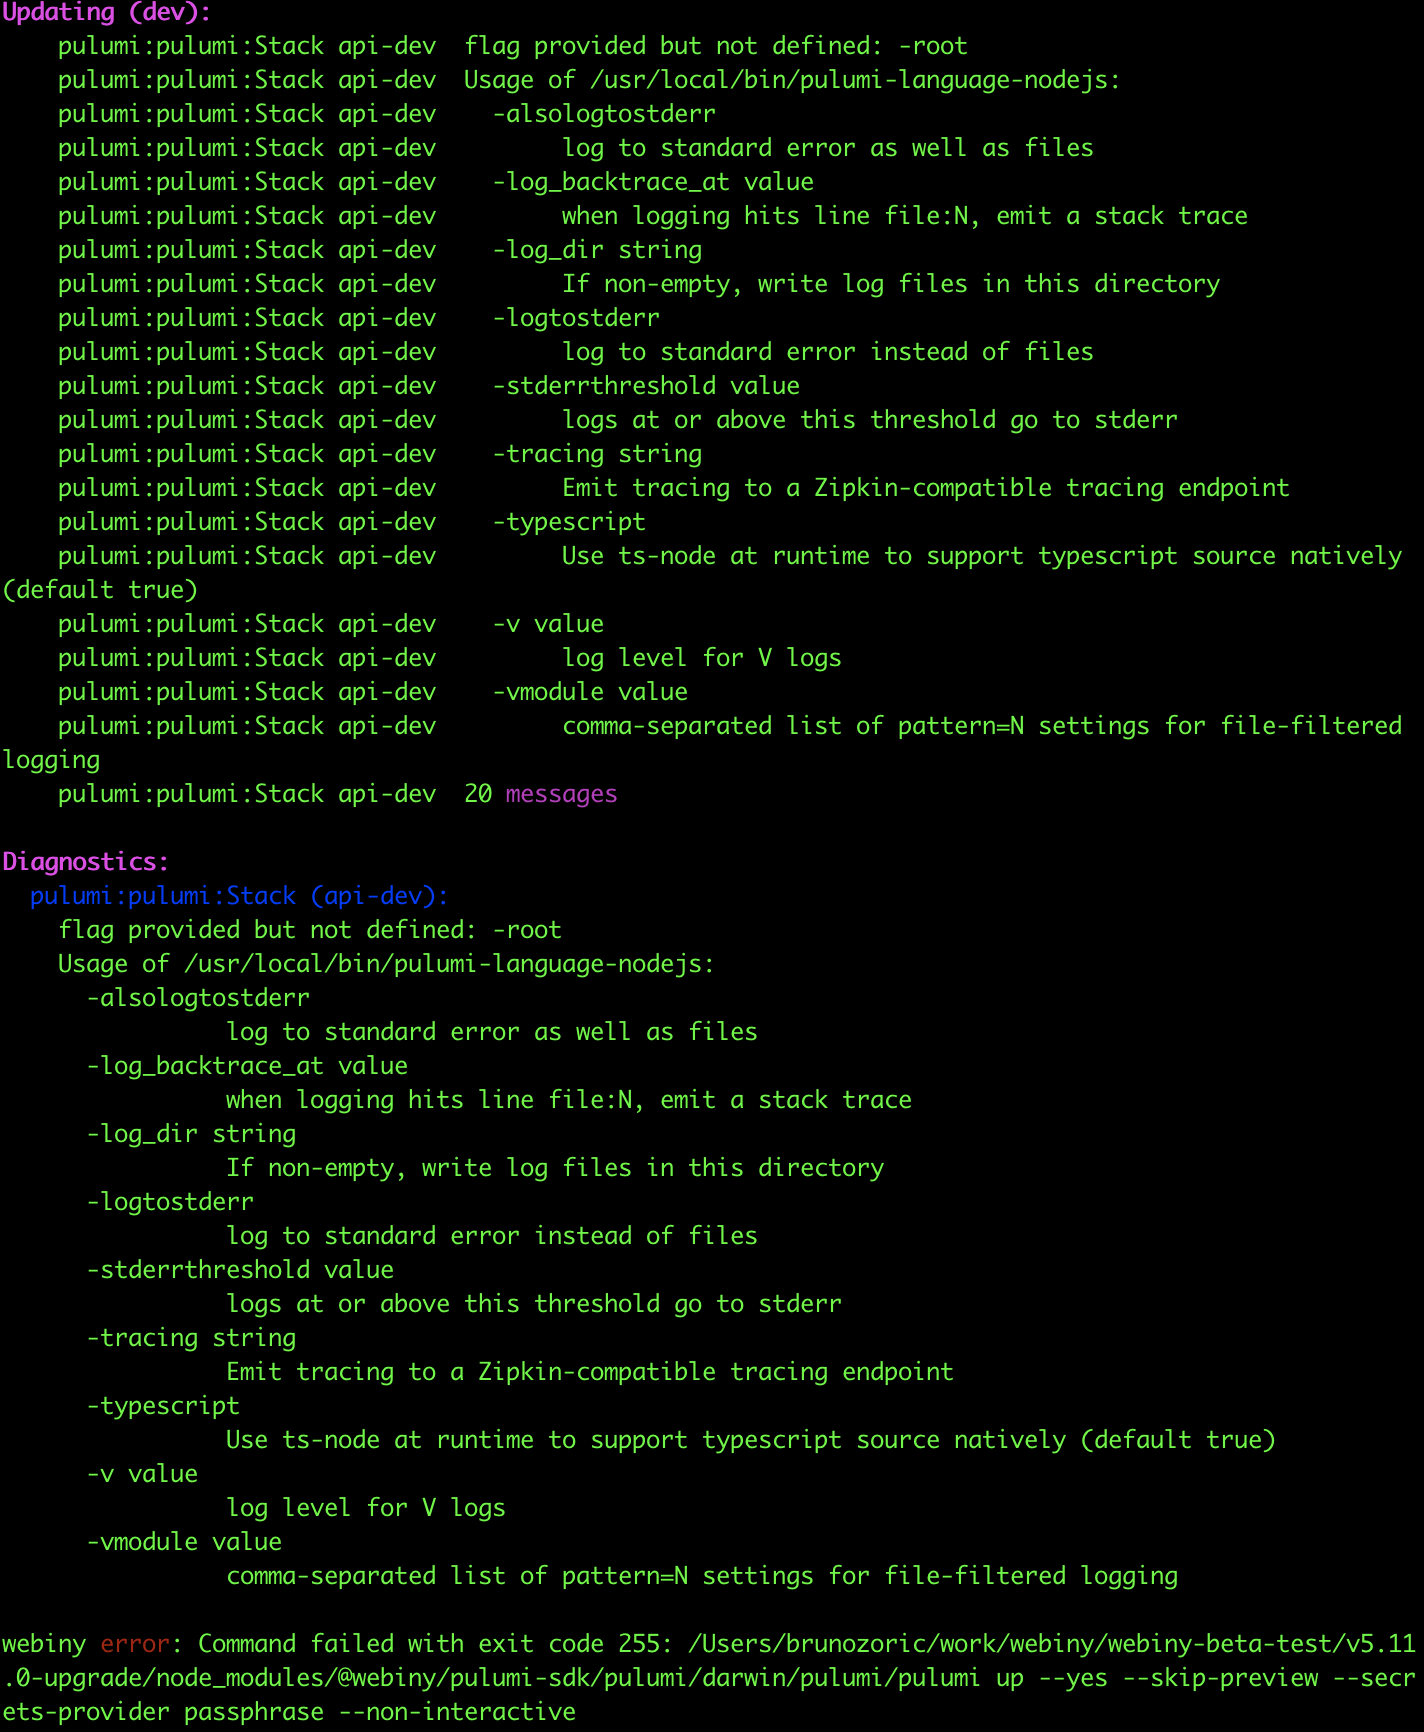 Pulumi CLI Error
We’ve discovered that this issue can be resolved by simply removing Pulumi CLI as a globally installed tool. For example, if you were using MacOS and installed the Pulumi CLI via Homebrew, then uninstalling it via brew uninstall pulumi would solve the shown issue.